
The pattern … see why I was attracted to it?
In the last twenty-four hours I’ve chosen two patterns that called for a CDD. I’m not sure that I’ve ever encountered a CDD before. No, really. It’s the truth.
That said, I do know what a CDD is! It’s a centered double decrease. Essentially, what it does is decreases one stitch on either side of the center stitch in a pattern. And they’re very pretty if used properly!
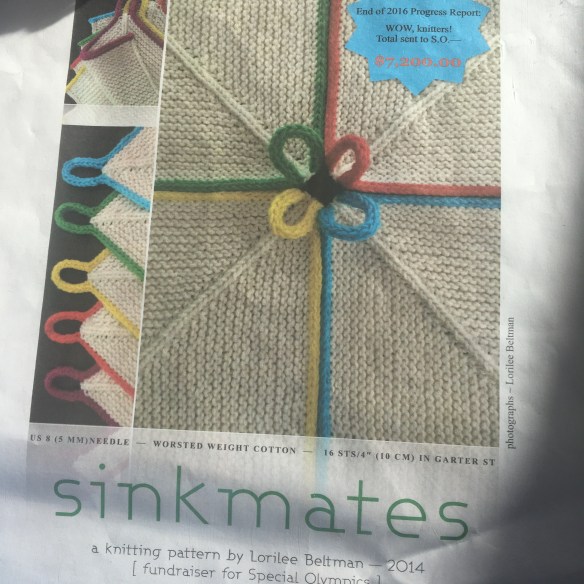
First up, a dishcloth pattern that I bought a couple of years ago to support the Special Olympics and it’s called Sinkmates by Lorilee Beltman ($2 on Ravelry). I had unrealistic expectations around this dishcloth pattern, having assumed that it was a mitered square. Wrong. It was a CDD! It’s fun to knit and the first thing I’d do next time is to make the i-cord on a larger needle than the rest of the project. Mine came out somewhat lop-sided. But it’s a dishcloth. Enough said.
Next, Hartland Slipper Socks from Berroco Folio, Vol. 4. by Amy Christoffers. I loved these at first glance and knew I had to make them. Thankfully, they’ve got short cuffs and are knitted in worsted weight Berroco Ultra Wool which makes them knit up quickly. And since I had a whole weekend off this weekend, I have spent a lot of time in my studio. I love them and will be making more! There is a CDD in the “flower” design at the ankle. I’m going to show you my sequence of stitches on the dishcloth because it’s on almost-white cotton and you’ll be able to see the stitches really well!
So, here is my photo tutorial on how to do a CDD if you don’t know already …

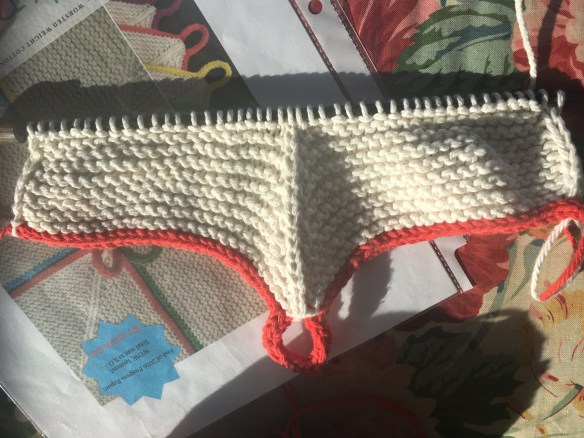
The CDD on Sinkmates Dishcloth … rows of CDD straight up the middle!
Knit over to the stitch before the center stitch (the CDD “line”) … see photo below!
Remember, worked stitches are on the right-hand needle, stitches to be worked are on the left needle.
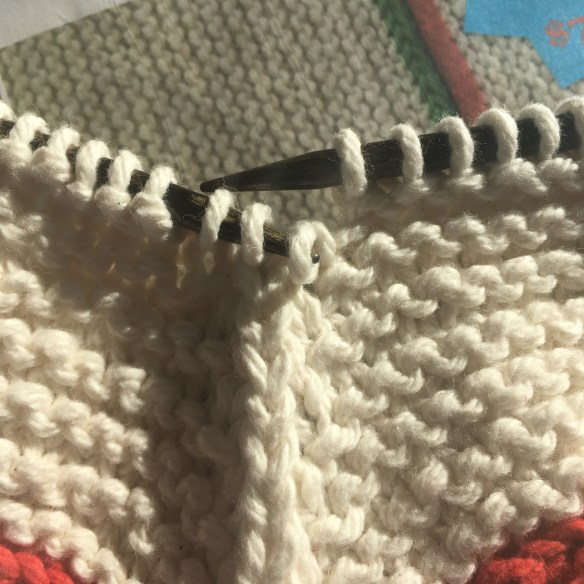
Knit up to one stitch before the center
You are going to work the stitch before and the center stitch together as if to knit two together (K2tog). (Insert the right needle knitwise into the two stitches at the same time from left to right as if you’re going to knit them together. Don’t wrap the stitches, though … see photo below.

You can see the ridges on my thumb nail. I need a manicure!
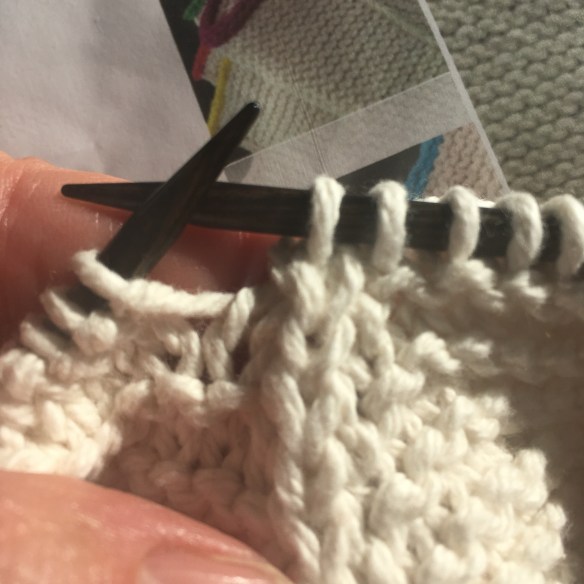
Next, complete the slip. Slip the stitches onto the right-hand needle by pulling the left needle back and out of the stitches, leaving them on the right needle. OK so far?

Knit the next stitch on the left needle. In the photo below you can see the two slipped stitches and then the knitted stitch sitting on the right needle. You can see them, can’t you?

Now, get ready! You’re going to slip the two slipped stitches over the knitted one. (Insert the left needle into the two slipped stitches from left to right, holding your working yarn in your right hand and keeping some tension on the working yarn, slip the two stitches over the knitted one.)

When it’s all said and done, and the stitches are slipped over, this is what you’ll see.
When the left needle is pulled out of the completed stitch, you will have something like this. Hopefully, it’ll be exactly like this! The CDD is in line with all of its sister stitches below and you’ll have two fewer stitches in total on your dishcloth.
See how pretty it is?
Go buy the pattern and give it a try! Share pictures with me of your attempts on my Queen Bee Knits by Linda Warner Facebook page! I’m excited for you to try something new!
Follow me on Facebook (Queen Bee Knits by Linda Warner) and Instagram @QueenBeeKnits. I’m also on Ravelry (lindar).
