French Macaroon by Caroline Hewger for the Noble Thread

Sunday, June 23, 2024

It was gray and hazy when we woke up this morning and we’ve since had a really good rain storm. Think rain boots and full-length yellow raincoats with a hood pulled up rain storm. The plants will thank us for it, I’m sure. I had intended to start the day with a trip to Target to return some stuff I bought last week that didn’t fit as intended but I went up to my atelier instead.

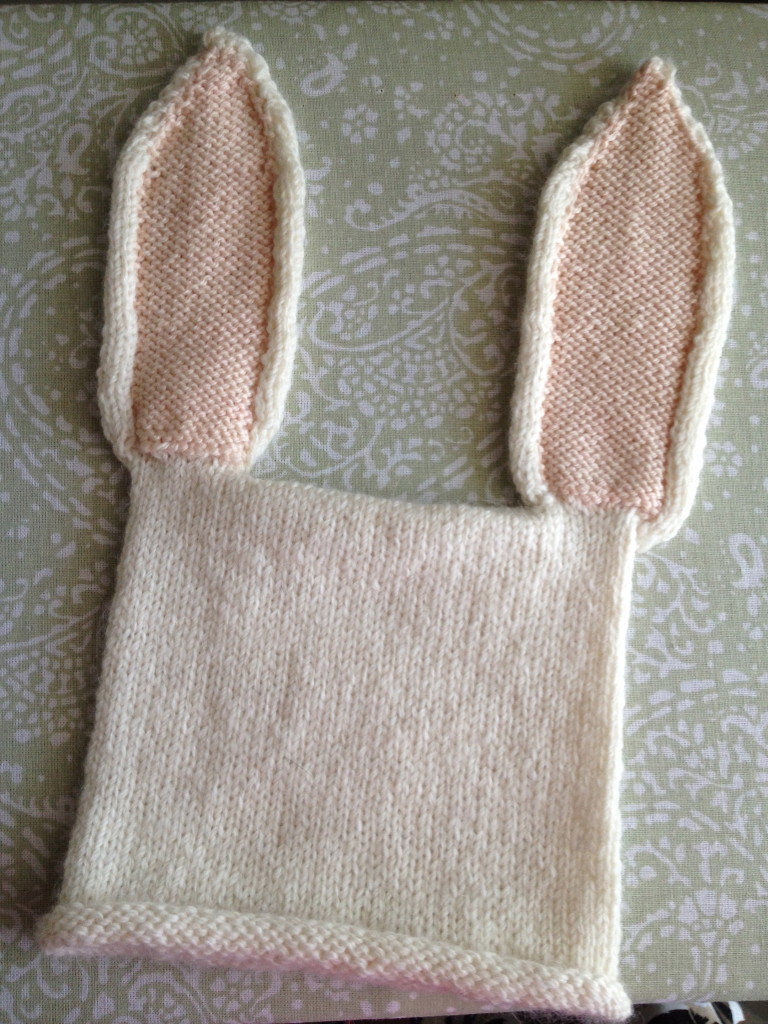
AND I’m happy to report that I’ve finished the first French Macaroon sweater. This was a simple/boring knit until the finishing part. The garter stitch body starts with the main color and then you cast on the stitches for the sleeves on each side of the body in a contrasting color resulting in a little “T” shaped boxy form. The second side is pretty much the same except for a button hole at the middle of the back. Then it’s a three needle bind off at the shoulders/sleeves and seam the sides and underarms are you’re good to go. BUT I realized a little too late this time that the sleeves are meant to be folded back so the next time I make this sweater I’ll weave in well past the normal distance.

I left the cast on tail extra long at the very beginning so I could use it to seam the body in the main color and I cut off a length of the left-over contrast color to seam the underarms. Seaming Garter Stitch is pretty simple if you look at what you’re doing and know how to read your knitting. On the sides, you grab the bars behind the smiles or frowns (look at your knitting and you’ll see what I mean!) on one side and then go to the other side and do the same. On little garments I tend to use every stitch rather than two at a time which I sometimes do for adult garments.

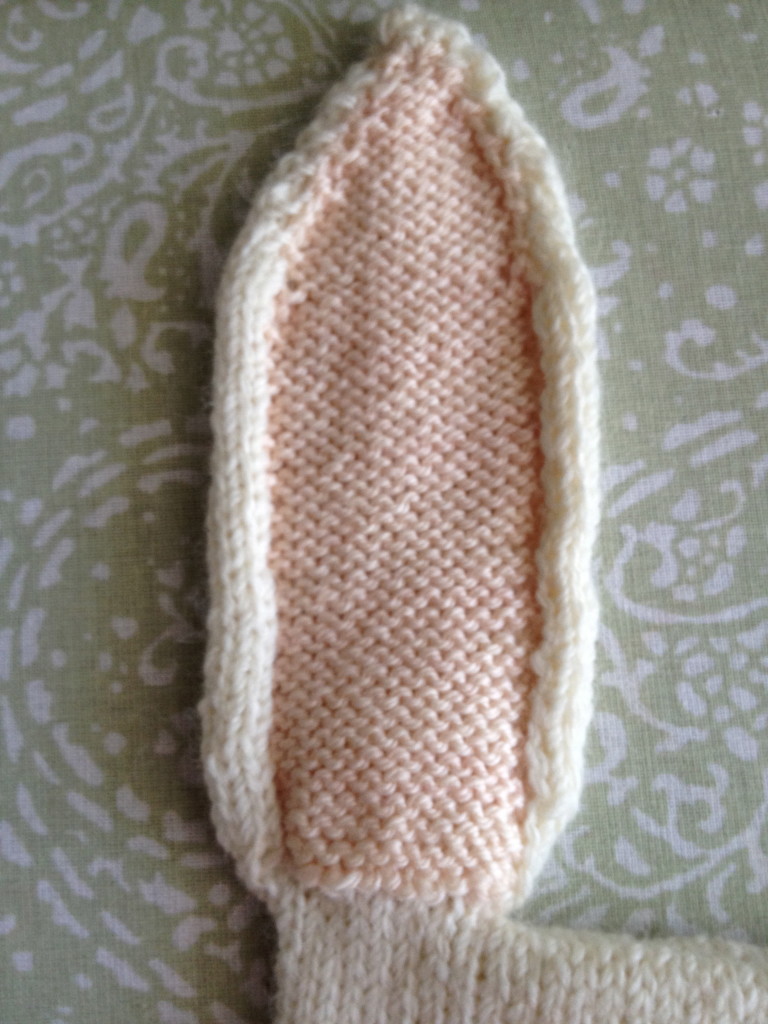
Under the sleeves it’s a bit different but still simple enough if you read your knitting. I took a few in-process photos to show you what I mean.

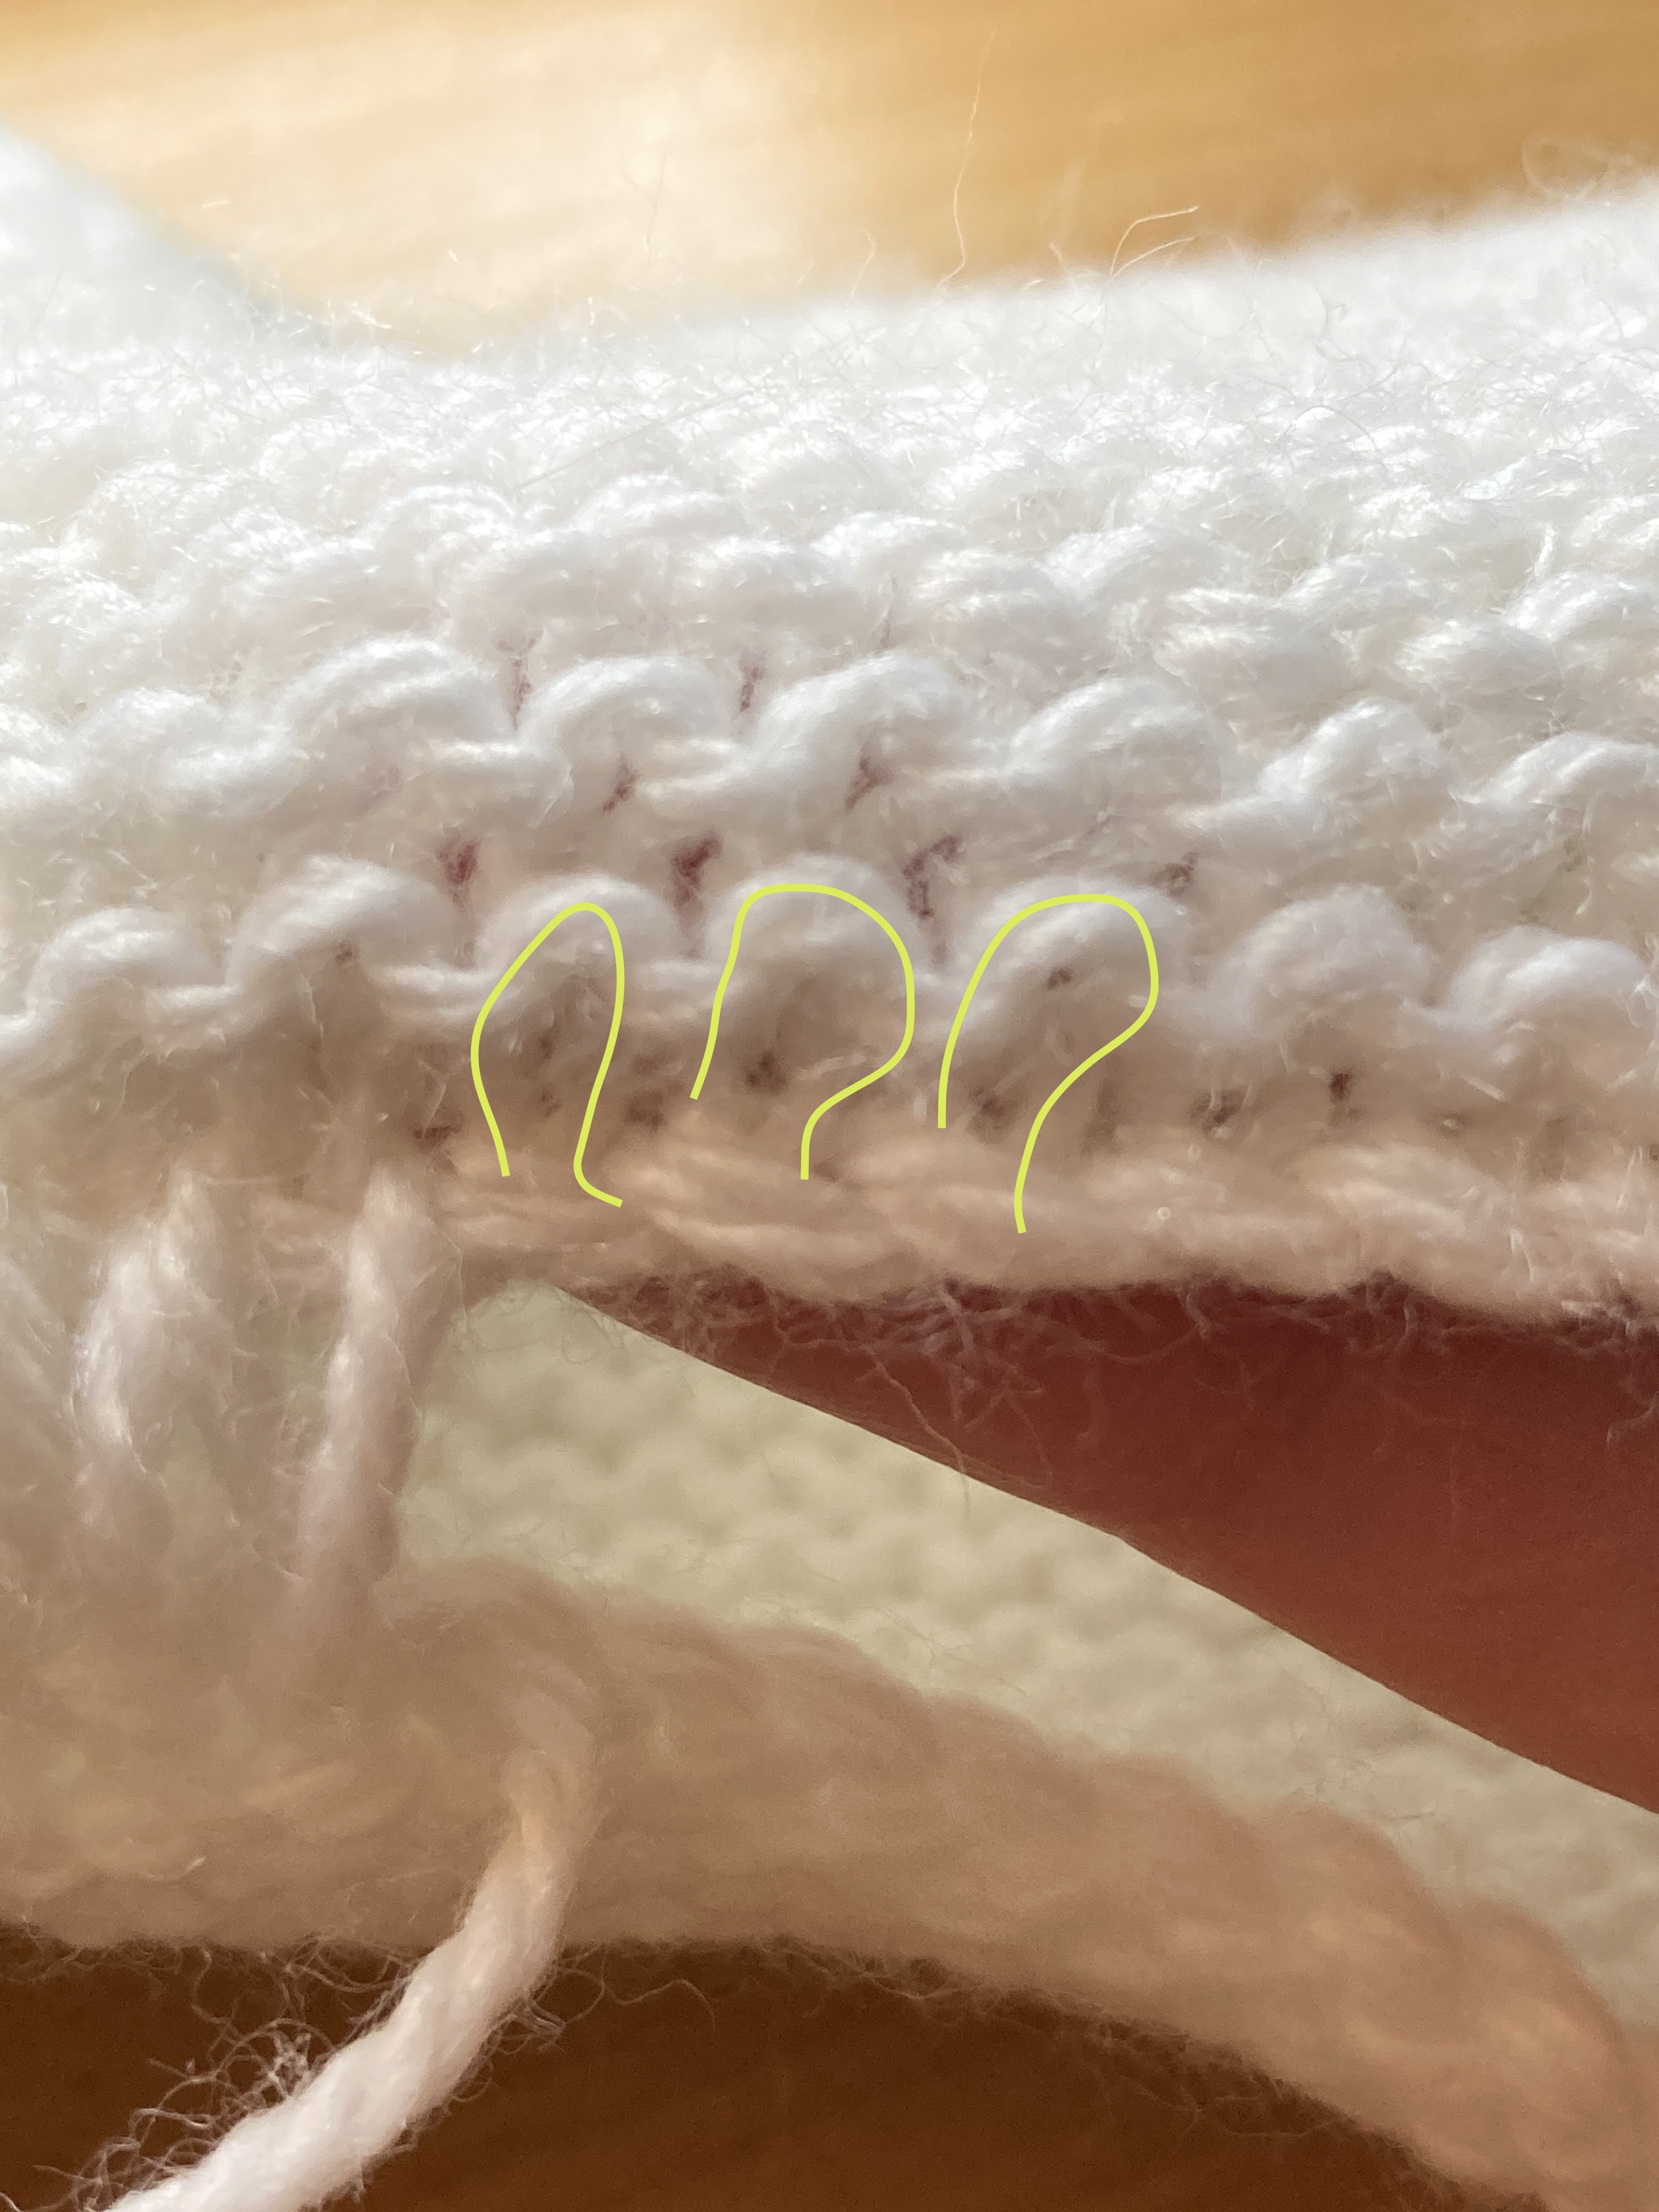
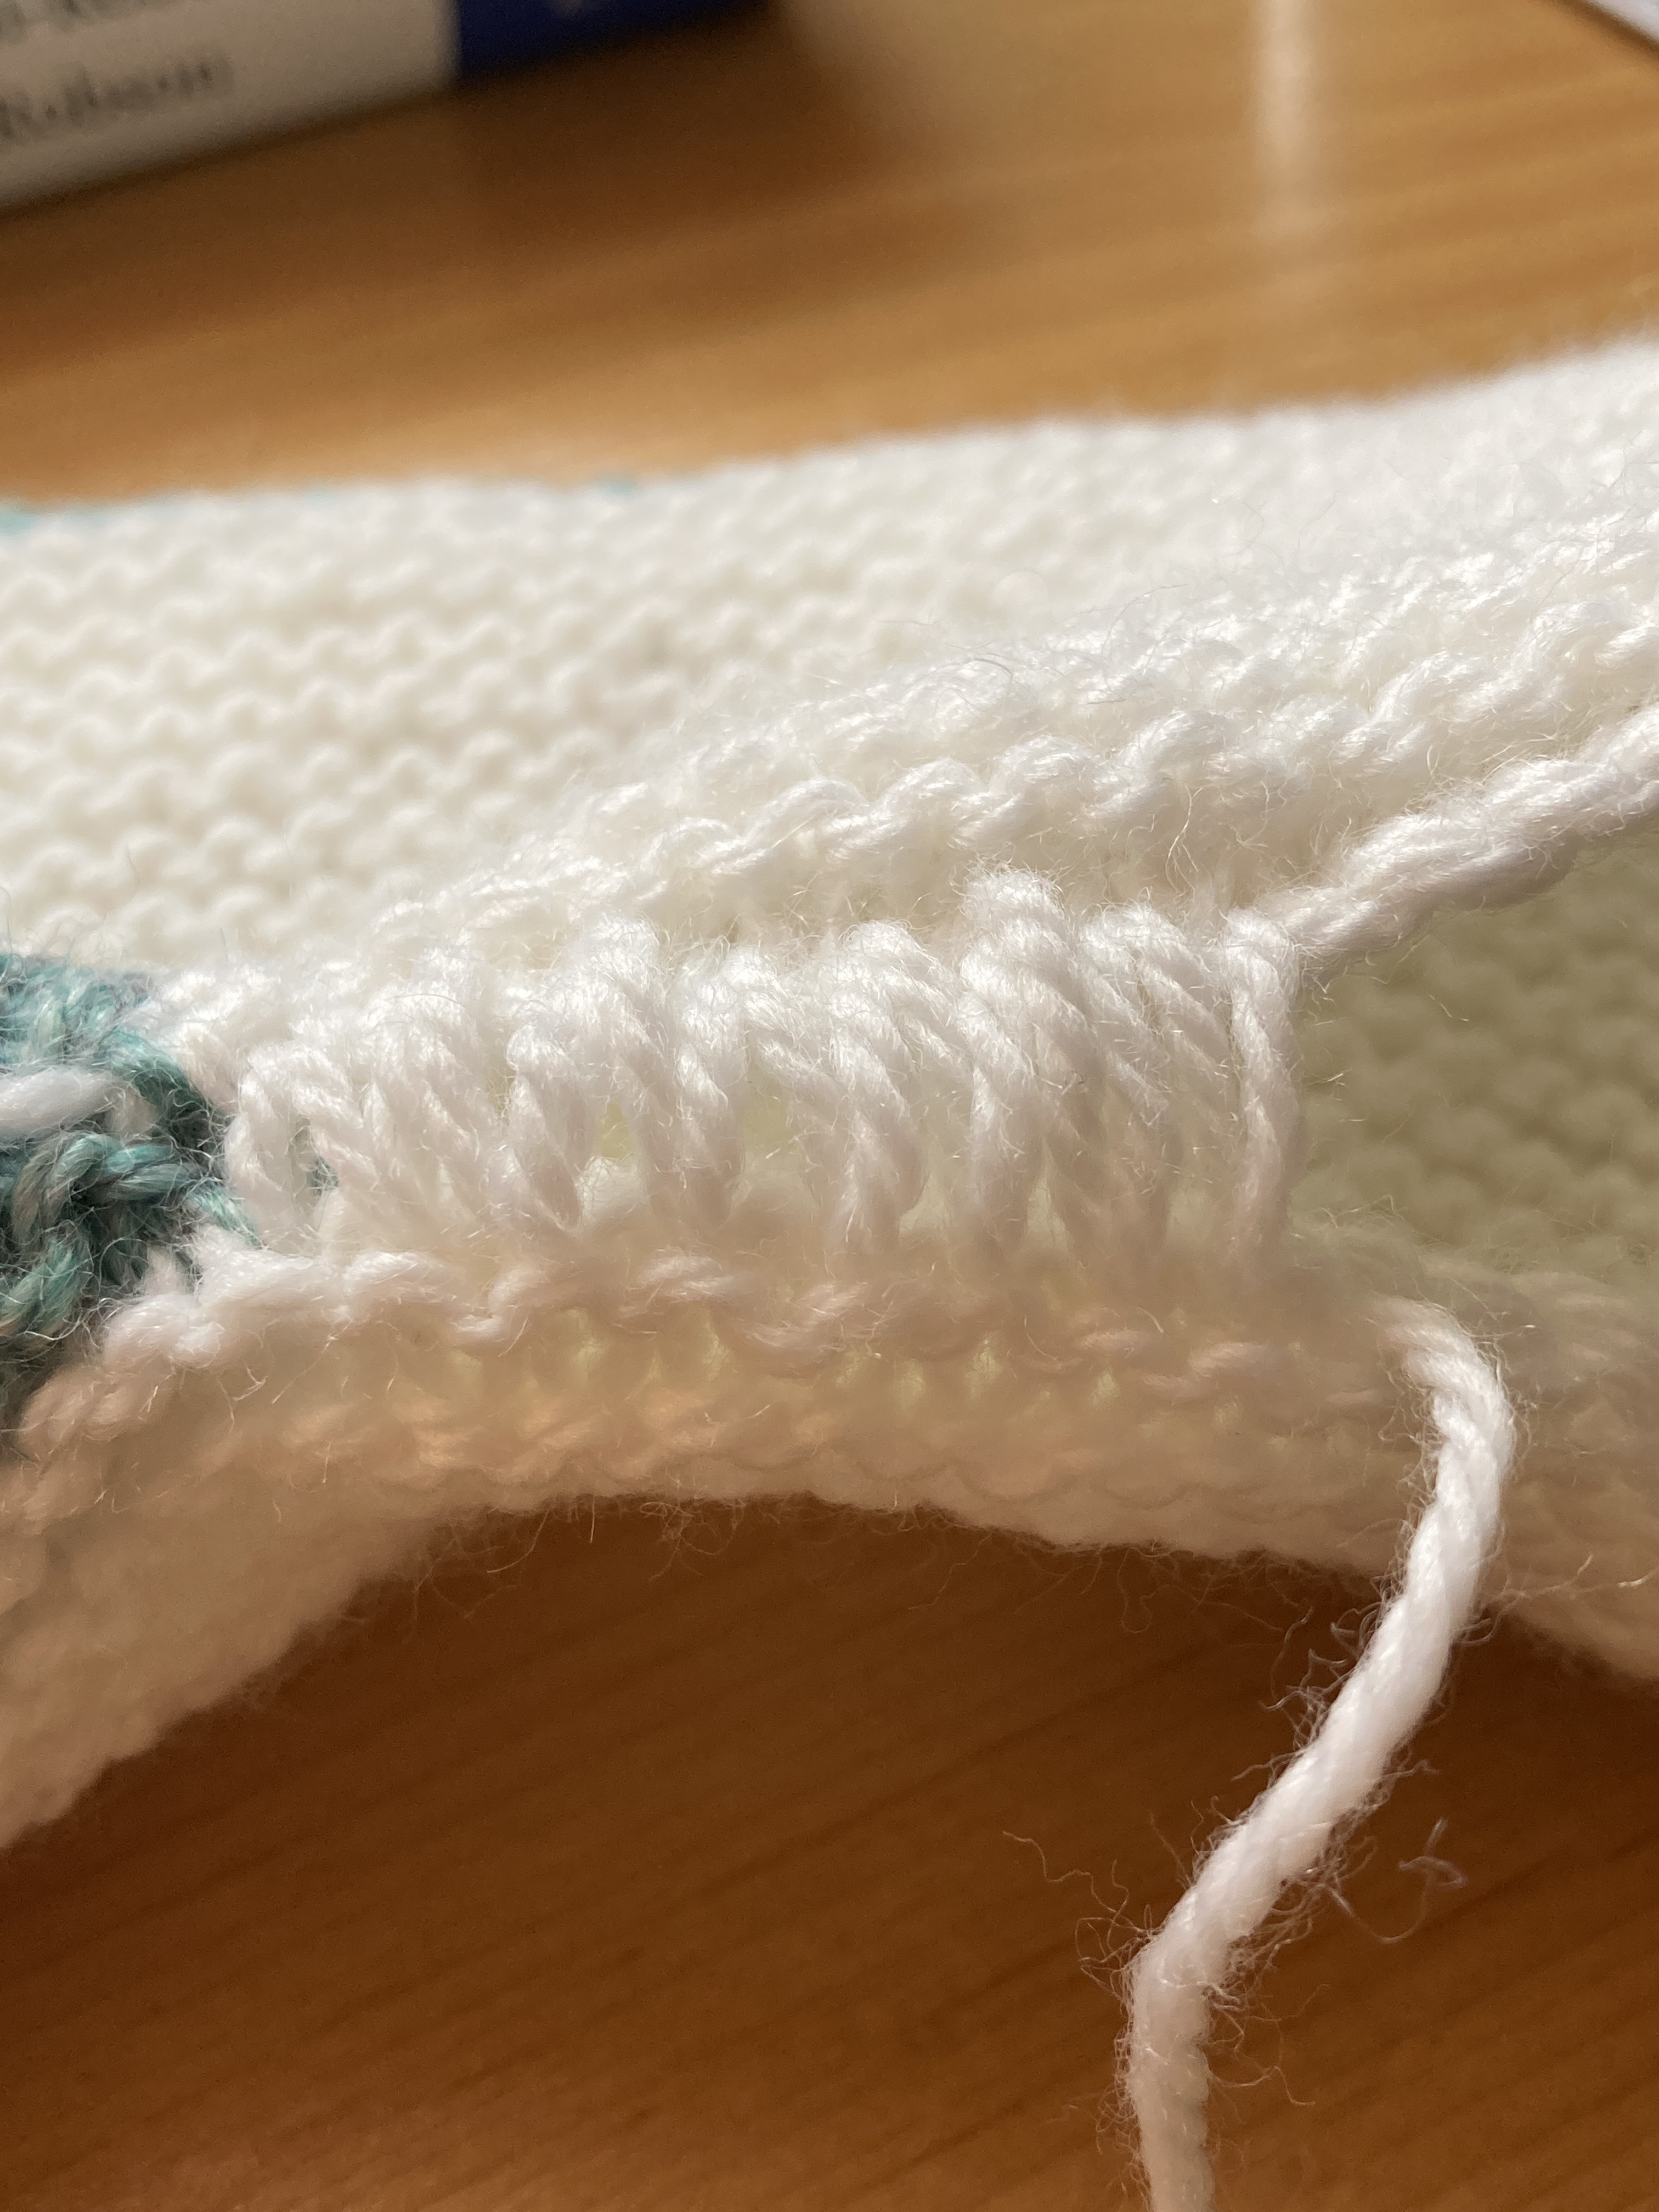
I marked my stitches on the top of the underarm with grellow “loops” and I use the bottoms of the loops where the “v” is to insert my needle. Can you see the lower “v” that’s in front of my needle? (There’s another loop with a “v” stacked on top of where my needle is. I am careful to catch the two legs of the bottom “v” (the stitch) when I am seaming.

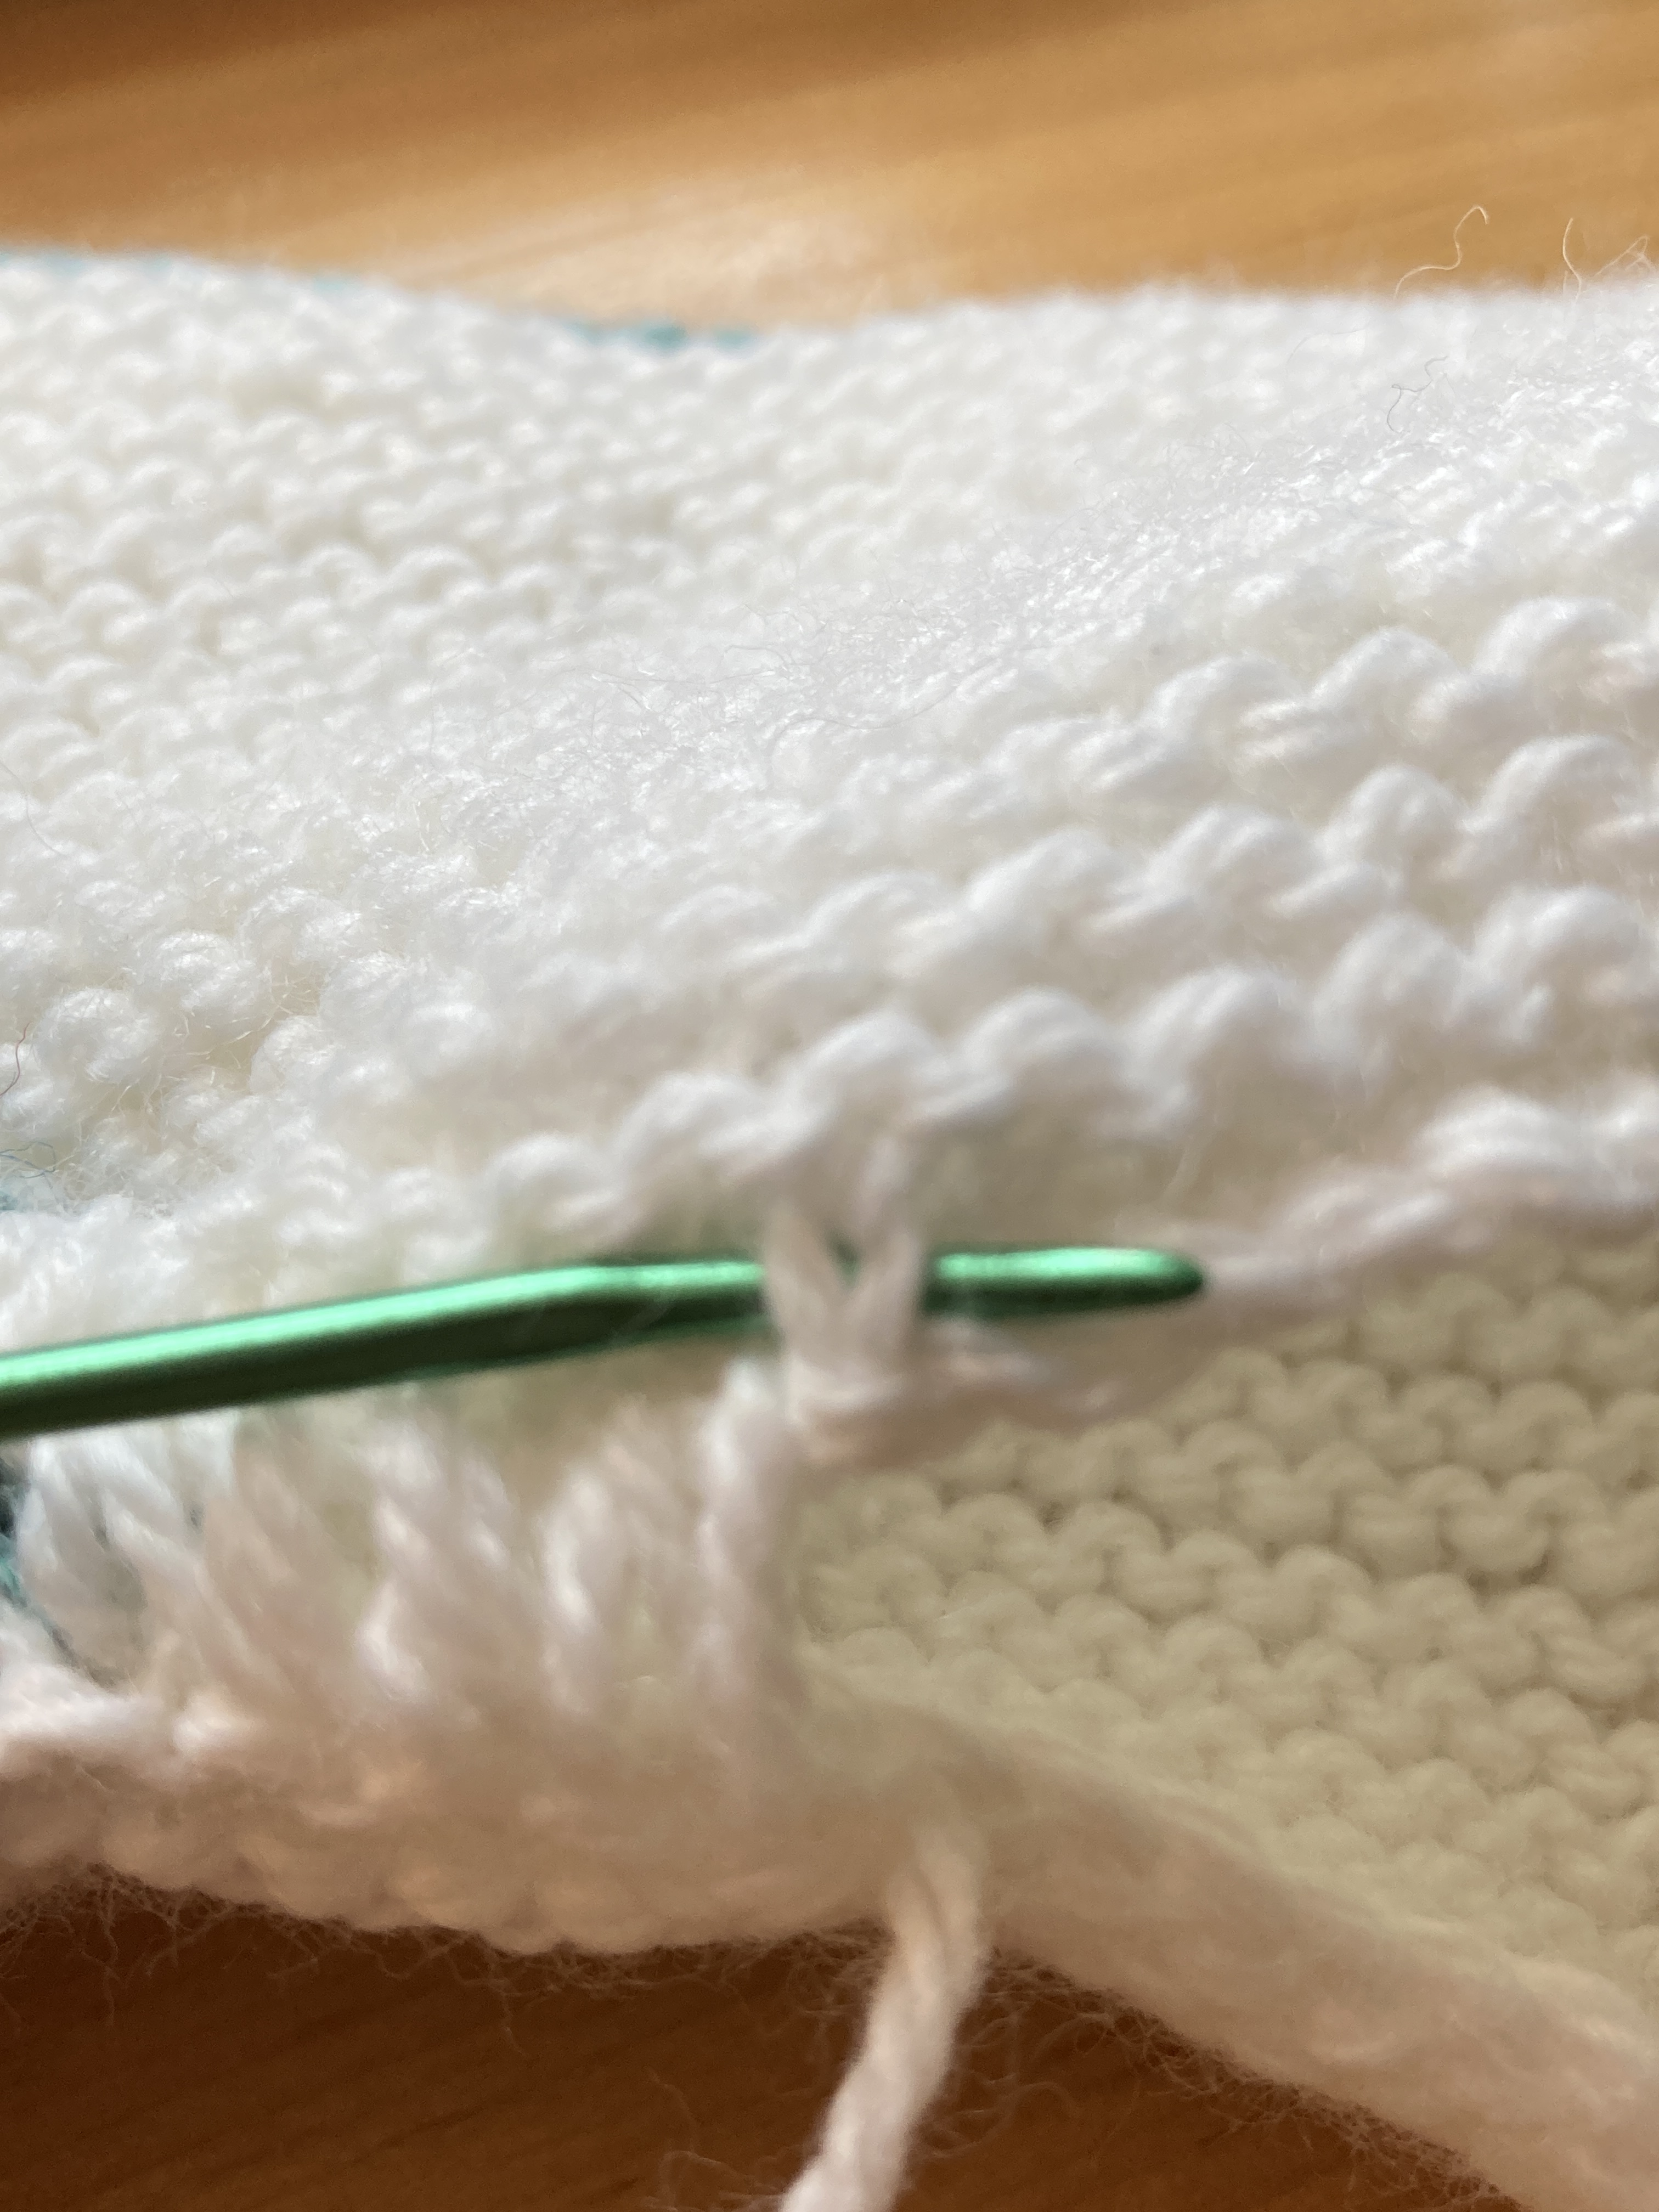
This is half of the seaming … seaming requires two sides. In this case I’m holding my sleeve horizontally so I have a top and a bottom that I am sewing together. Here’s the bottom.

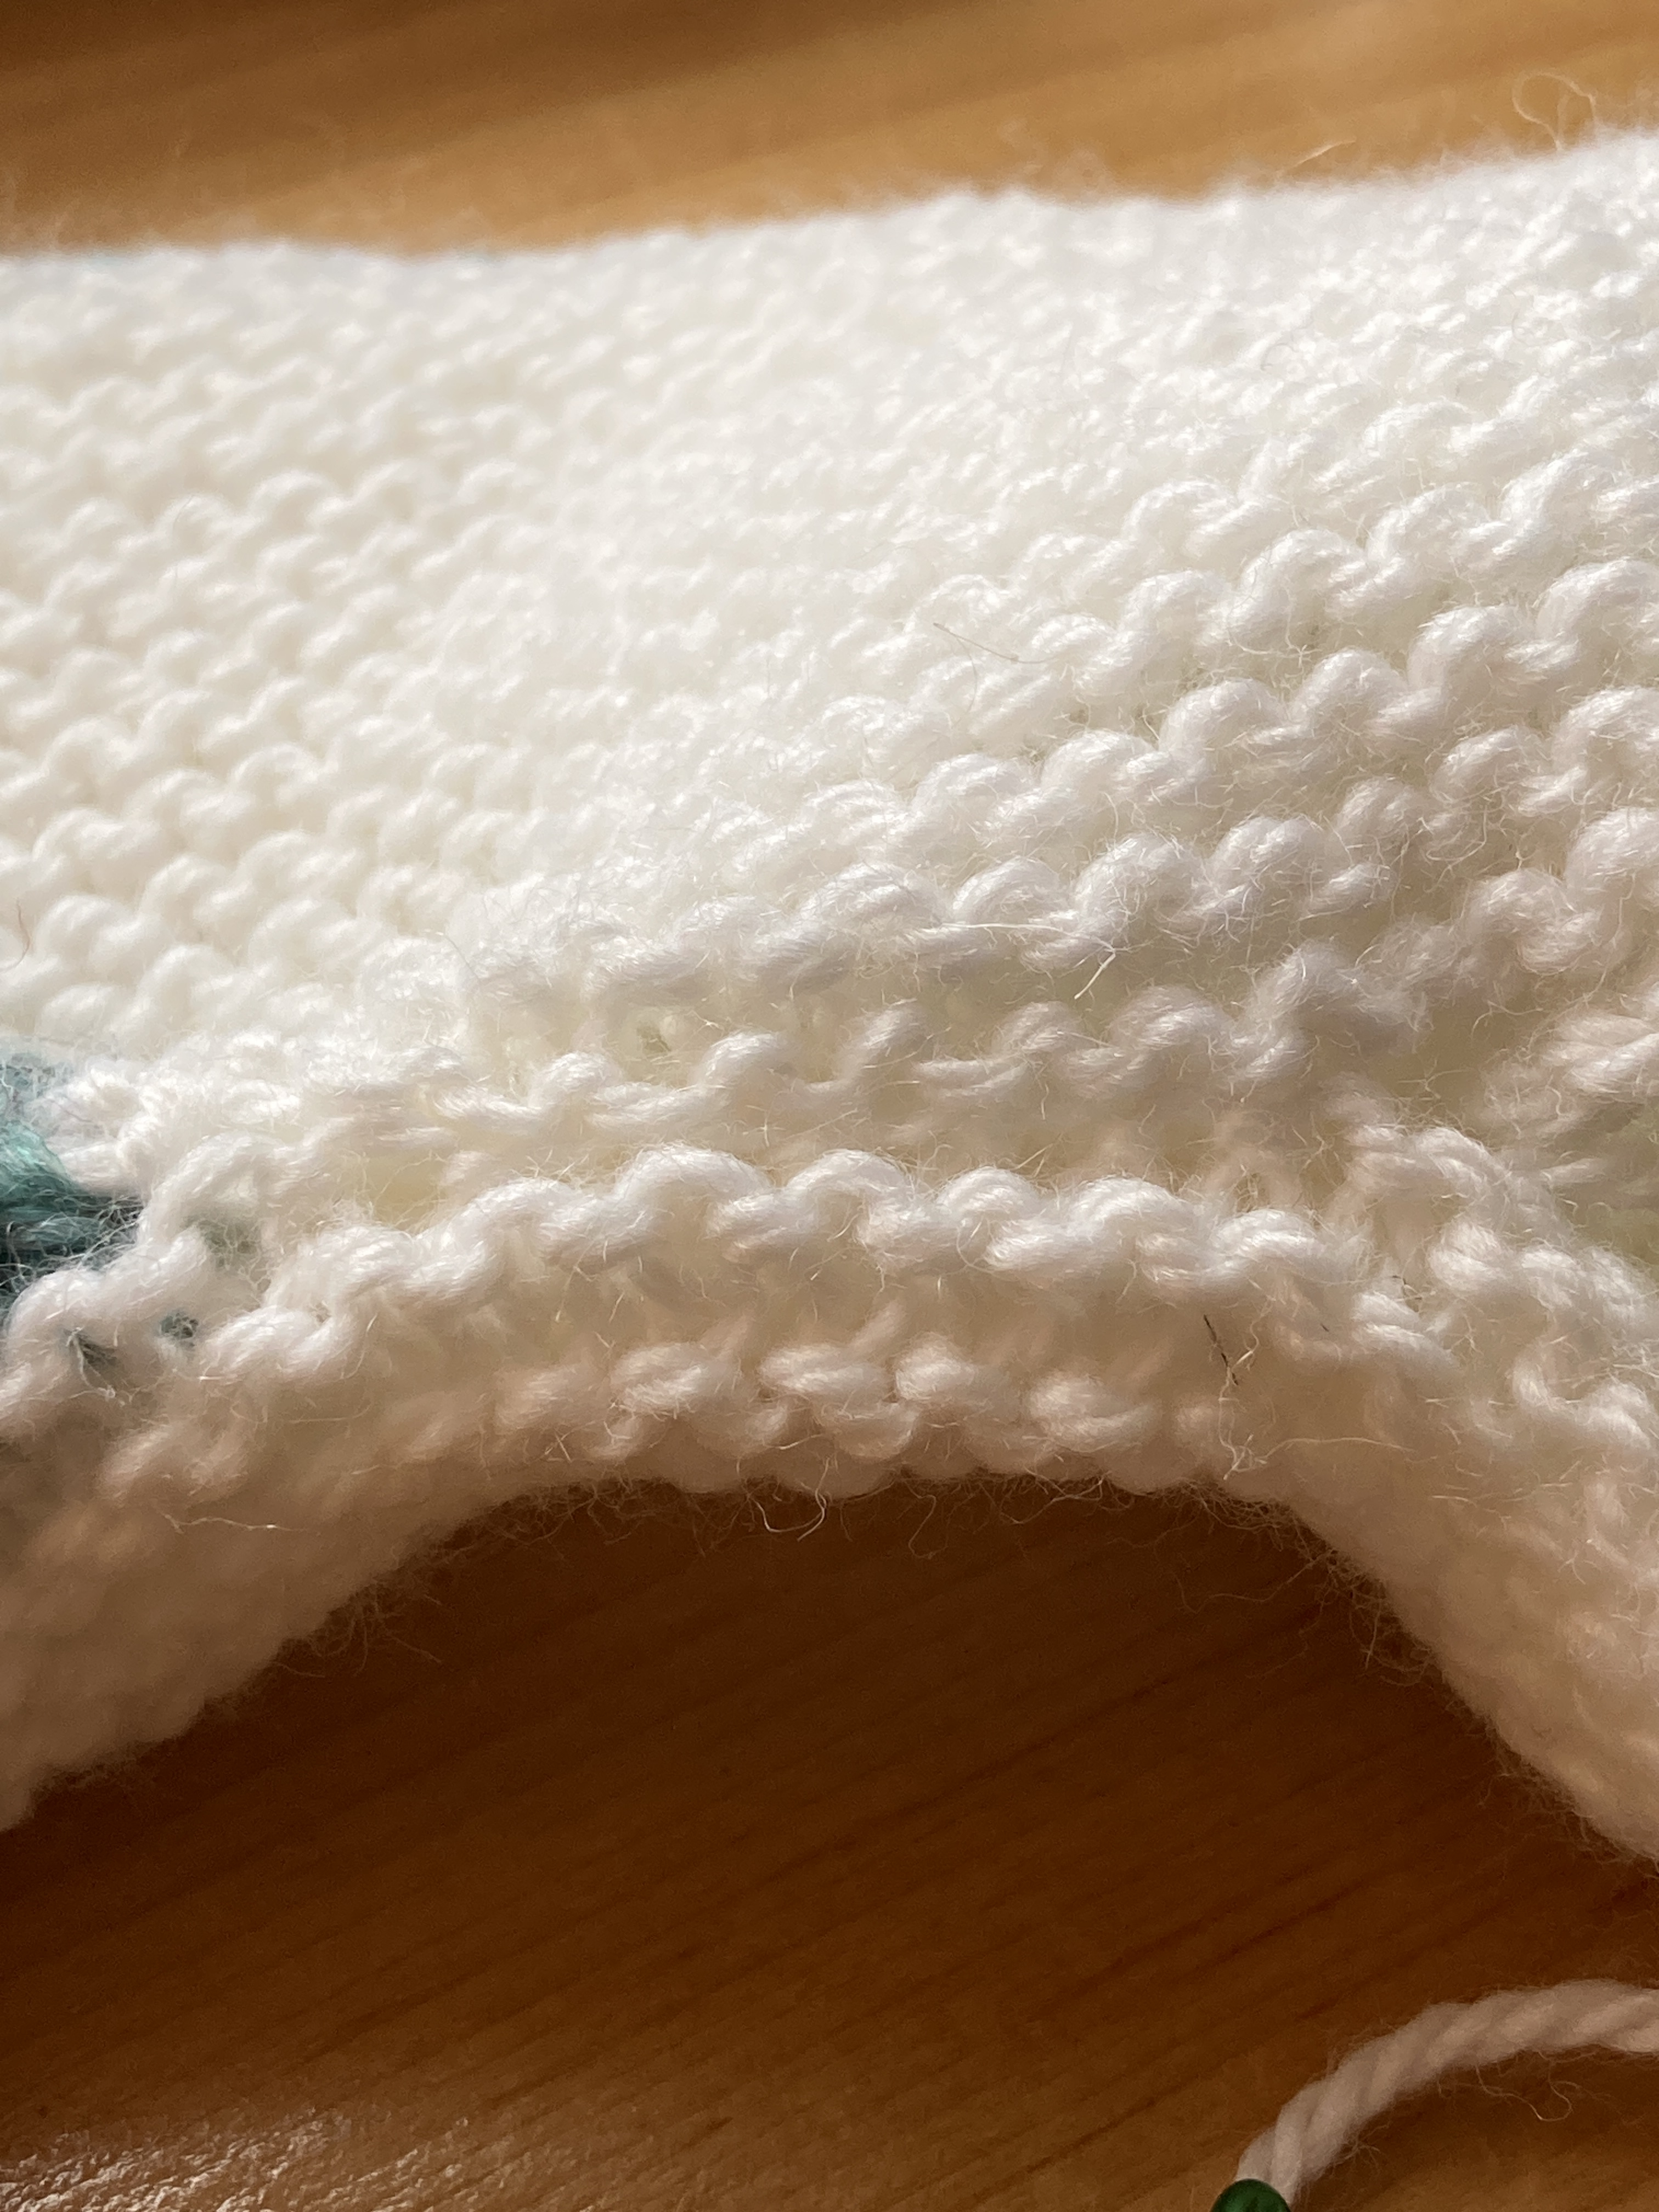
The photo on the left shows the little smiles and frowns that are on the bottom row of the sleeve seam. I am going to go under the smile in this case and grab both legs of the stitch and in this case, they’re an upside down “v” (an “A”?). You’ll notice that the smiles are above and between two frowns.

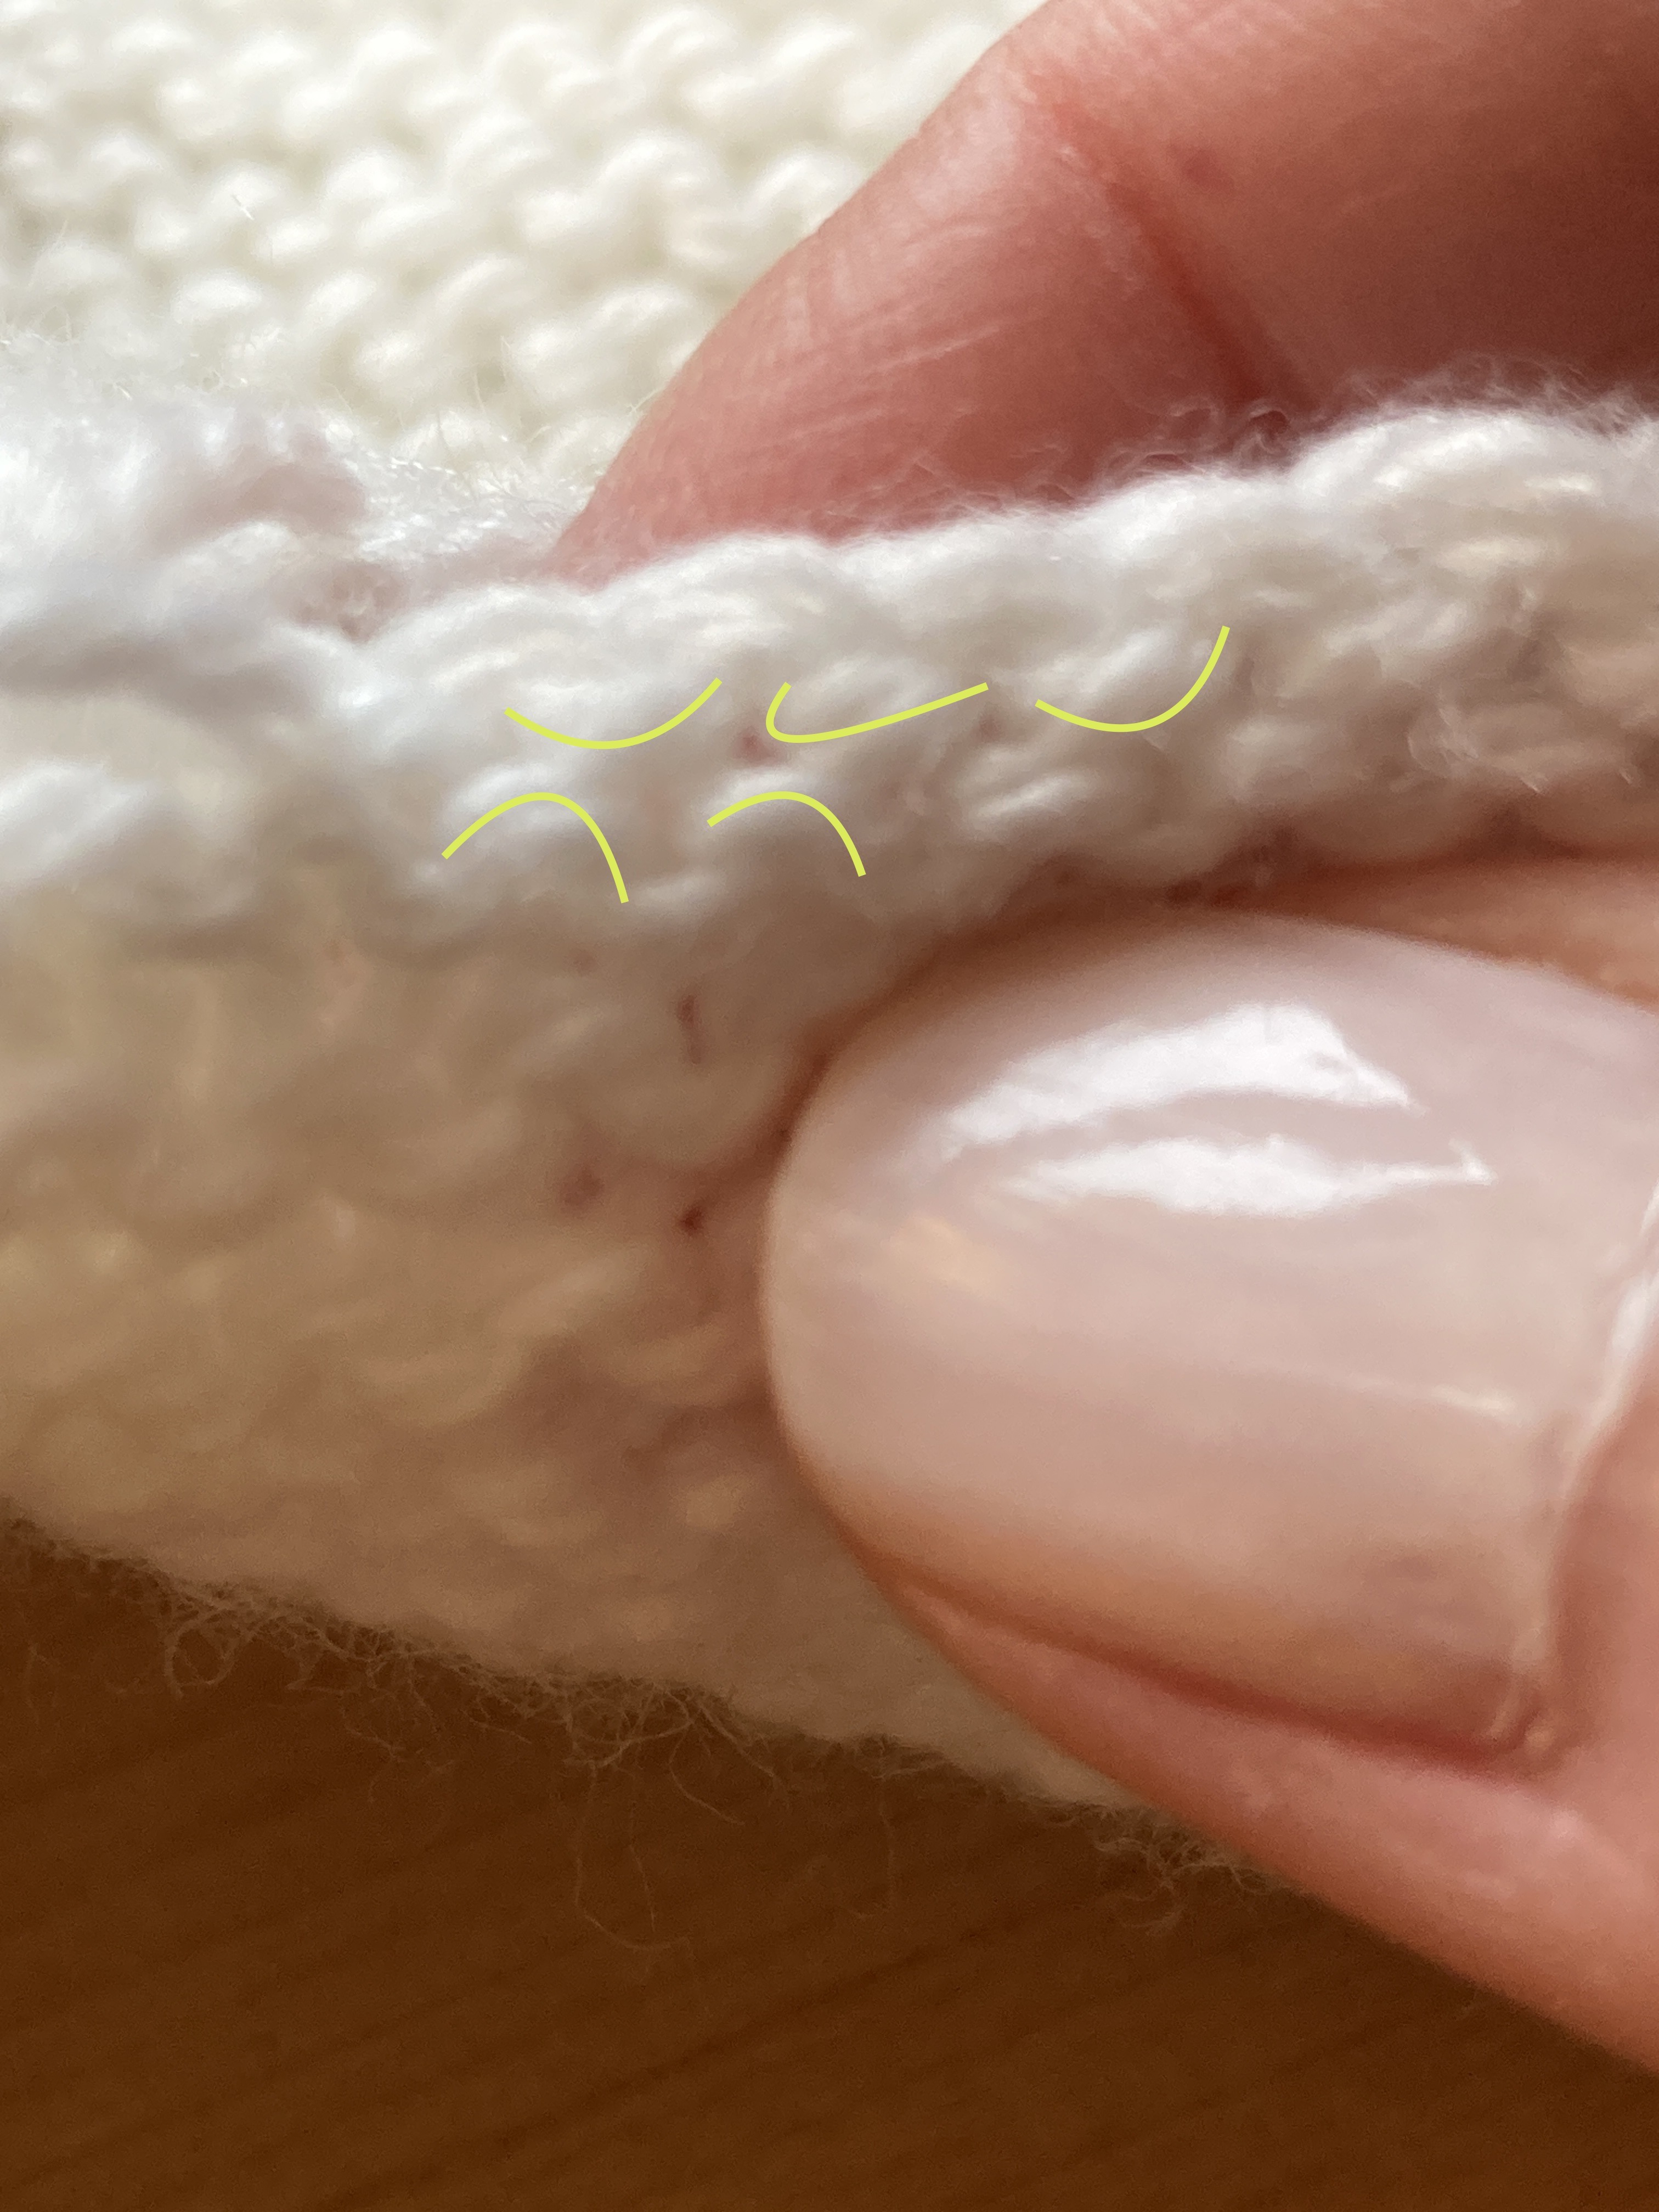
Now you’re going to loosely sew between the top and the bottom of the sleeve leaving the stitches loose for about an inch or two and it will look like the first photo below. I’ll take hold of the tail of the yarn and pull the working end/ where the needle is … gently! until all of the stitches are zipped up tightly. I pull once more from each end of the working yarn to ensure that the seam is taught and will lie straight. Continue across the underarm a couple of inches at a time until all the stitches are used up.

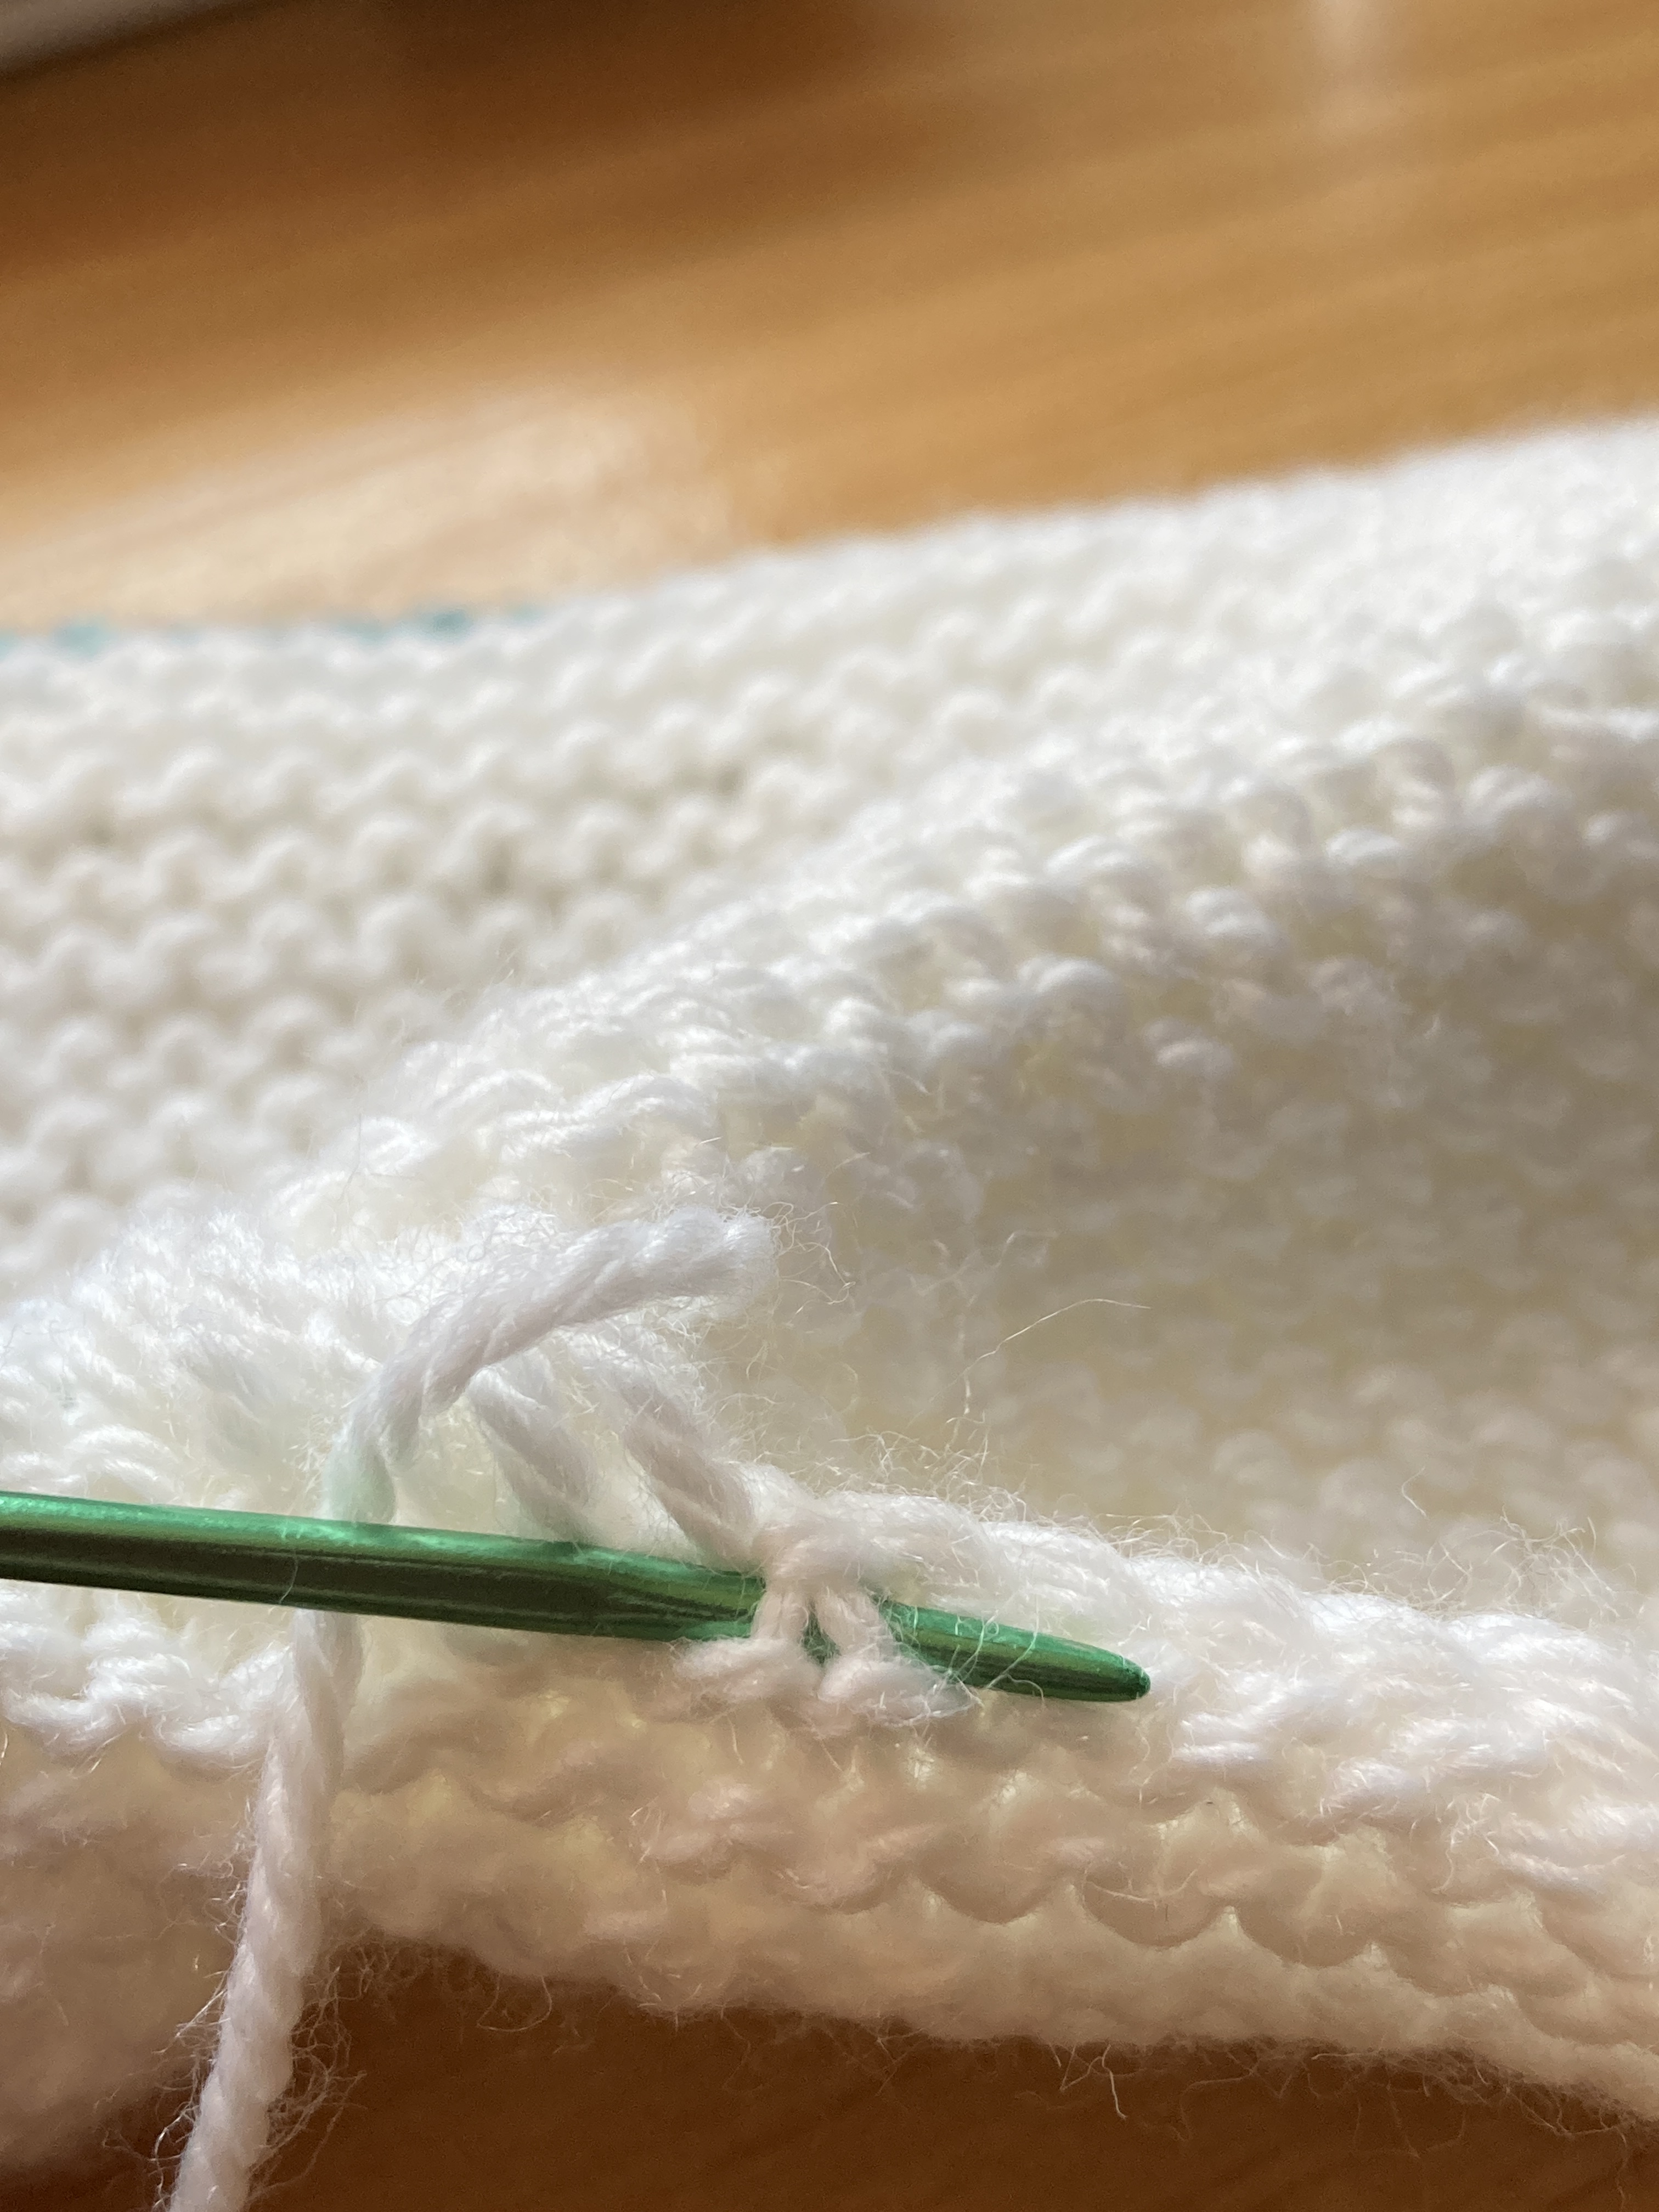
Ta! Da! You’re done! I find seaming really satisfying when you (finally) learn how to handle the different types of seaming that you’re asked to do in knitting. After 40-ish years, I am finally settling in to being comfortable with seaming and don’t dread it like I used to. I knitted seamless garments for years because I was so intimidated by seams but as I started to learn more techniques for finishing and seaming, I got more comfortable. Kind of like everything in life, right? Thus the statement, “The more you know” (remember the PSAs on NBC?)

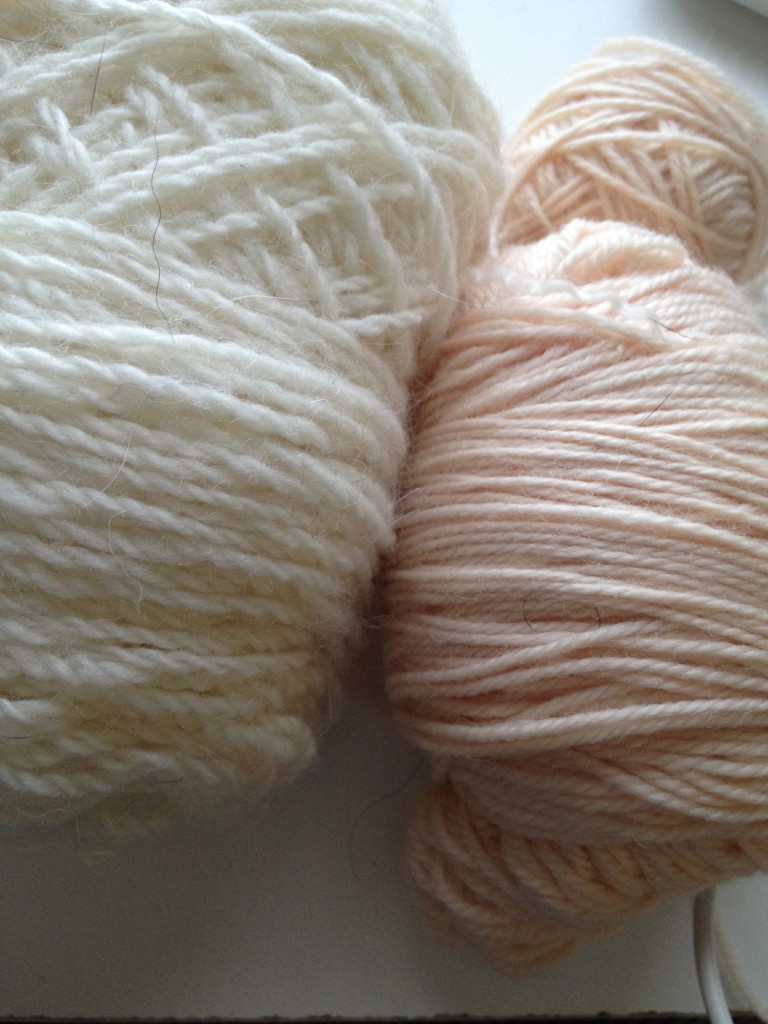
I knitted this little Macaroon sweater in Berroco Vintage DK rather than the intended cotton yarn. I don’t love knitting with cotton and Vintage has a bit more stretch and it’s soft and washable. This one is going to live with a friend’s baby who is bi-coastal and he should be able to wear it in the fall. The fact that the sleeves can be rolled back is a good thing because it’ll give him a few months more wear because they grow almost fast enough that you can see them grow out of clothes from day to day.

I have two more of these sweet sweaters to knit for other babies in my life. I think I’ll take one of them with me on my next travel excursion and in the mean time, I’m working on a pair of Hermione’s Everyday socks for my sister and I cast on a tank top for me last night.

Hermione’s Everyday Socks is a free pattern on Ravelry by the Crazy Sock Lady. I have written about it before and I love this pattern. These are knitted with Coop Yarn’s Socks Yeah! fingering weight superwash wool with nylon. I love this yarn! I had gotten several hanks of it when I joined A Year of Techniques with Jen Arnall-Culliford back in the day and chose not to make the projects in the class. Years later, I made a pair of orangey-pink socks for myself and I want to send a great pair like this to my sweet sister. I like this pattern with variegated and solid yarns and it’s easy to memorize. I’ve started the second sock and they’re almost always with me just in case I have a few minutes to knit.

Last night I cast on the Staple Linen Top by Joji Locatelli in Muse, a merino/linen blend yarn that I bought when I attended Knit City Montreal. I’m eager to see how the yarn knits up. This pattern was one of the shop models at Sonder Yarn Company’s booth and I thought it would be a good summer garment and I hope it will fit well and look a little dressier than a t-shirt. I loved the pale pink Grand Ballet colorway. Crossing my fingers. Ha! Ha!

I’ve gone on too long. The rain has stopped and I can go get dressed and head to Target for my returns. Gone knitting.

Blocking Nancy’s Vest on a Beautiful Sunday

Sunset. Sunday, January 14, 2024

As the sun sets on this weekend, we’re enjoying some quiet time at home. We went into town to pick up groceries that we’ve not had time to do since we’ve been traveling and living around a couple of crazy winter storms. But today we got it done and we can eat for a week or two before we have to grocery shop again. I pulled some bananas out of the freezer as I was organizing and will make some banana nut muffins in the morning and maybe some granola, too. You know it’s been a crazy time when we run out of granola!

Nancy’s Vest by Carol Sunday

My Nancy’s Vest is blocked. I’m really excited to be able to wear this vest this week when I go to work. It’s been an interesting challenge because it looks so simple but it has a few techniques that were new and several directions at once so I needed to pay close attention. Despite being warned, I didn’t read ahead in the pattern and neglected to stop and divide for the front and back pieces (and I had to frog back 3 inches of stockinette) and there were a couple of places where I didn’t decrease on the front parts. Fortunately I was paying closer attention and didn’t have to frog back quite so far.

Regardless, I really enjoyed the process and I loved learning a couple of new tricks. The button bands were knit as you go as part of the garment and that was fun. I am eager to see how the button holes work. I used the ones in the pattern but I wasn’t sure about them. I also liked the cabled decreases, they make for nearly invisible shaping on the body of the vest.

When I got to seaming the shoulders, I had the back bound off and live stitches on the front left and right. The directions said to graft them together. This made my head spin and there was no tutorial for doing this. I’ve grafted plenty of stitches together when there are live stitches on both sides but this isn’t the case here. And THEN she offered an option of a 3 needle bind off. Again, I’ve done a lot of these but they entail having live stitches on the two sides being knitted together and bound off. So, I thought about it for a few minutes and decided to unpick the bound off back stitches and return them to the needles and then I did a three needle bind off at the first shoulder, bound off the stitches across the back of the neck and did a three-needle bind off at the second shoulder. It seems to have worked and it will add some structure to the shoulder.

The blocking happens now, before the finishing of the back of the collar. I will have to add a little bit of length to the collar pieces before grafting them together and attaching them to the back of the neck. That’s the only seaming in the whole garment! I’ll weave in the ends and then crochet around a couple of spots and it’ll be finished and ready to wear.

On Friday I hope my friend/co-worker and I will both be wearing our Nancy’s Vests at work. We had our own little KAL that we didn’t plan but kind of just happened. It’s funny that we are both finishing at about the same time considering.

I’m going to give myself a bit of a break from finishing until my vest dries and tonight I’m going to knit up a pair of fingerless mitts with a hank of deeply stashed Malabrigo Rios. I don’t know what the colorway is because the label appears to have left the building, but it’s a pretty blue colorway. These will knit up quickly and will be satisfying after the longer projects. After that, I’ll be frogging back one sleeve on my Norwegian sweater that is SO close to being done. I’m going to attempt to decrease more rapidly and then knit the colorwork and cuff (and then try to copy what I did on the first sleeve with the second one. That’s all I have left to do and that sweater will also be finished. I sure do hope after all this that I will be able to wear the sweater. My allergies seem to be getting worse with some wool. I hope the natural wools will be exempt from allergies. I can wear Patagonia Organic Merino and I hope this Norwegian wool will be free of whatever makes me sneeze!

Gone knitting.

Final pictures will be posted on my Instagram feed @queenbeeknits and lindar on my Ravelry project page.

A Hare Pair (Rabbit Hat by Jane Terrza)

IMG_4456I have had this ball of white-ish yarn (Oasis Farm Fiber Mill “Bunny Yarn”) in my stash for years. It’s tried to be a scarf a couple of times and, subsequently, frogged. I had set it aside because I didn’t know what it wanted to be. Until I saw the Rabbit Hat by Jane Terrza on Facebook one morning a couple of weeks ago.

I have two adorable nieces in northern California and I just HAD to make the Rabbit Hats for them for Easter!

I used the following yarns from my stash for the hats: Oasis Farm Fiber Mill Classic Bunny in white. I had two skeins that I wound into one huge cake. I used about half of the two skein cake for both hats. (Don’t you love knitting for children and babies?) I needed something pink for the inside of the ears in a similar weight. I had a skein of Lorna’s Laces Sportweight wool in a very pale pink (pale pink colorway, I think) that I won in a contest for a soapbox package. It was perfect!

First Hat

First Hat

The first hat was the larger of the two and I made it as the pattern was written with a kitchener stitch graft at the top of the hat and reverse stockinette on the inside of the ears (the pink part).

Reverse stockinette inside the ears

Reverse stockinette inside the ears

The pattern was easy to follow and the hat is adorable. The hat is knit in the round and the ears are knit in two pieces each from stitches placed on stitch holders. Once knitted, the ears are seamed. Easy enough.

What I found “awkward” was that all of the decreases for the ears were all done as K2tog. It seemed to me that the top of the hat could be more easily seamed with a 3 needle bind off rather than kitchener stitch and be nearly as pretty (and take a lot less time to seam). I guess it will be up to you to decide what you want to do but I wanted to share with you what I did with the second little hat for the baby sister!

Hat 2

Hat 2

I knit the hat just as the pattern was written. (I happen to love a little rolled brim on a hat!)

The changes that I made came in the top seam and the ears.

For the top of the hat, I did a 3 needle bind off. Next time I would turn the hat inside out first but I am not unhappy with the little seam on the top of the hat. I took a bit of time to adjust the stitches onto holders … I had to knit the first six stitches to get the yarn into the right place to bind off the top of the hat but otherwise, it was a cinch!

I knit the ears with a K2tog (knit two together) decrease for a right-leaning decrease on the left sides of the ear pieces and a SSK (slip slip knit) decrease for a left-leaning decrease on the right sides of the ear pieces rather than always using a K2tog decrease as written in the pattern. I think this looks a little bit prettier.  I also was thinking about treating the ear as one piece circularly and carrying the contrasting yarn across. I decided to seam them instead to save the yarn. (Hey! I am a Yankee at heart!)

Stockinette inside the ears … by mistake but it still looks cute.

Stockinette inside the ears … by mistake but it still looks cute.

Because it was the second hat, I wasn’t paying attention to the pattern directions and totally forgot about the reverse stockinette on the inside of the ears. As a result, they are stockinette stitch. And it’s fine. Bonus! I find the seaming easier this way.

Since I was using natural fibers, I steam blocked both hats and made sure the pink insides of the ears were “hugged” by the creamy white backs of the ears all around. I think they are adorable and can’t wait to see my little nieces wearing them!

A Pair of Hare Hats … blocked and heading to California!

A Pair of Hare Hats … blocked and heading to California!

Which one do you like best? The pattern can be found on Ravelry and is a minimal charge … buy the pattern and support the designer!

Gone knitting!