I-cord is not a difficult thing to knit and it can be used for so many projects.
Recently, I knitted i-cord ears for a Tiny Baby Bunnies pattern and you can see pictures of my projects on my blog, here, or on my Ravelry page, here.
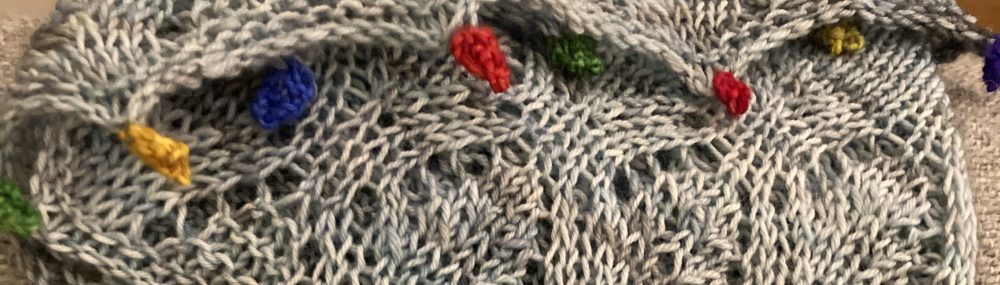
I’ve also used them for embellishing knitted garments like my Senorita Lolita dress and on an original cowl that I knitted and is for sale in my 3 B Street shop.

Senorita Lolita (Copyright 2011 Prima Dogma by Queen Bee Knits)
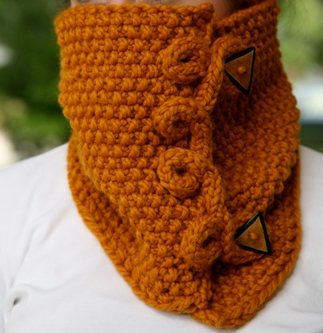
Butterscotch Cowl
Copyright 2013
Queen Bee Knits Original
I-cord is a spiral “tube” of knitting that is constructed by sliding the working piece from one side to the other side of your DPN.
It’s a great handle for knitted (and felted totes), it’s a great embellishment for knitted garments (and can be formed into flowers or stems or just about anything you can imagine!
It’s also very simple to knit!
Here is what you need to know to be successful when knitting i-cord!
Cast on the required number of stitches to be used for the i-cord (in this case, I used 6 stitches.)

Cast on # of Stitches
Slide your stitches to the right side of the DPN (do NOT turn your needle!)

Slide stitches from cast on position at the left of the needle to the right side
Knit all stitches (to knit the first stitch, you’ll bring the working yarn around the back of your needle and give the first stitch or two or three a good tug to pull the yarn so there won’t be a huge gap but don’t worry too much as the next few rounds will help even it out!)
Note that the stitches will be on the left side of the DPN. Do NOT turn your needle.

Knit all stitches (sorry, it’s a little blurry, but you get the idea!)
Slide the stitches to the right side of the needle and knit all stitches again.
Repeat sliding the stitches from the right to left of the DPN and knitting all stitches until i-cord is the right length for your project. It is also helpful to give the “tail” a tug or two to get the i-cord to stretch out & down.
After a few rows, you’ll start to see the tube starting to take form.

After a few rows of knitting (9 here)
Queen Bee
Knitting Tip
Knitting Tip – When you’re knitting circularly (in the round) on double-pointed or circular needles, in order to keep your knitting from getting “ladders” where the needles meet, remember to give an extra tug (gently, don’t break your yarn!) on the first and second stitches as you start working on a new needle. This will lessen the chance of ladders happening which are unsightly in your knitted garments. Trust me, I’ve got plenty of experience! 🙂
So, there you go! Practice this a few times and you’ll have a great new trick in your knitting arsenal!
Gone knitting!
