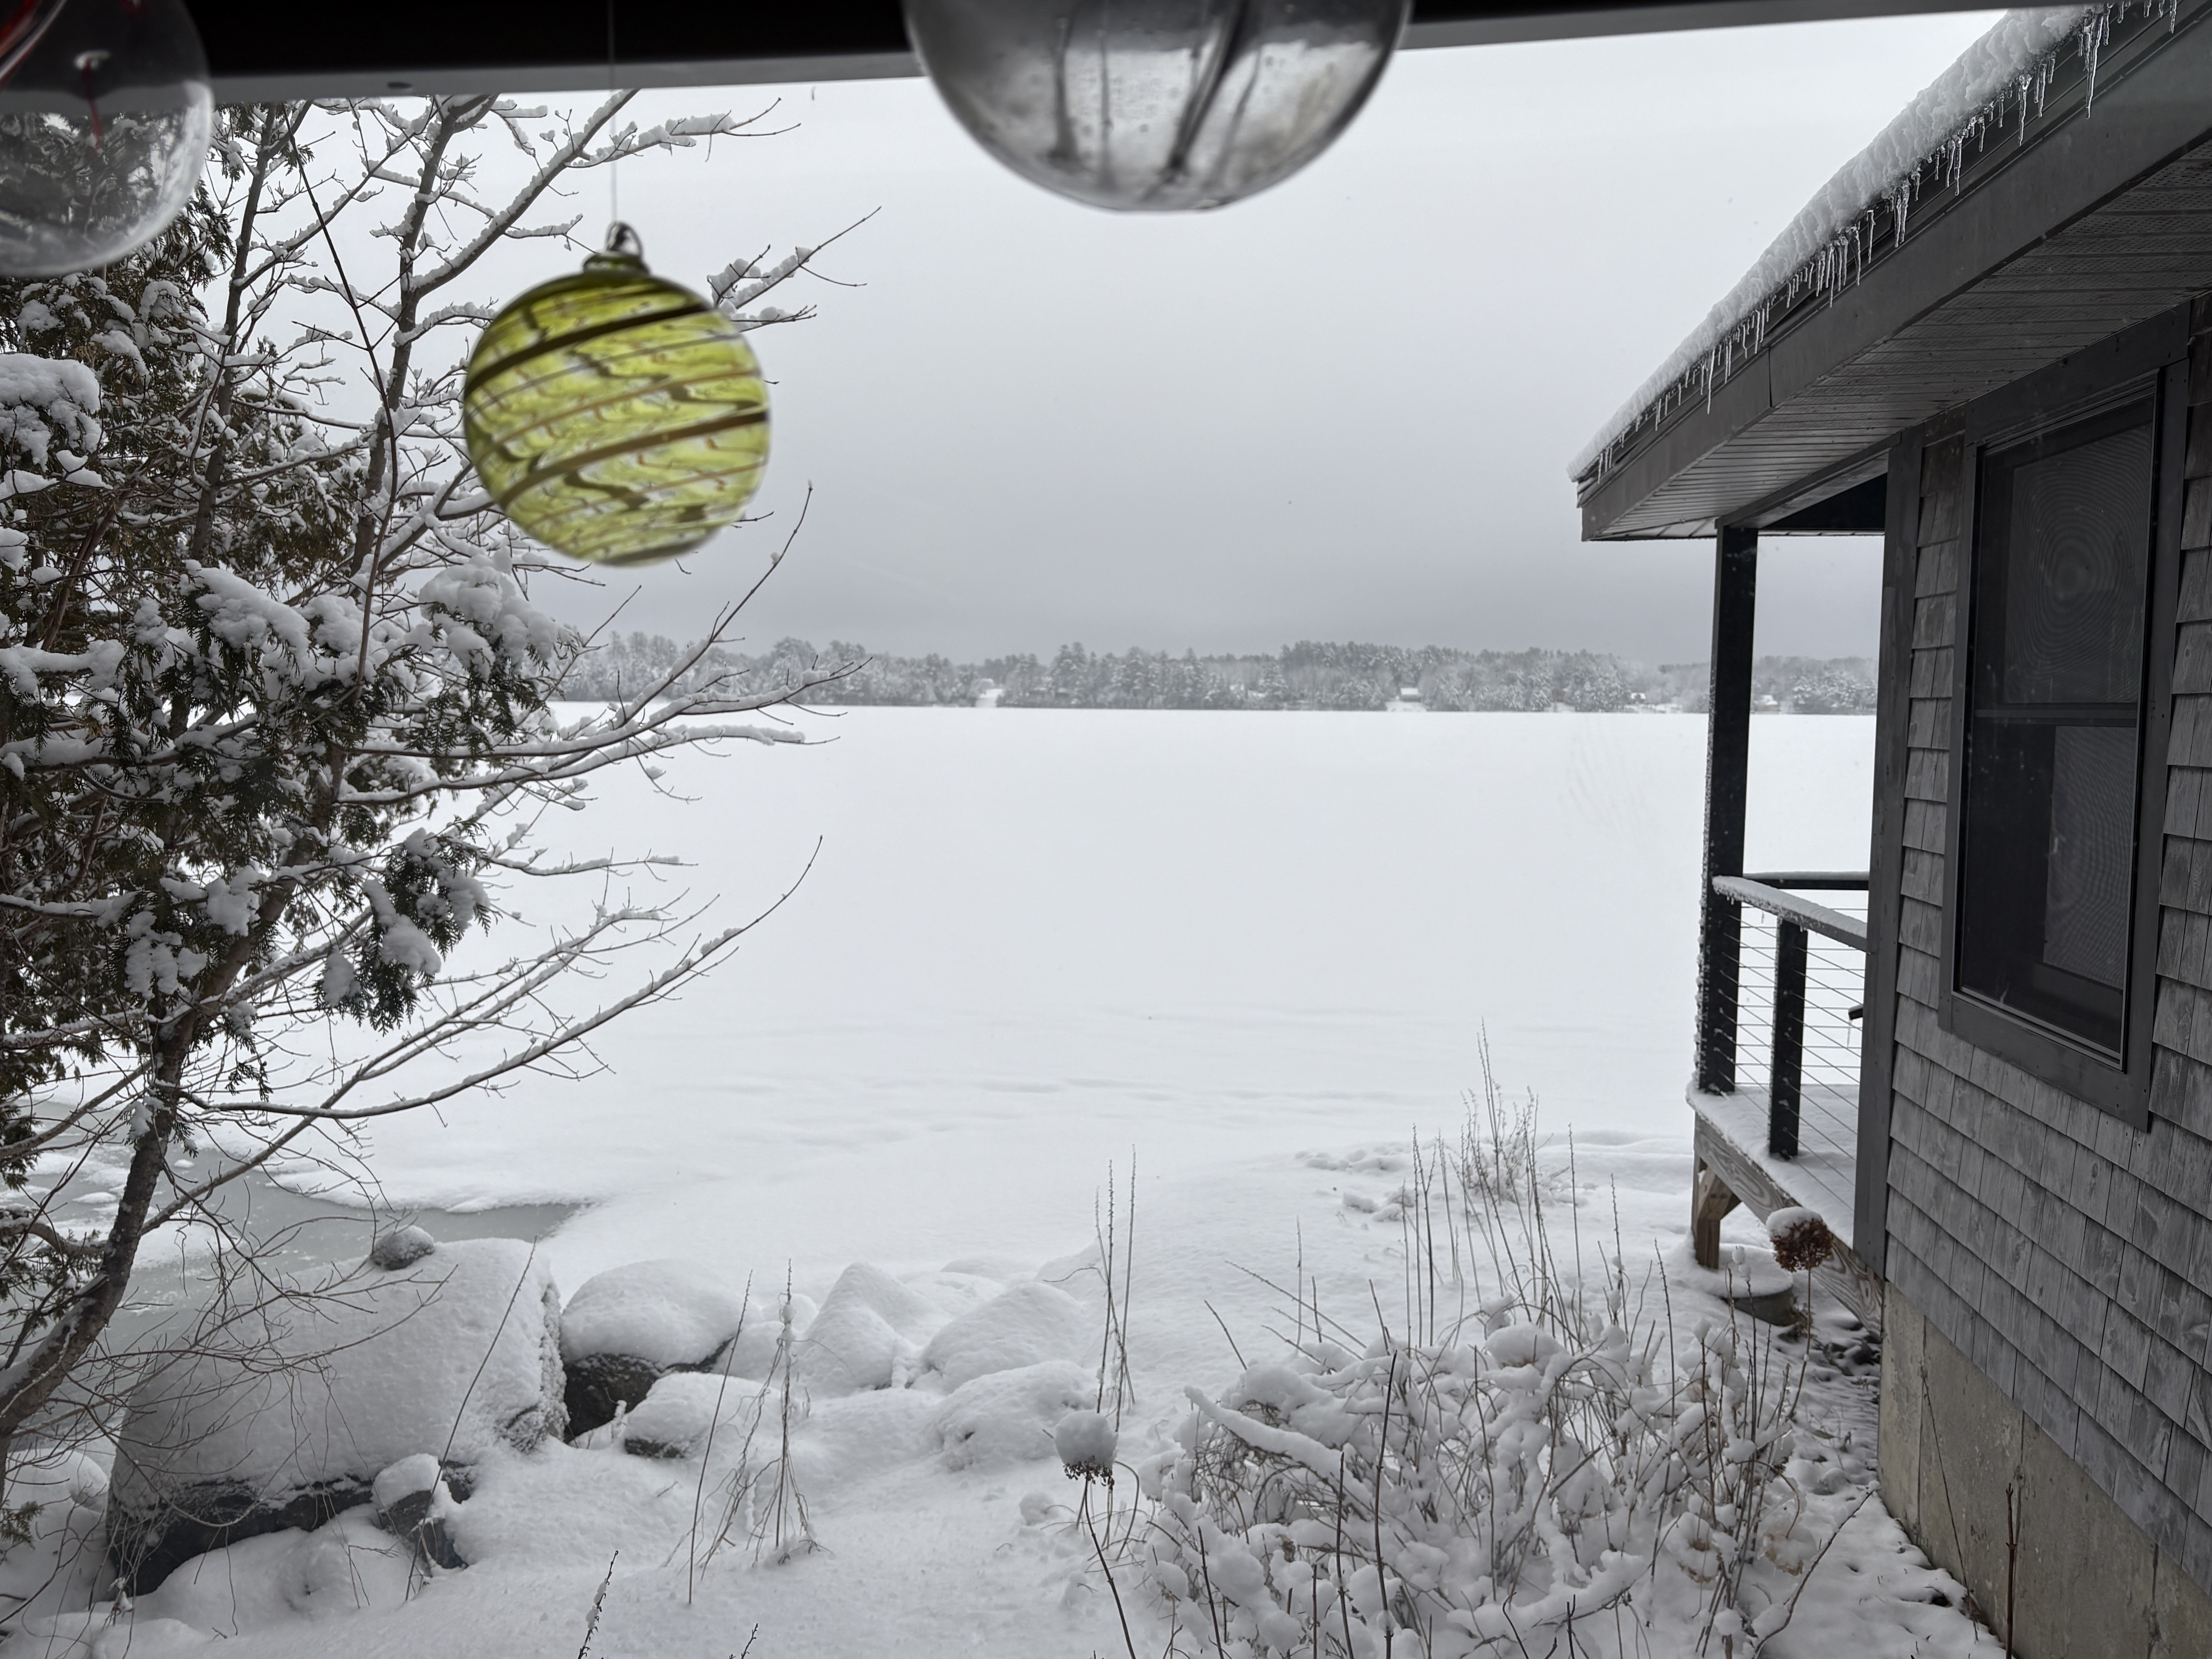
Whew! All day yesterday it snowed. Tiny flakes for an entire day … and left us with about 4 inches of snow. Hopefully the last of the season. You won’t hear me complaining, though, because the snow means that we’ll have water in our well this year. I’m so grateful to have the snow because it means we’ve had a winter and spring will come (even though it’s technically spring already.)
Yesterday was the perfect excuse to spend the day in my atelier knitting! And, for the most part, that’s what I did. I wrote a newsletter for the store (work) in the early morning and had breakfast with my hubby but the rest of the day was dedicated to being in my studio – catching up with calendar details, bill paying, flight booking and knitting.
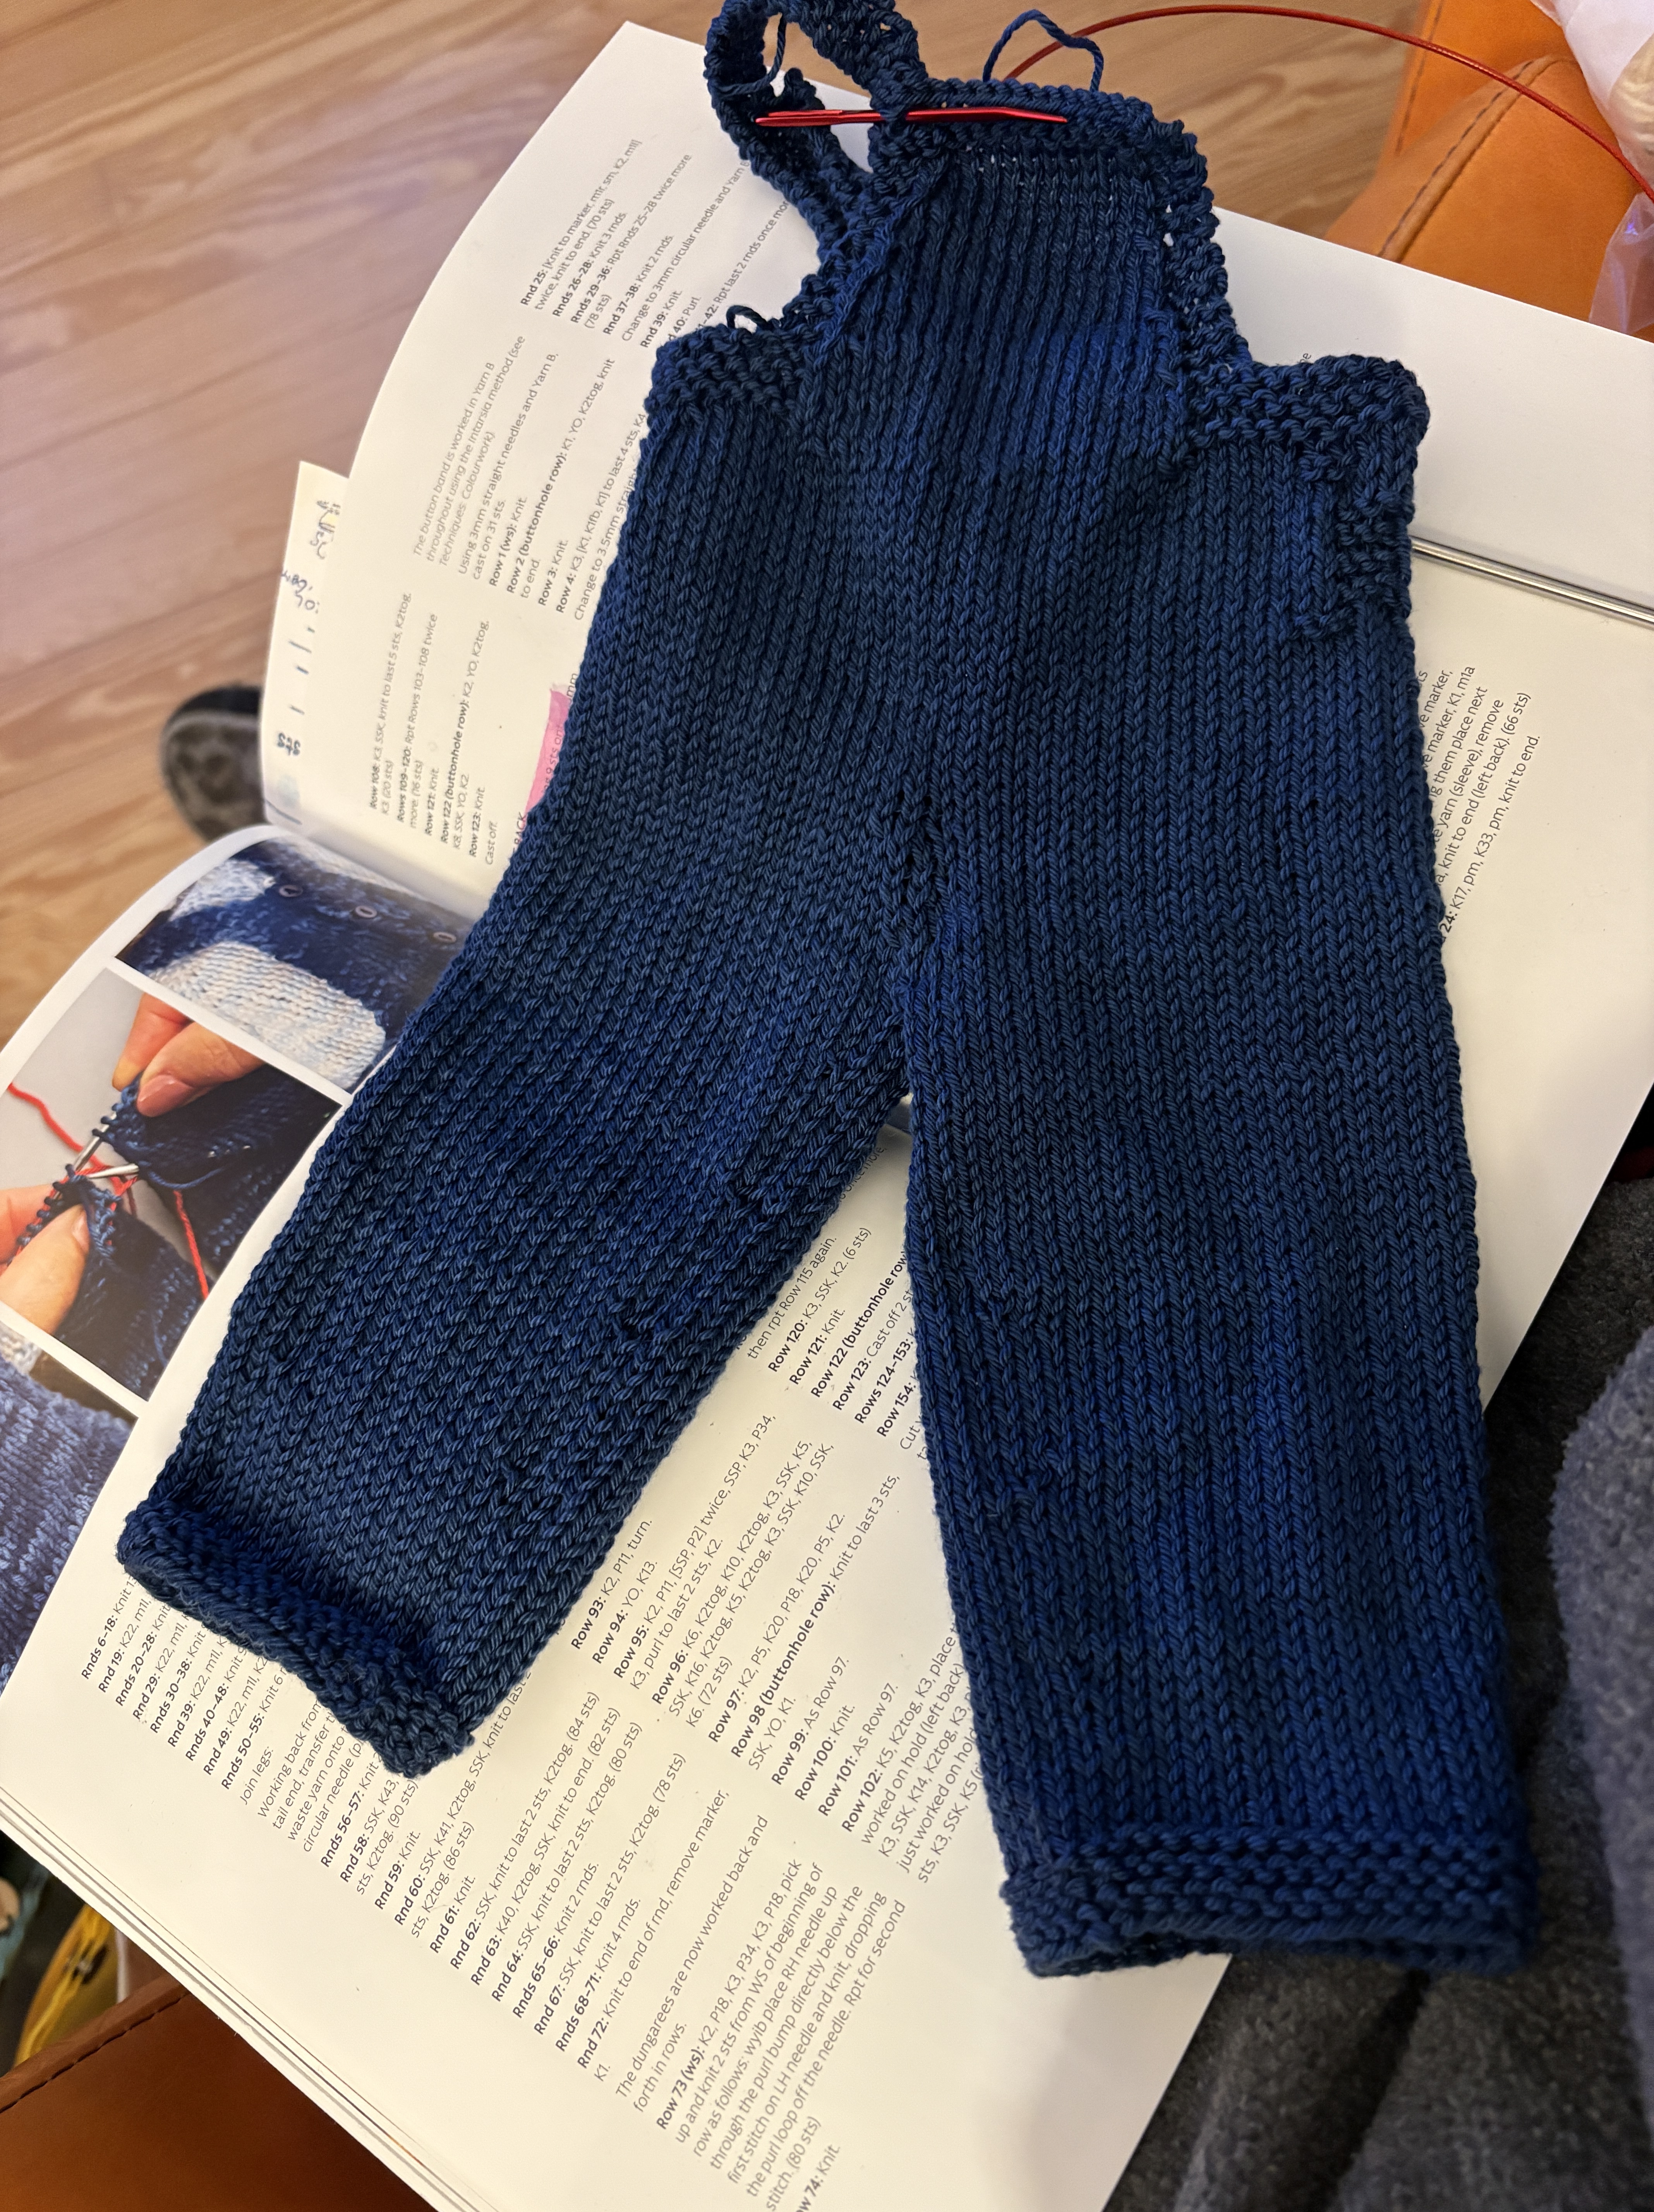
I spent the majority of the day working on these little (and I mean little) overalls. These are part of a gift that I’m knitting for a very special person and glad that I am nearing completion. Today the overalls are blocked and drying, pocket and all. I’ll begin (and hope to finish) a little shirt to go under them today. Once this project is done, I’ll start another one. I just haven’t decided if I want to finish another UFO or start a new one. You’ll find out when I do!
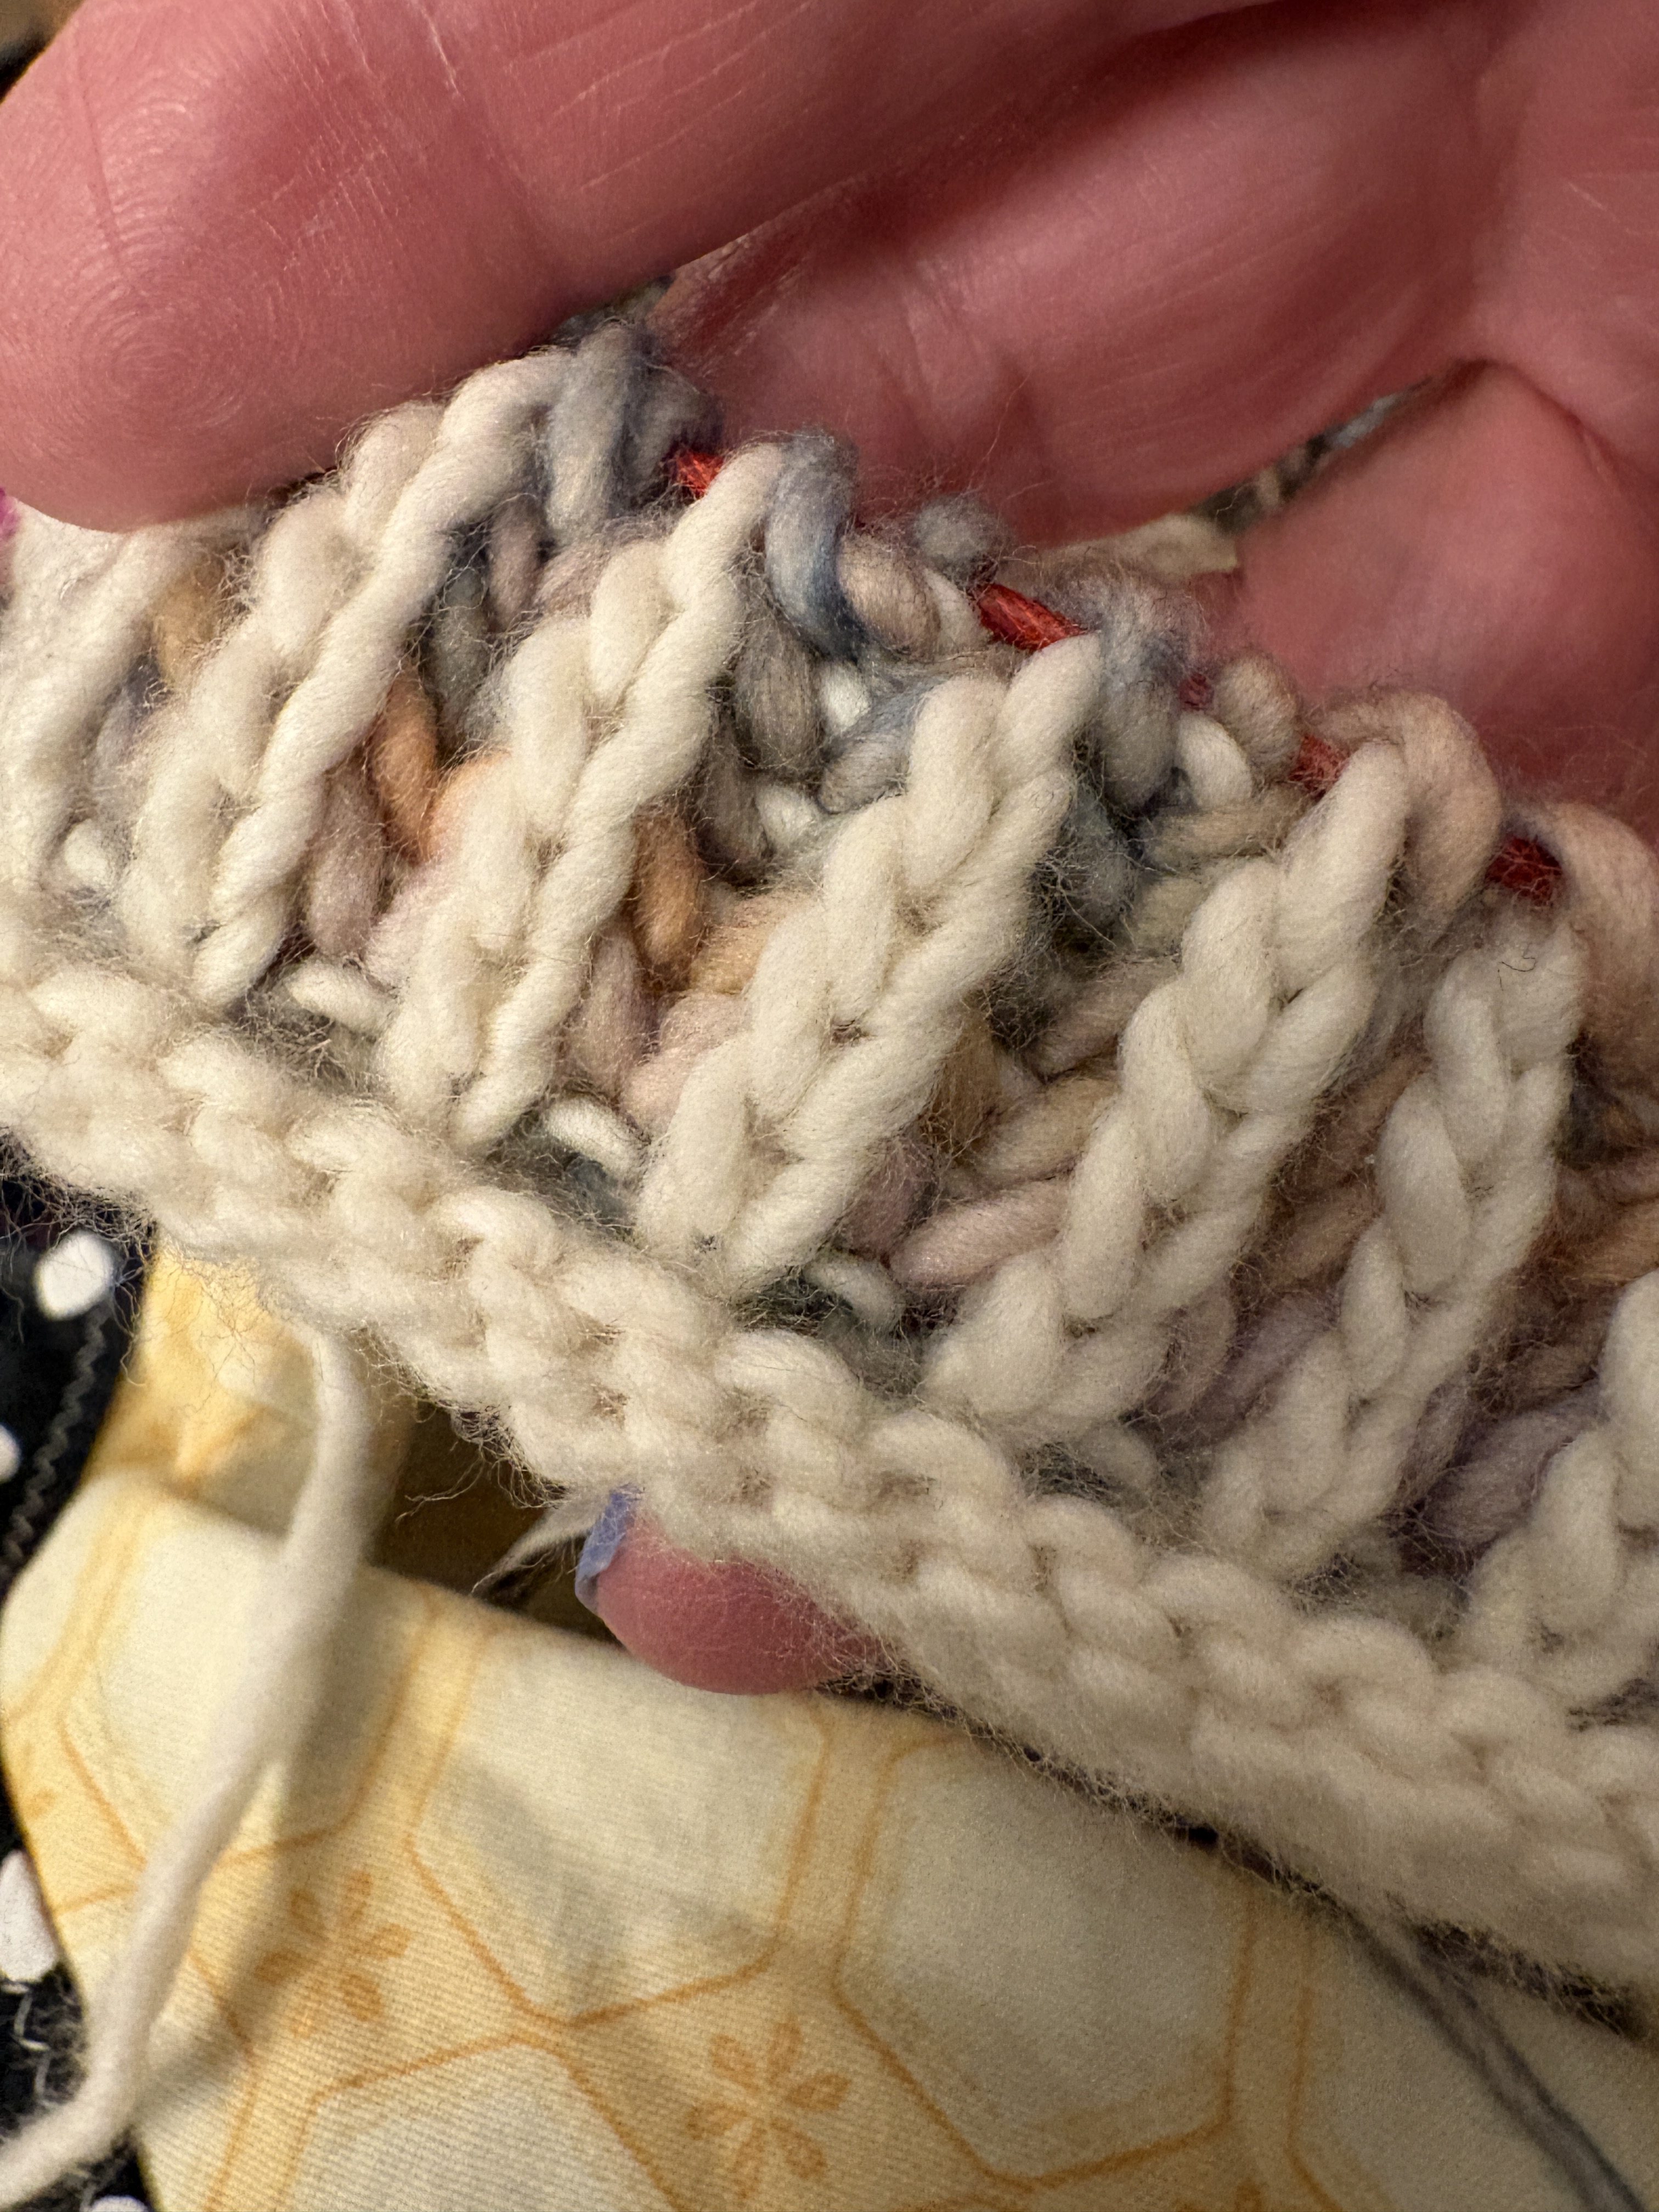
I also started a sample hat in brioche stitch that I am considering for a workshop at the store. I spoke to the boss about it on Saturday and she’s good with me doing it (and just about anything.) I had a very successful stranded colorwork workshop and she’d really like me to repeat that but I’d rather do something different and I think a 2-hour, one time workshop based on a technique like Brioche will be a good one. This particular hat is a 2-color brioche but the technique is basically the same whether it’s one- or two-color.
Two-Color Brioche hat for a future workshop
My Friday morning class is interested in doing the colorwork cup cosy that I taught in the other workshop so I will offer it to them and will maybe do it again one day but … it’s time to learn something new, right? I’m knitting for the first time with Malabrigo Worsted and it’s lovely to work with and very soft. I’m not sure how the hat will fit me but it’s really meant to be a sample for the workshop and the store, too. Hats are such a manageable project and a good palate cleanser, too.
Today I need to get a few tasks done around the house … bake up a batch of banana bread (in muffin form) to use up the overripe bananas and the laundry is overflowing once again. While the hubby digs us out, hopefully for the last time, I’ll be in the kitchen. I may also roast a bunch of veggies for lunches this week. I love roasted veggies with some couscous or soba noodles for lunch – hot or cold depending on the day. Tomorrow I’m back to meetings and preparation for a big event at Maine Arts Academy in early May … my role as board chair is nearly over and it’ll be fun to hand the reins to another board member and become “past chair!”
This morning before the sun came up after a perfect sleeping night interrupted by my snoring partner. I’m grateful that we have a guest room or I’d have been relegated to sleeping on the couch! Fall is a welcome change for me and I’m loving the cooler weather and have pulled out my flannel shirts so they can de-wrinkle without ironing. Ha Ha. I’m putting away my linens and tees because it’s sweater weather!
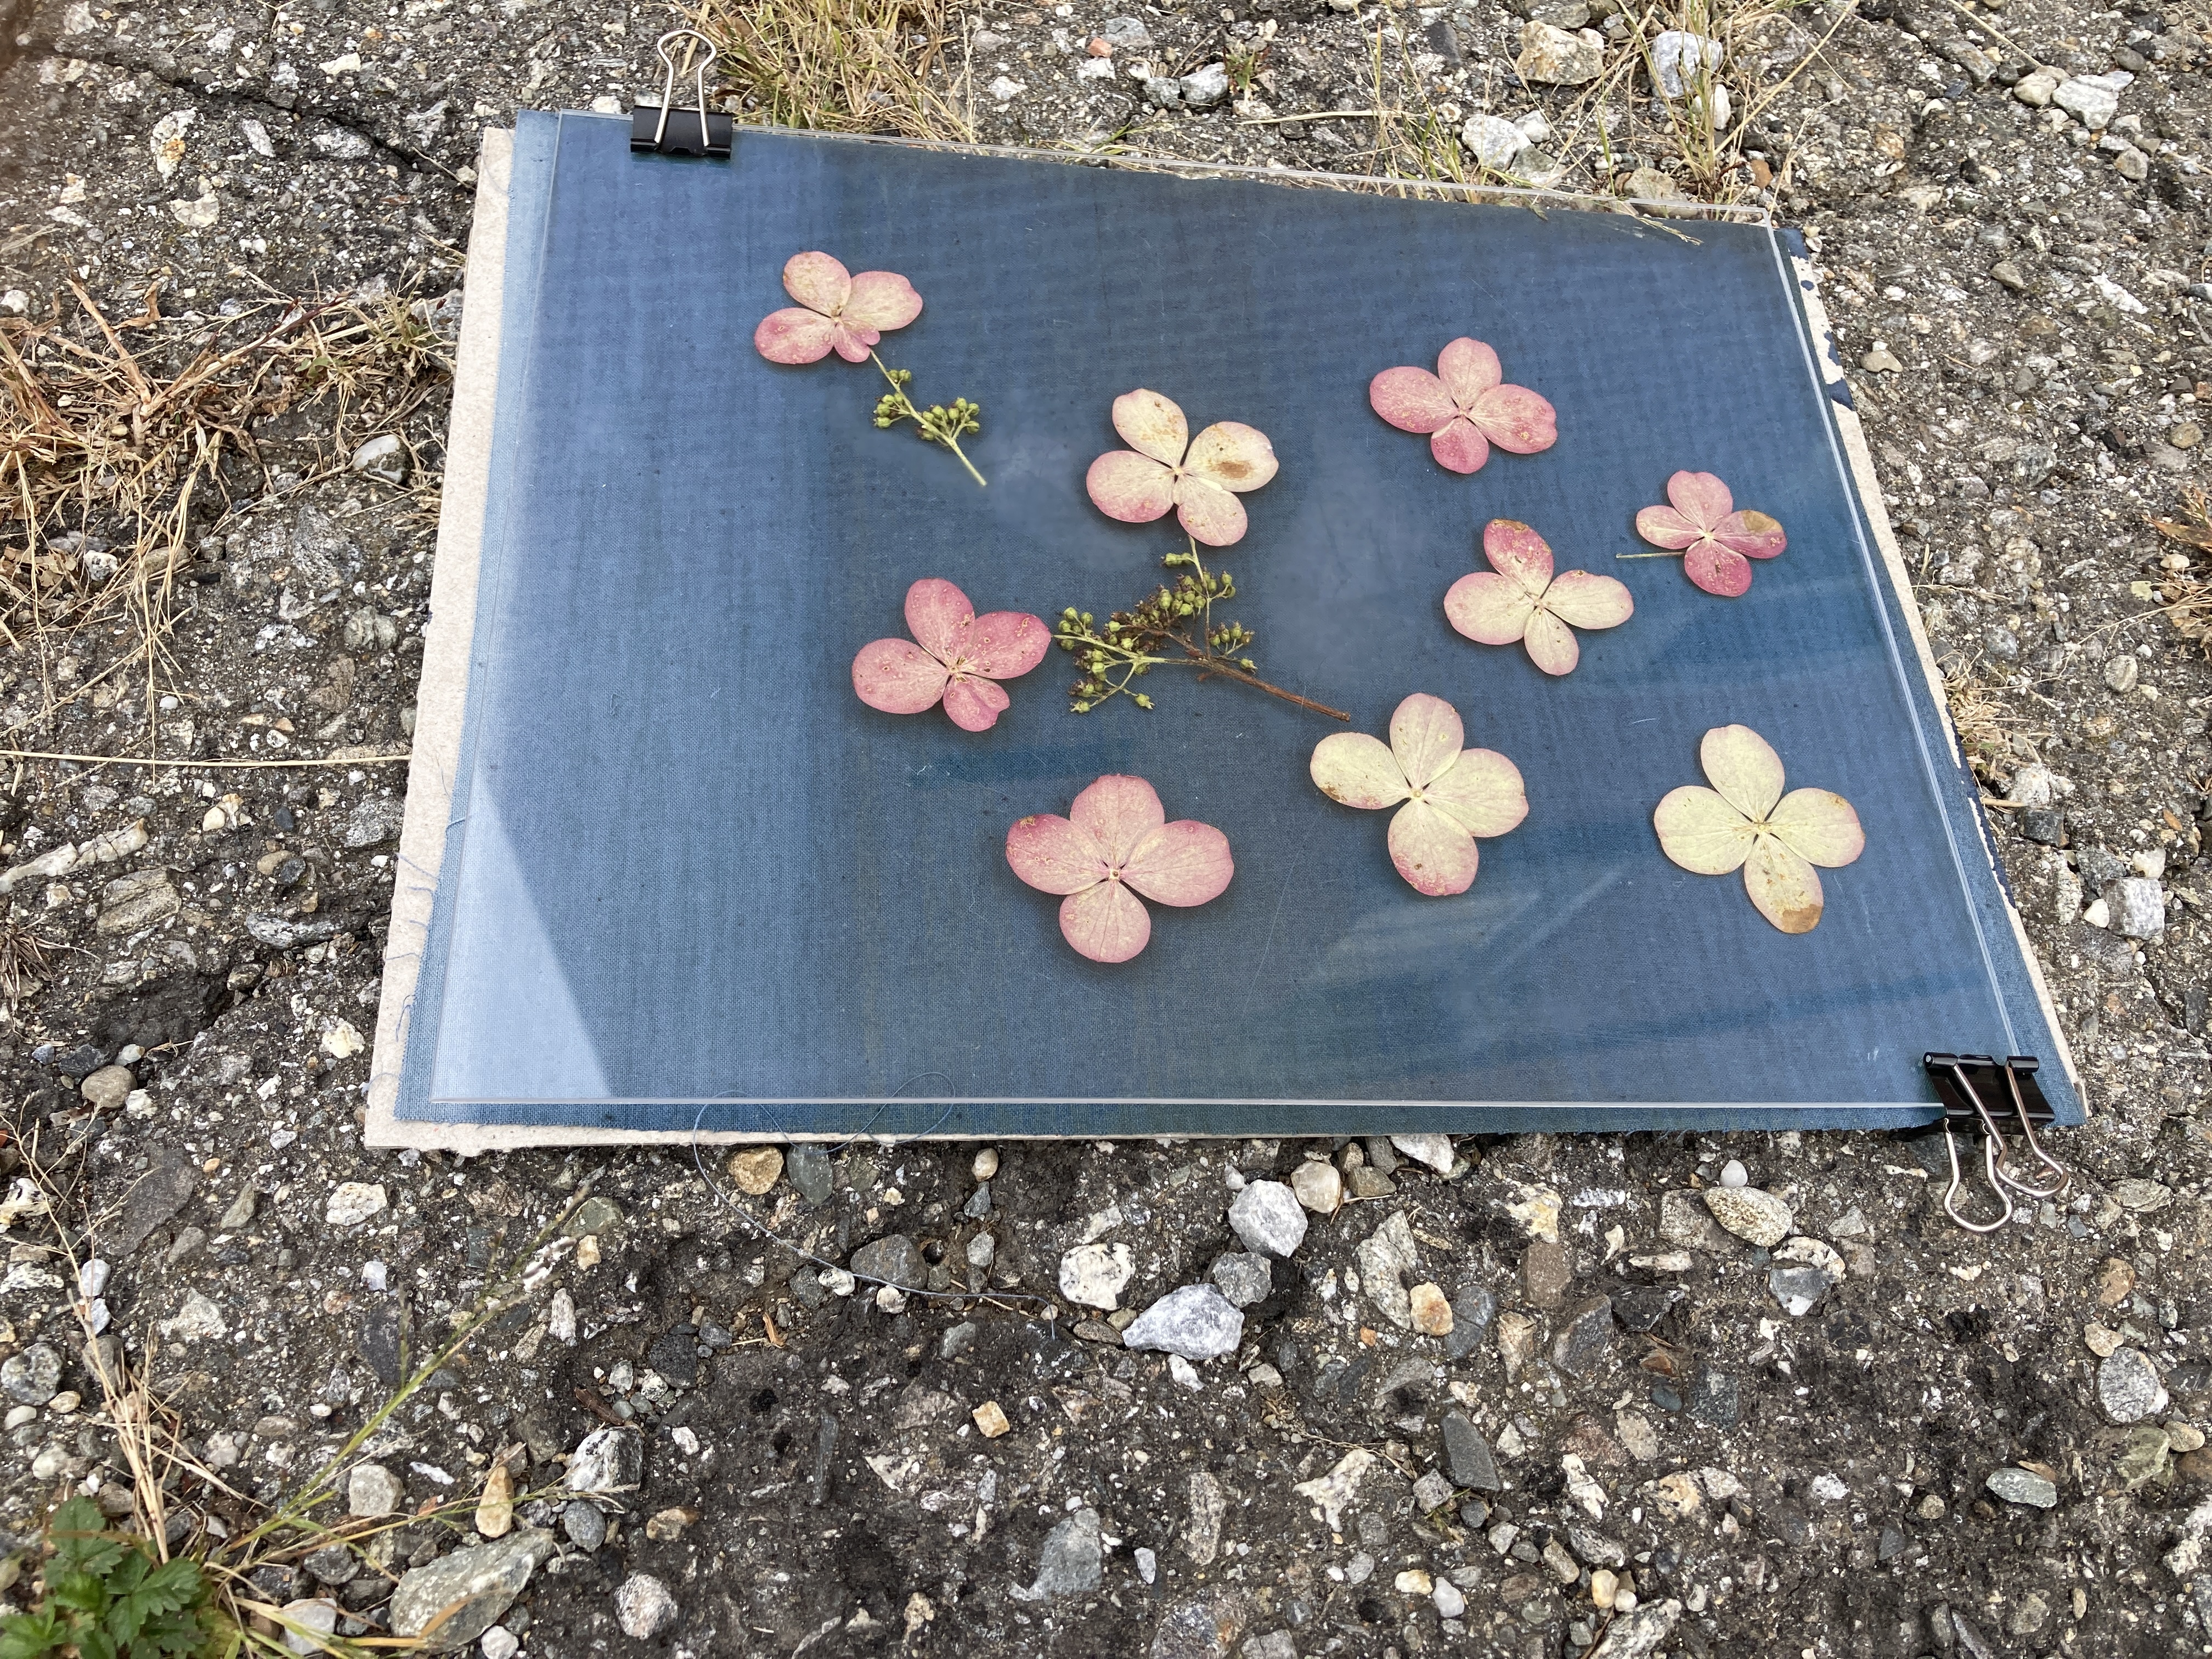
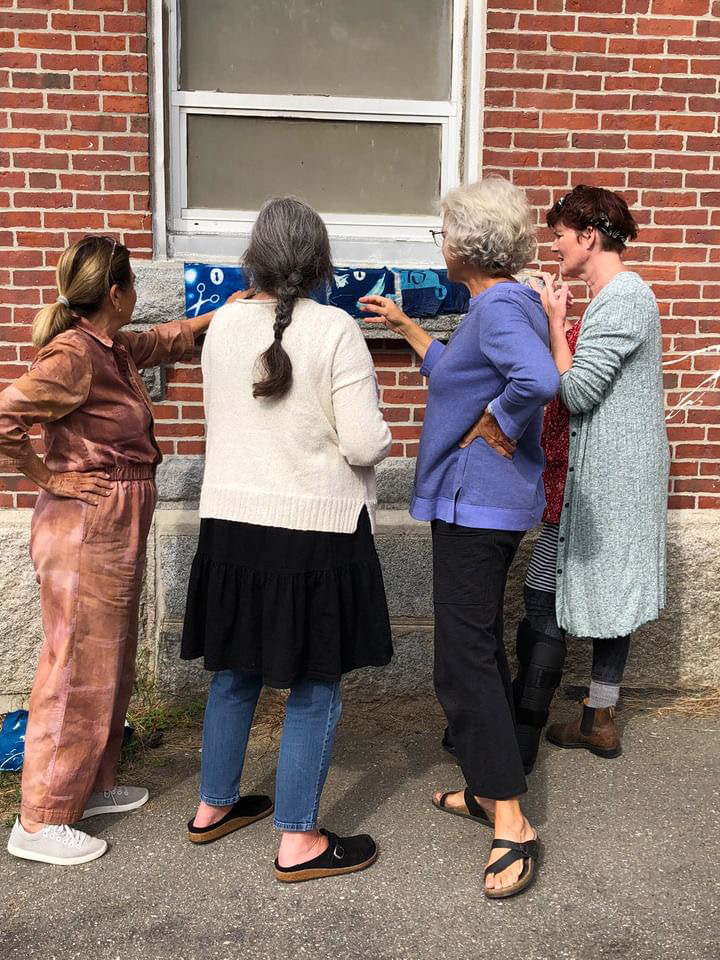
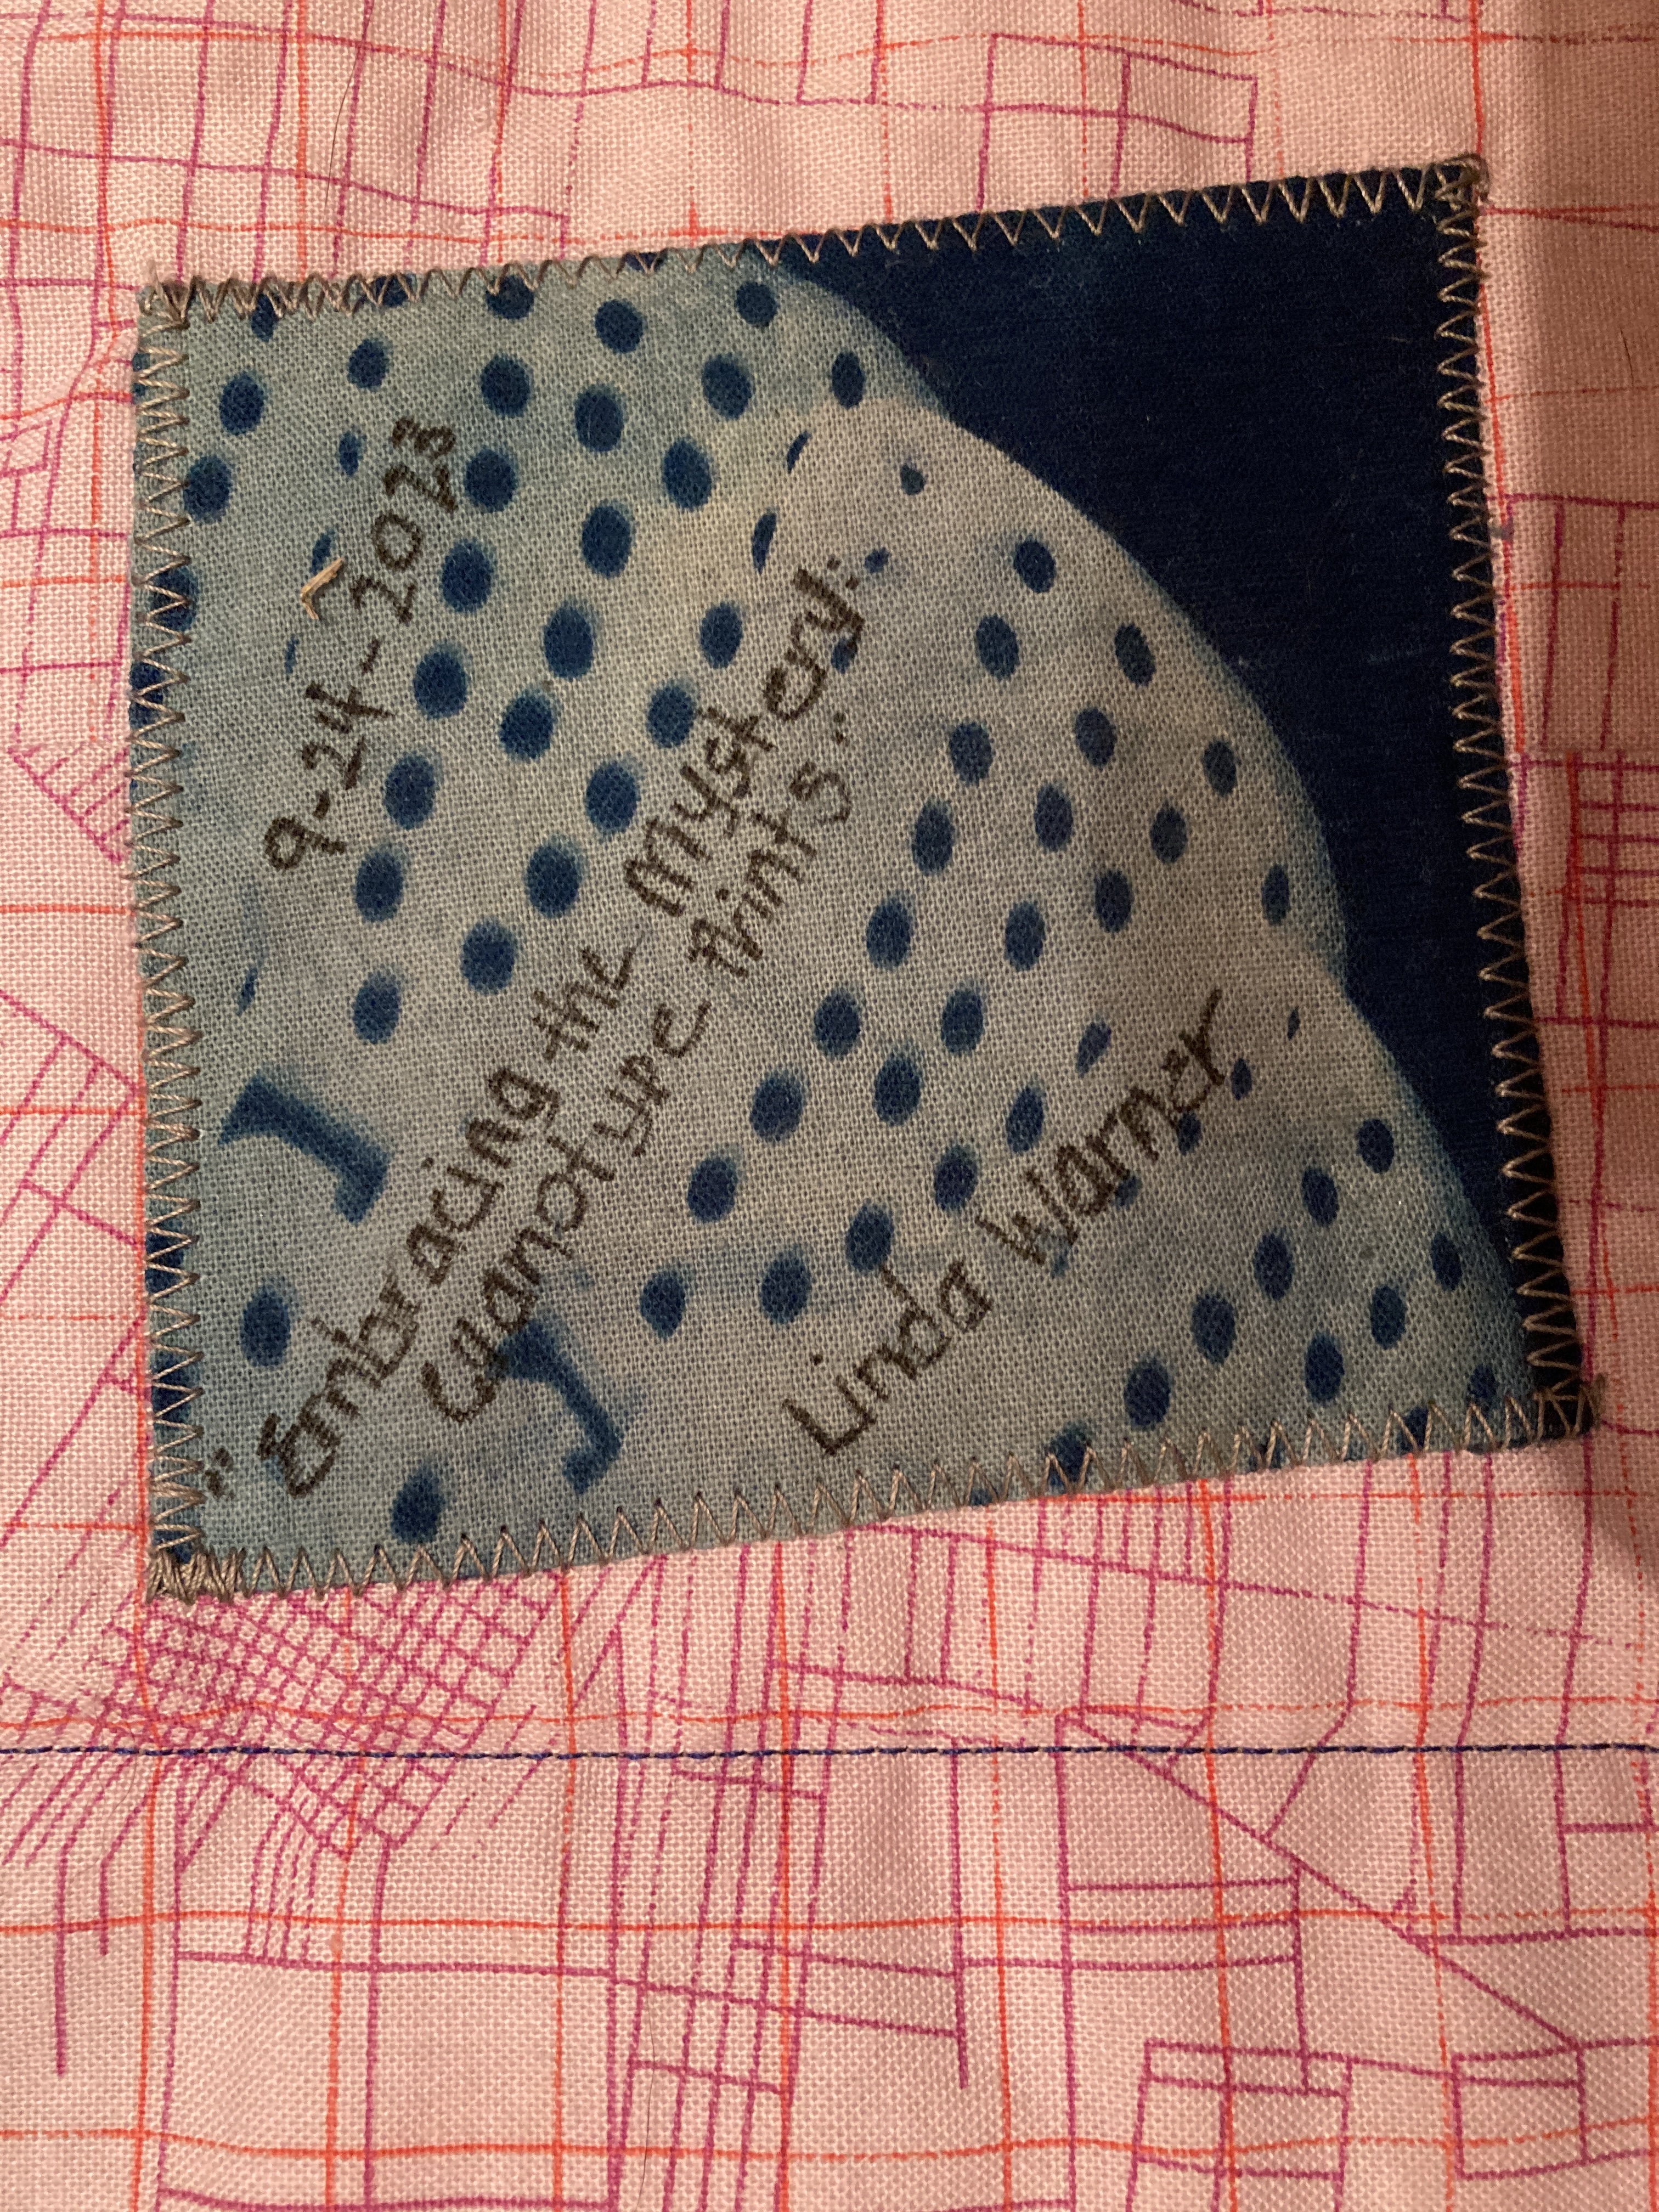
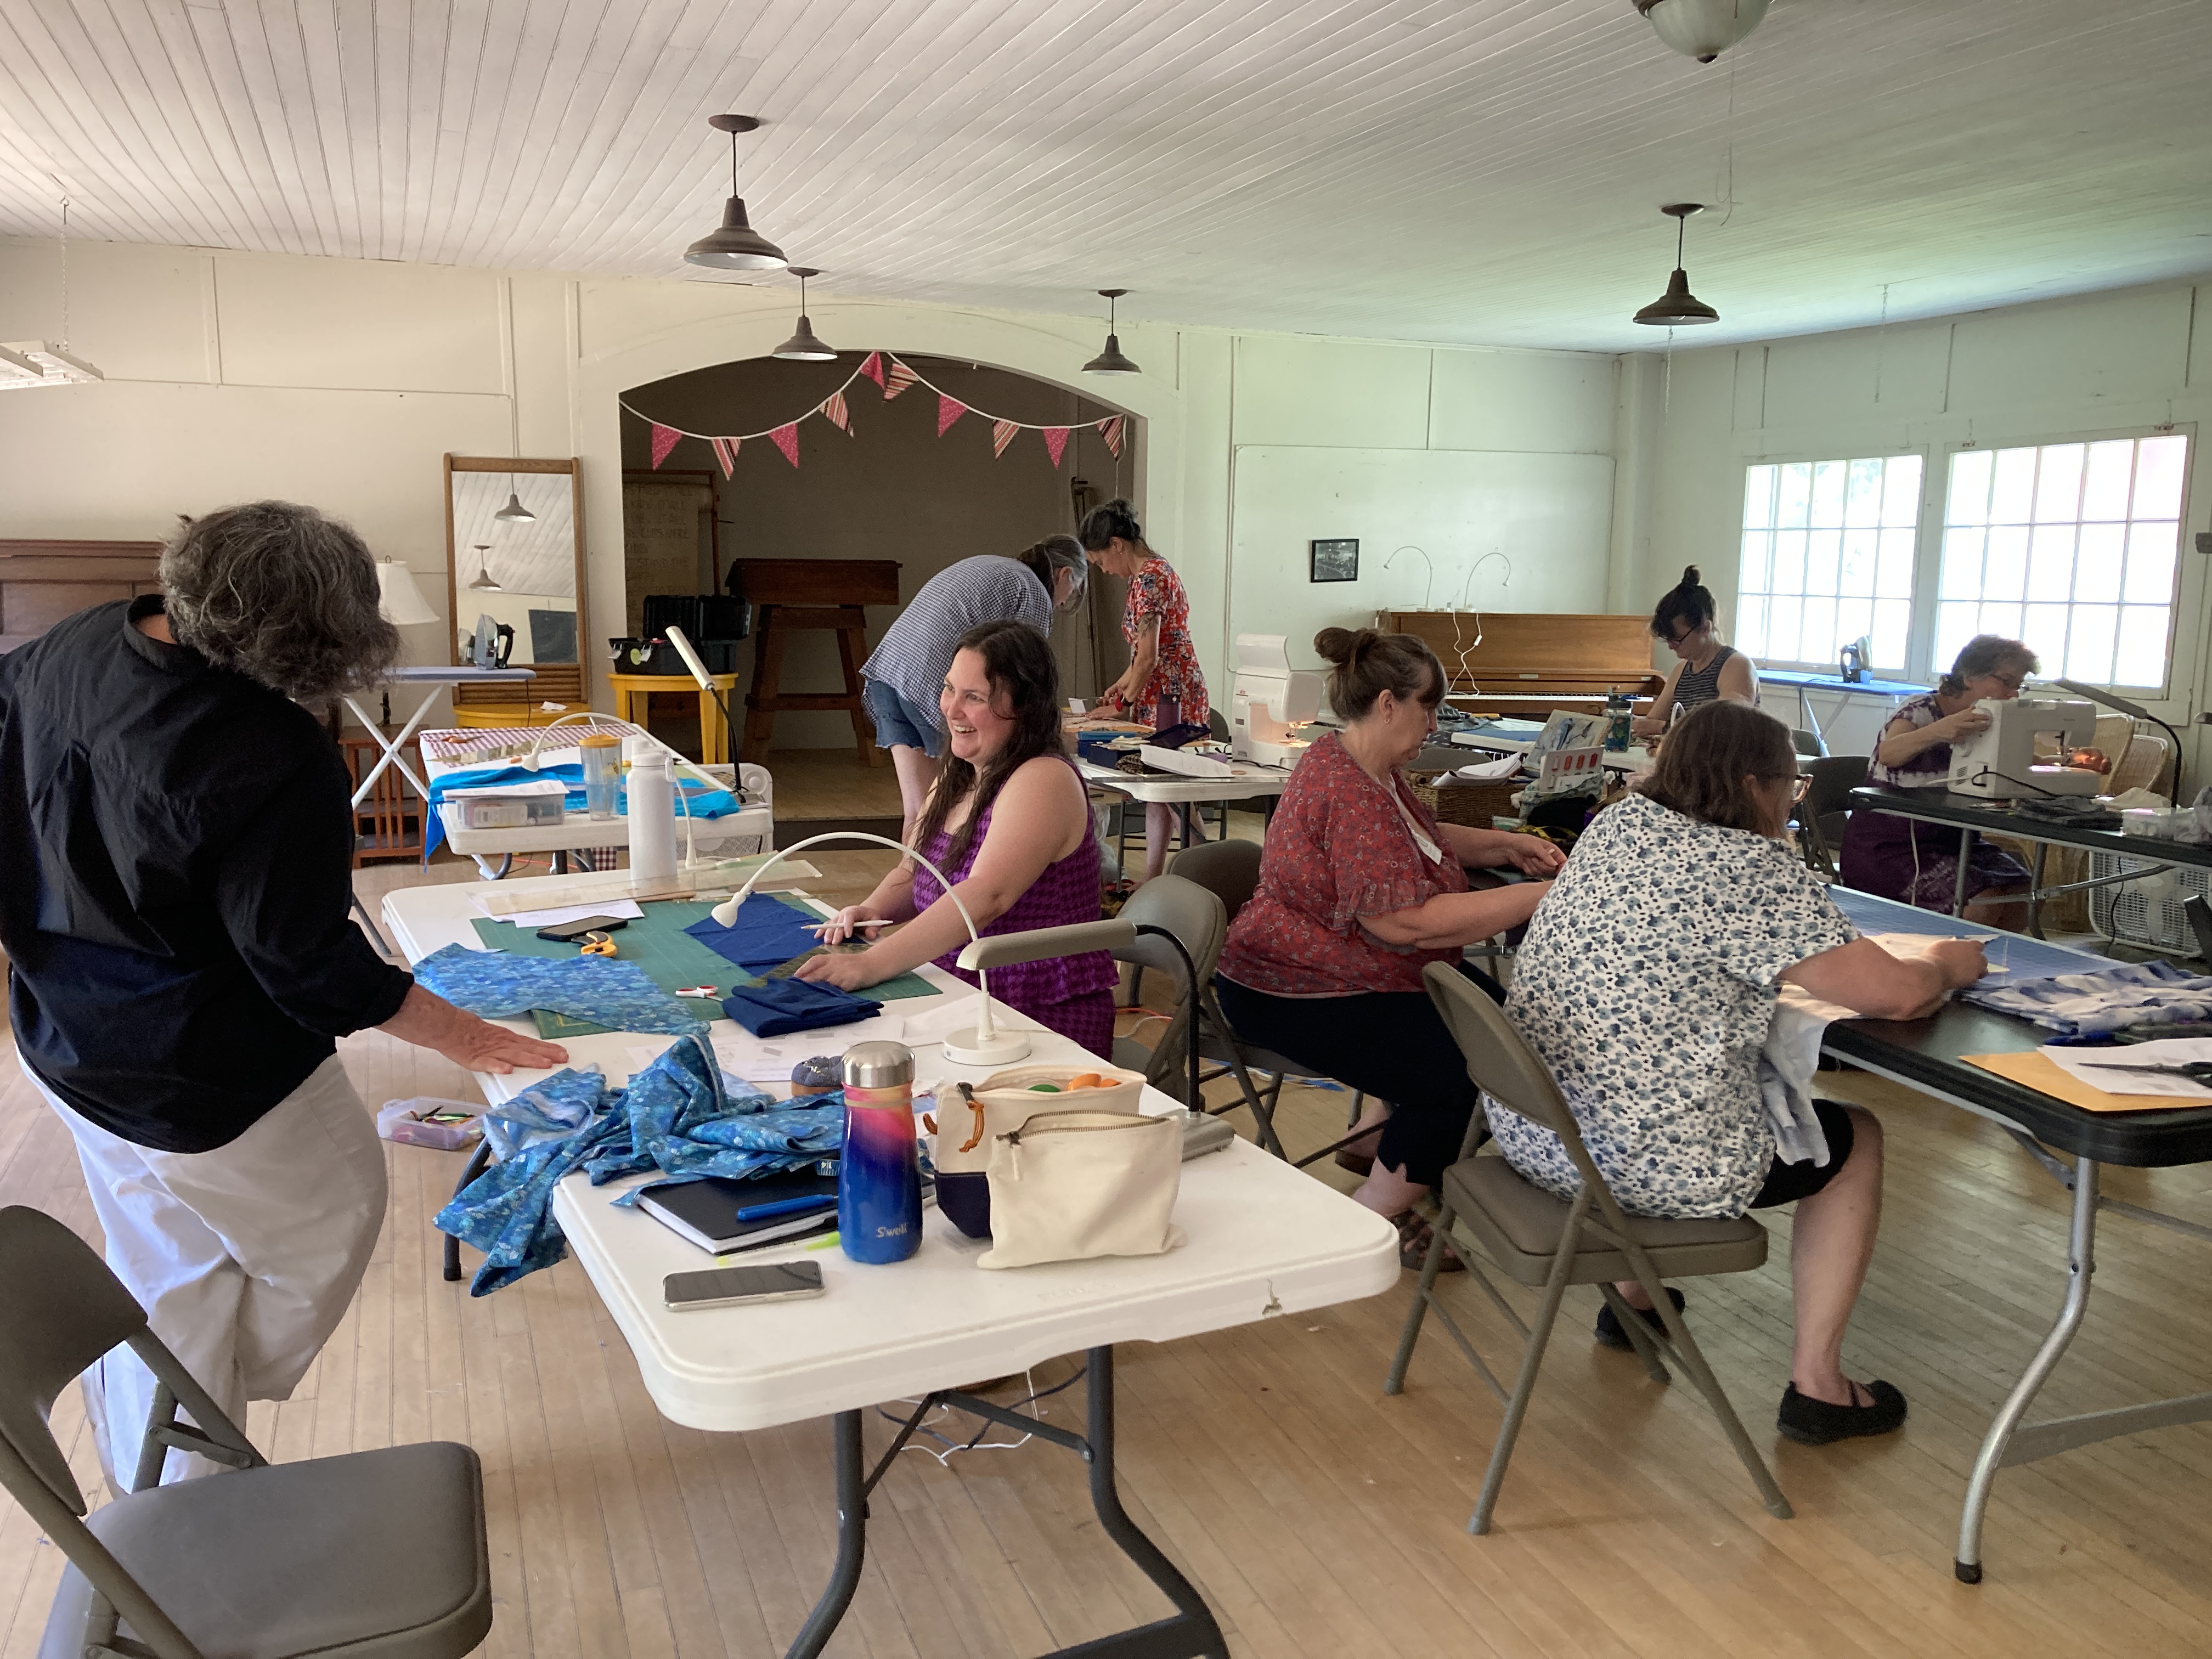
On Sunday I drove over to Rockland for a workshop with Katherine Ferrier at her Lincoln Street Center Studio at the suggestion of my friend Lori. The workshop was entitled Embracing the Mystery: Quilt Making and Cyanotype Prints. Cyanotypes are a photographic printing process that uses exposure to light to create its distinctive deep dark blue color.
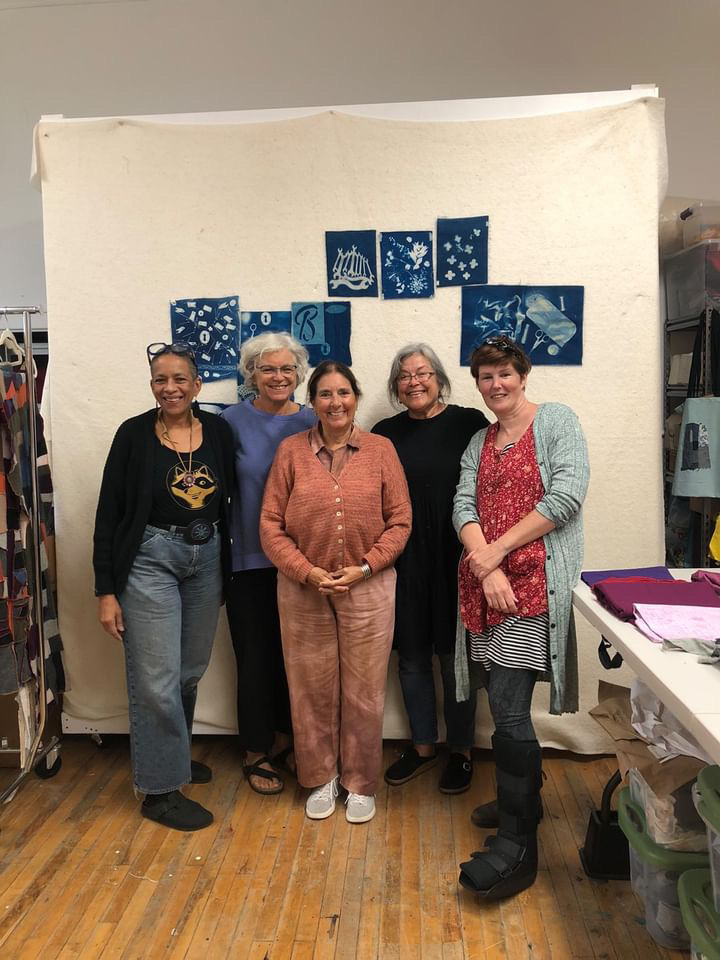
Our task was to design the prints, some just because and some with a prompt, perhaps telling a story and being willing to embrace whatever happened. It was a cloudy but bright day and that alone could make our results different than on a bright sunny day. We enjoyed the print making and getting to know each other so much. This was a remarkable group of creative maker women. I was inspired by their talents and I’ve already purchased some cyanotype fabric. If it arrives quickly, I plan to take it to a friend’s lavender farm this weekend to make some lavender prints!
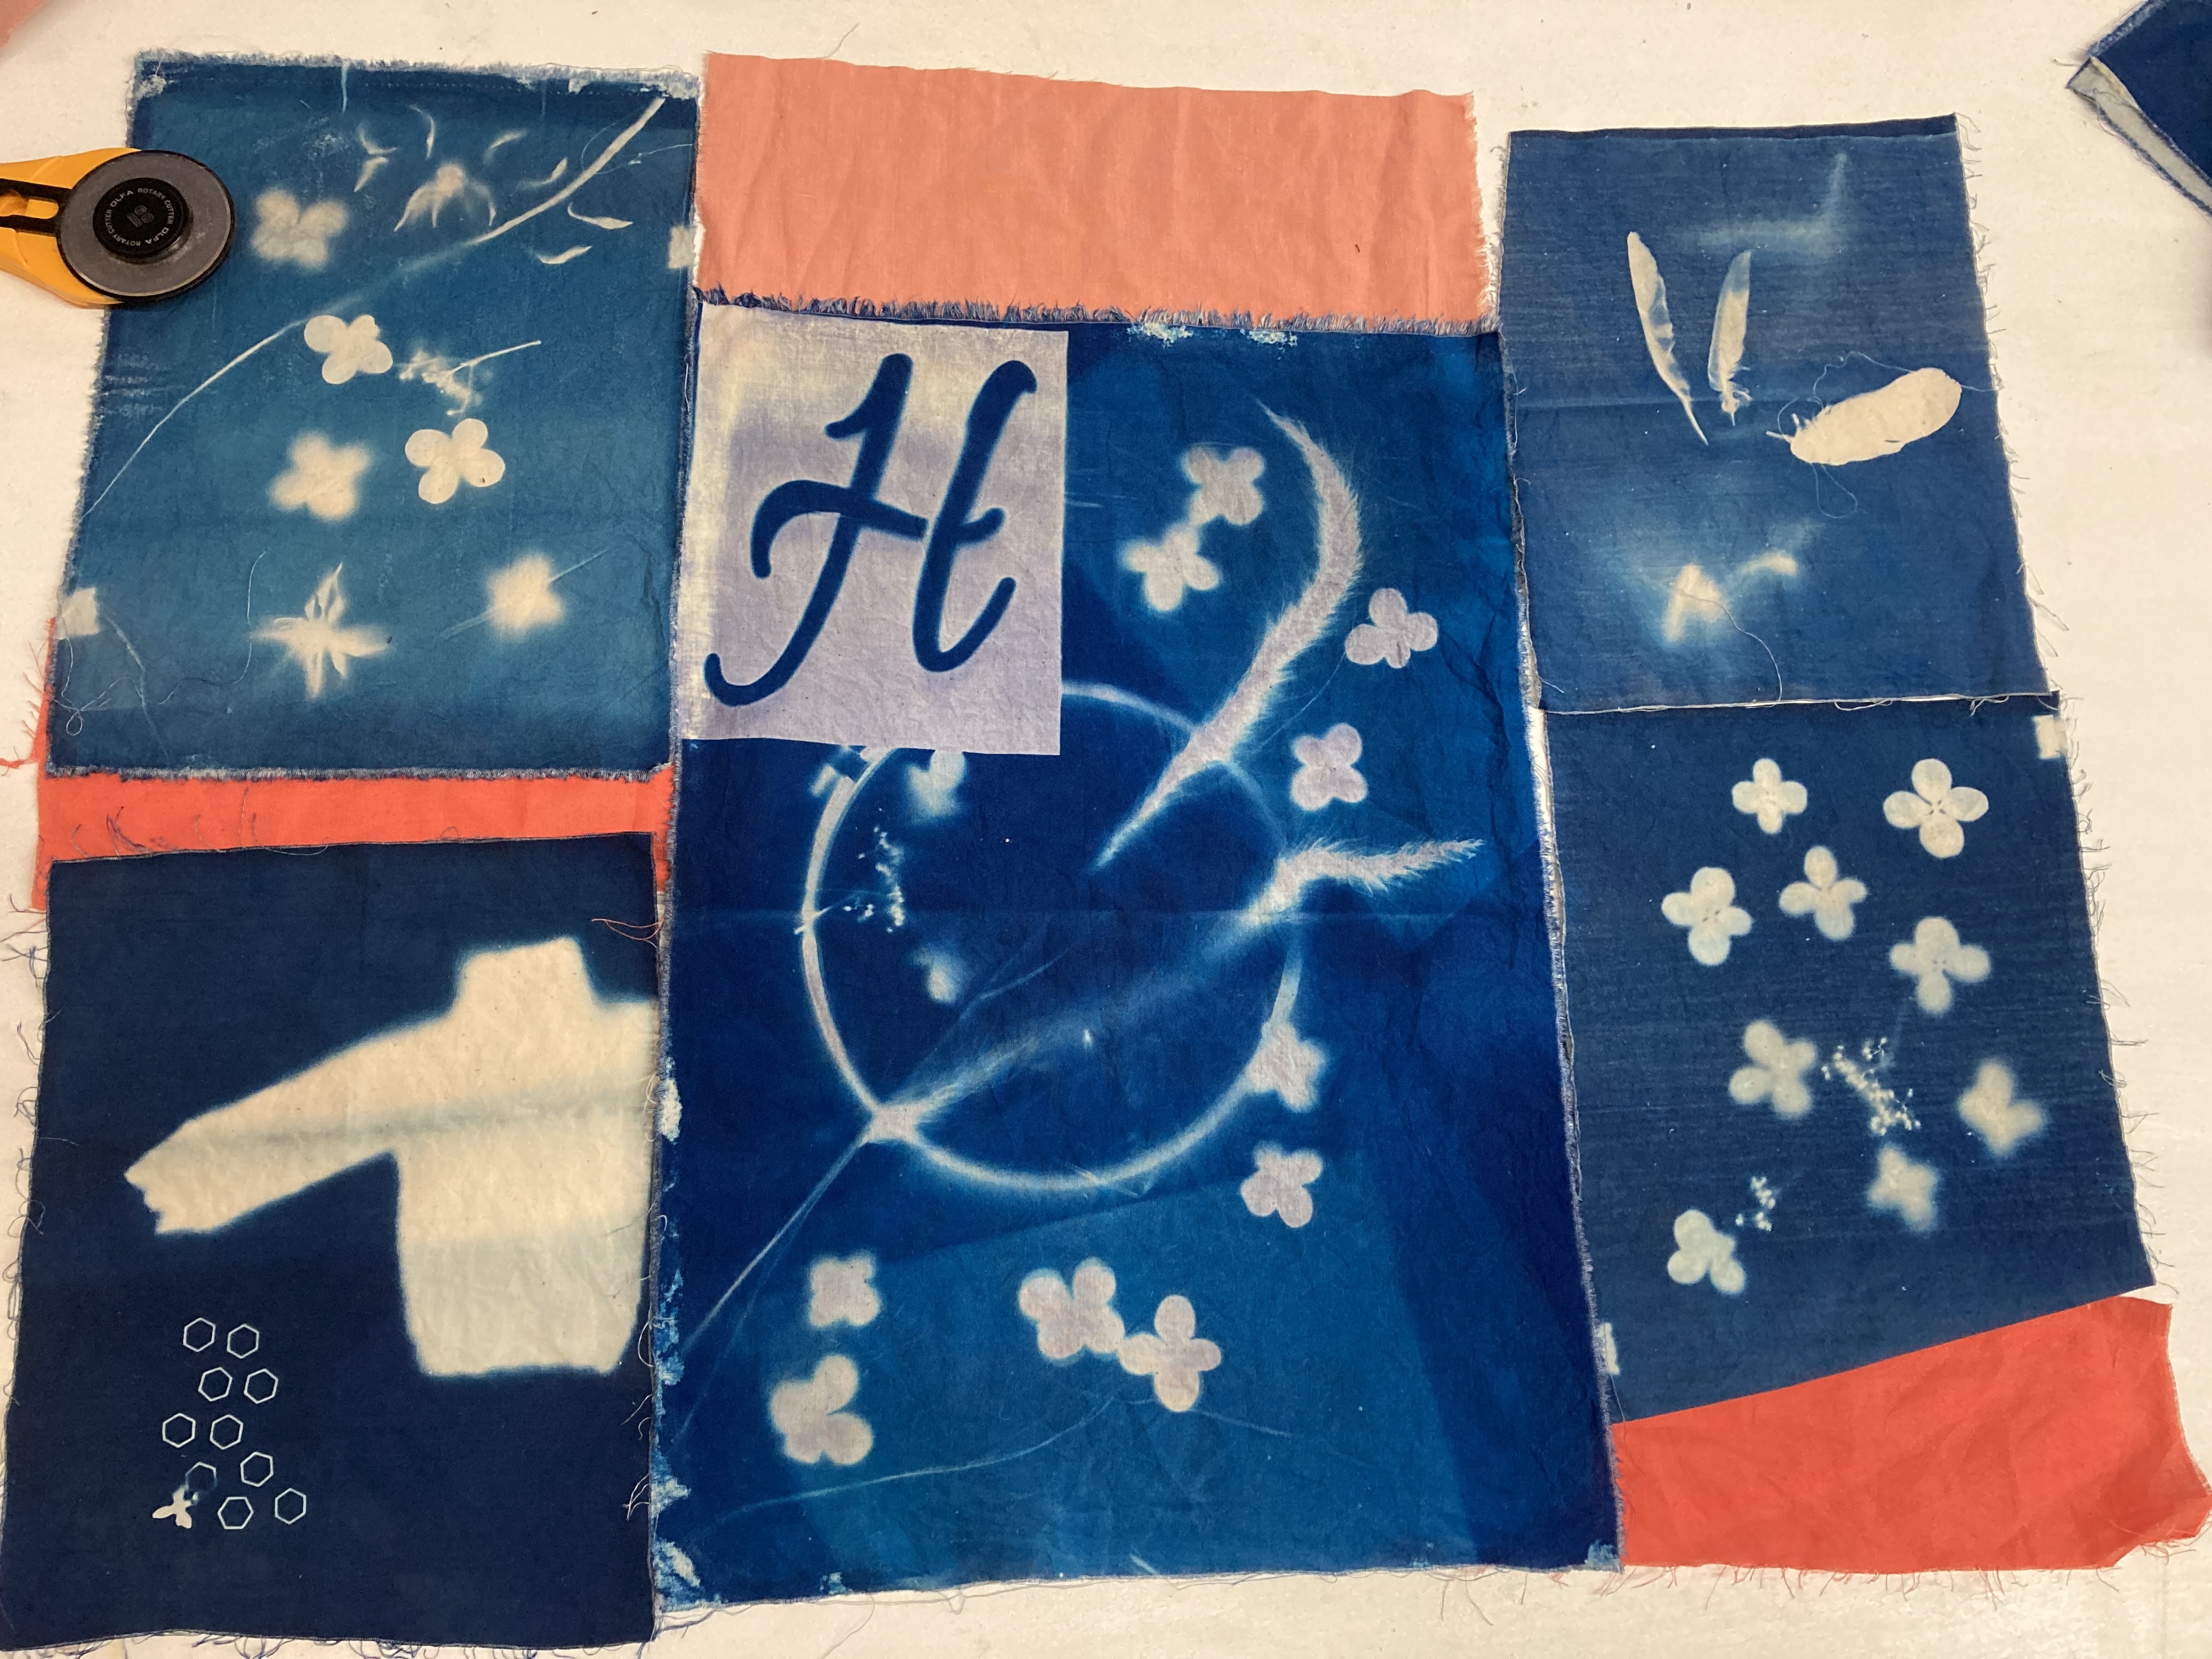
In the afternoon, we designed out quilts with our prints and some lovely scrap fabrics available from Katherine’s studio. I had originally thought I’d like to use just the cyanotype prints but with a little bit of guidance from Katherine and the beautiful orangey linen scraps, the final plan for my quilt top was made. And I love it!
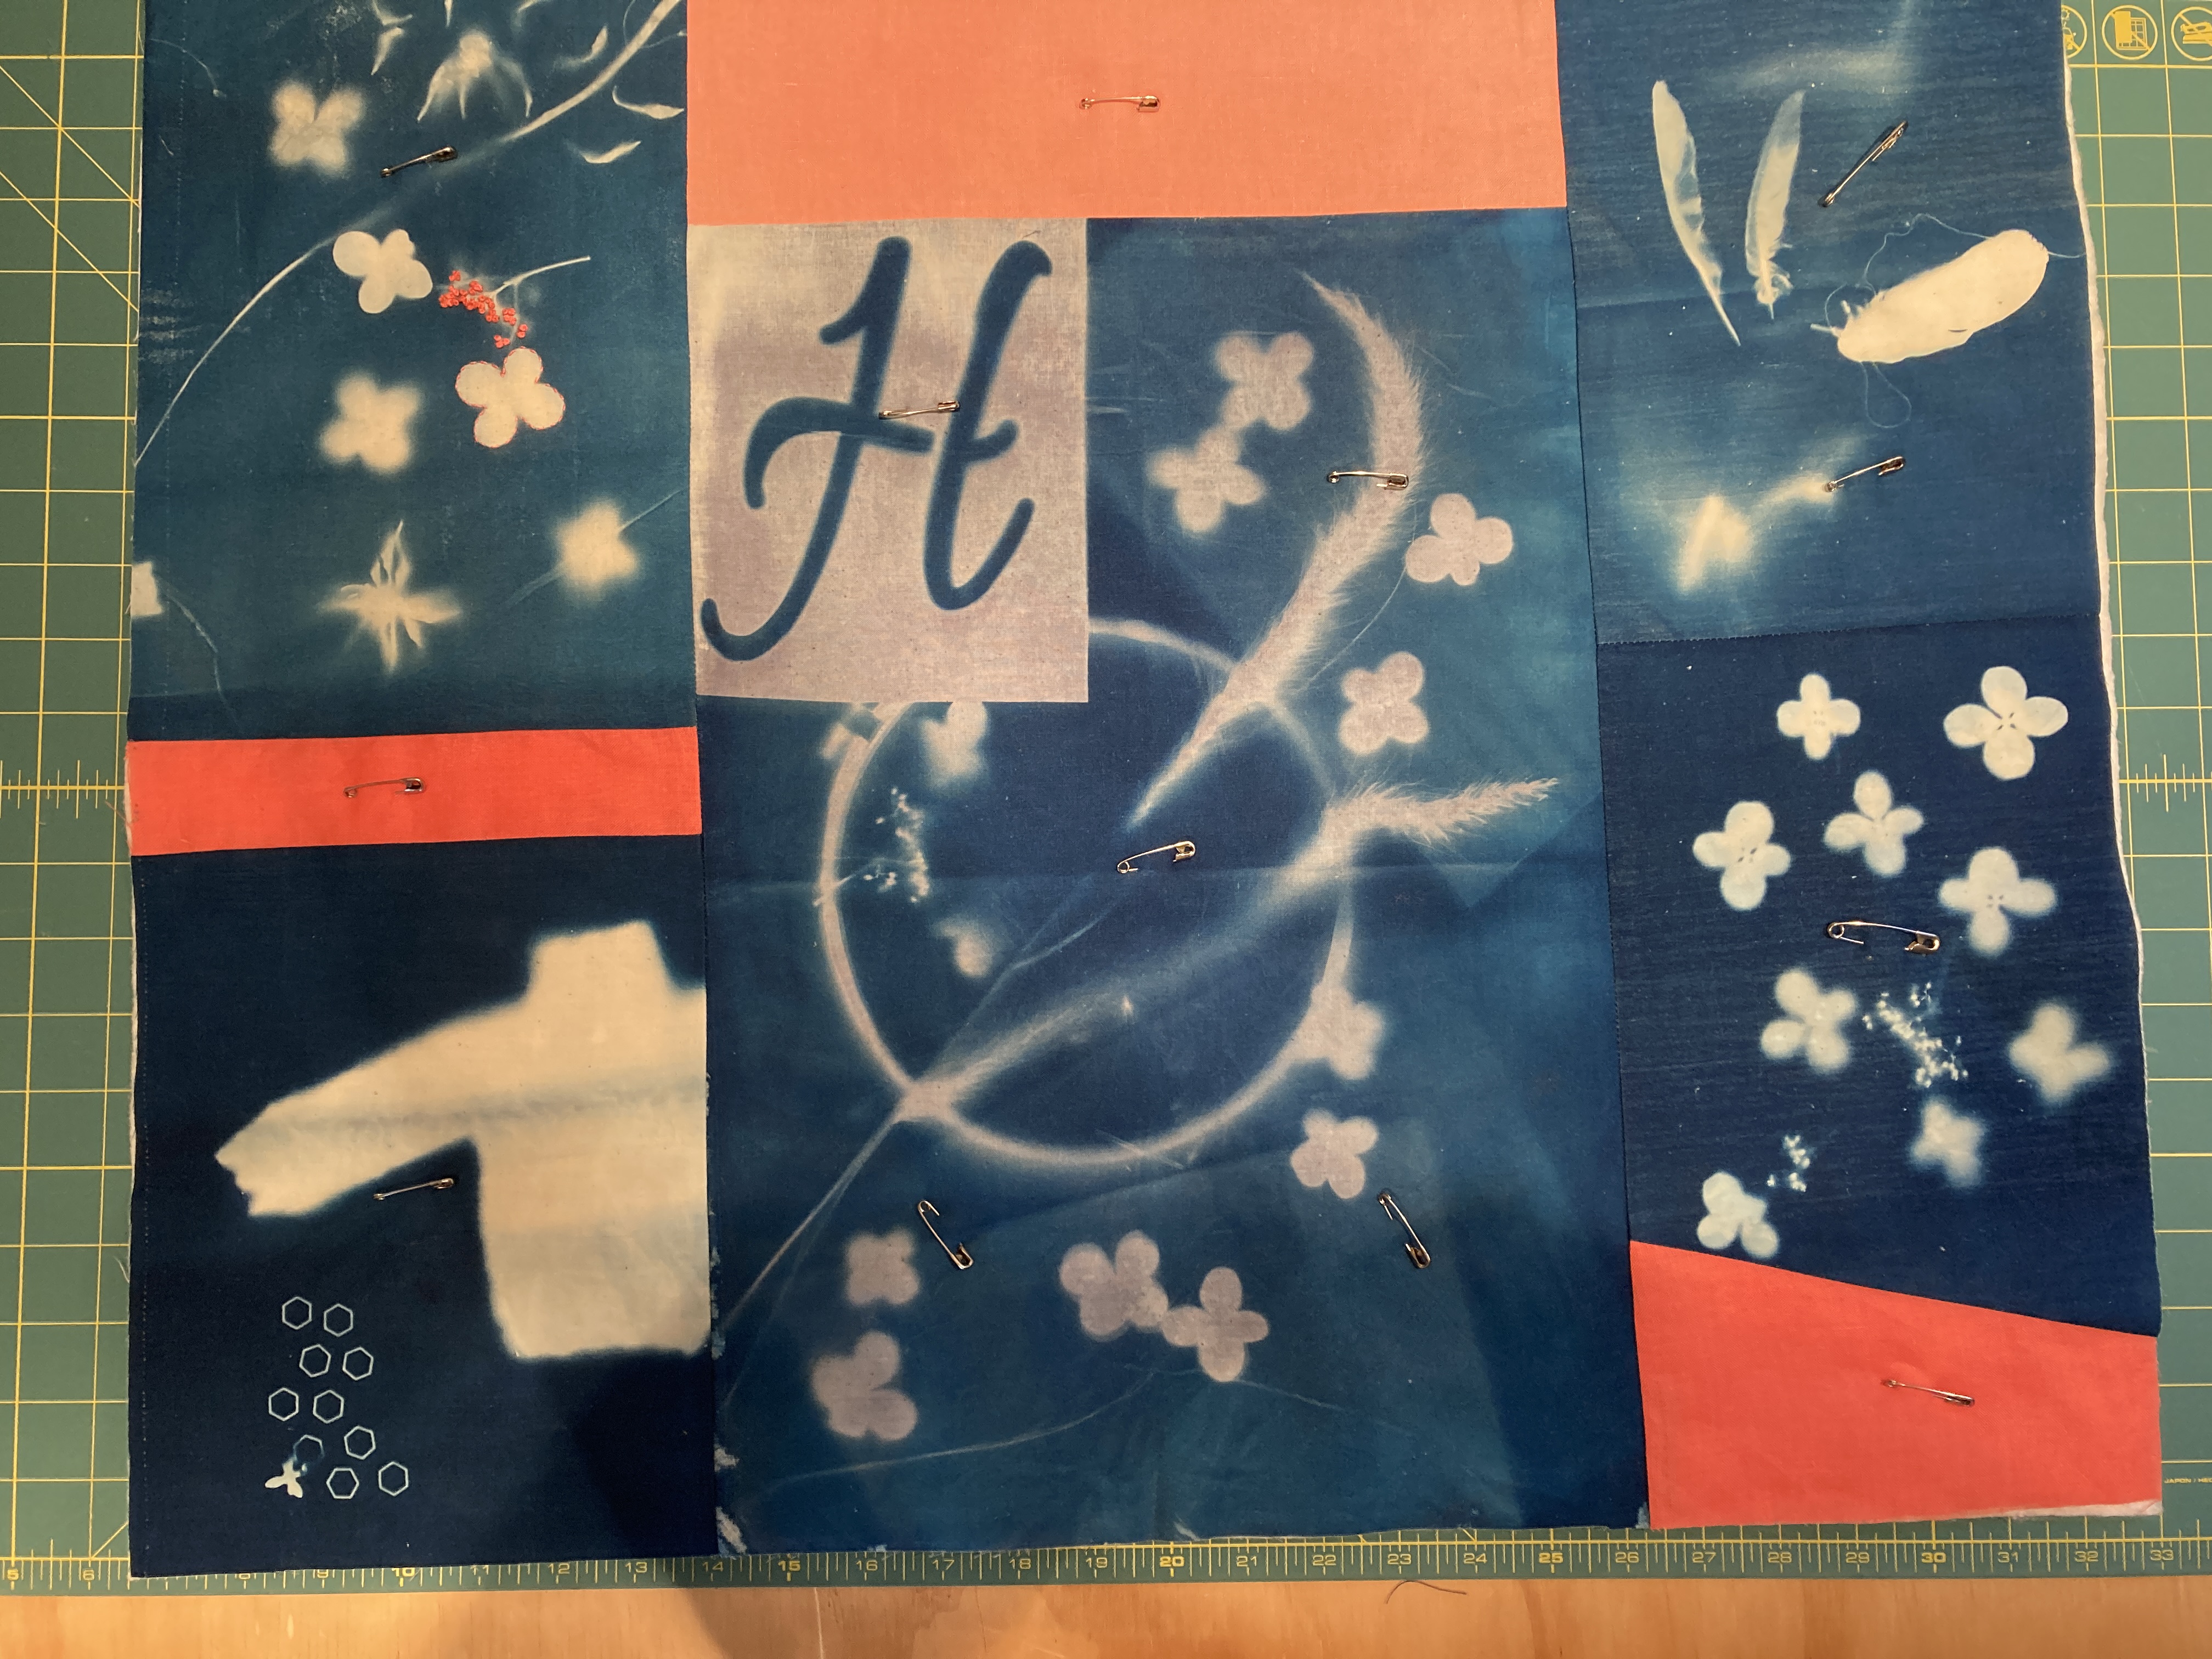
It’s a long ride home so I took my photos of the quilt top and my fabric, batting, and backing fabric home with me with the promise that I would finish it and with three new friends. For the last couple of days I put the quilt together. I finished sewing together my quilt top on Monday. I made a few rookie mistakes because I’m new to patchwork sewing where not all of the pieces are square or the same size. Nor are they a planned pattern. I guess this is my first original patchwork design.
I am so happy with it. I added a little embroidery detail on the top left corner piece; an outlined blossom and a cluster of french knots in colors similar to the pops of linen. Orange/peach/salmon seem to be a new theme for me.
The center piece, the largest piece we printed was a prompt to make a wish. My wish was about my home, my husband and my family. Inside the circle is a joined pair of blossoms representing my husband and me and outside are pairs of blossoms that represent our five children and their significant others. I will be stitching a little pink blossom to represent our granddaughter. The grasses crossing it all represent flexibility, softness, growth and strength and above it all the “h” is the wish for health, happiness and home. Home to me is not only a place that you live, it’s a sense of belonging, peace, comfort and safety. This piece has a lot of meaning in it for me. I really do love it.
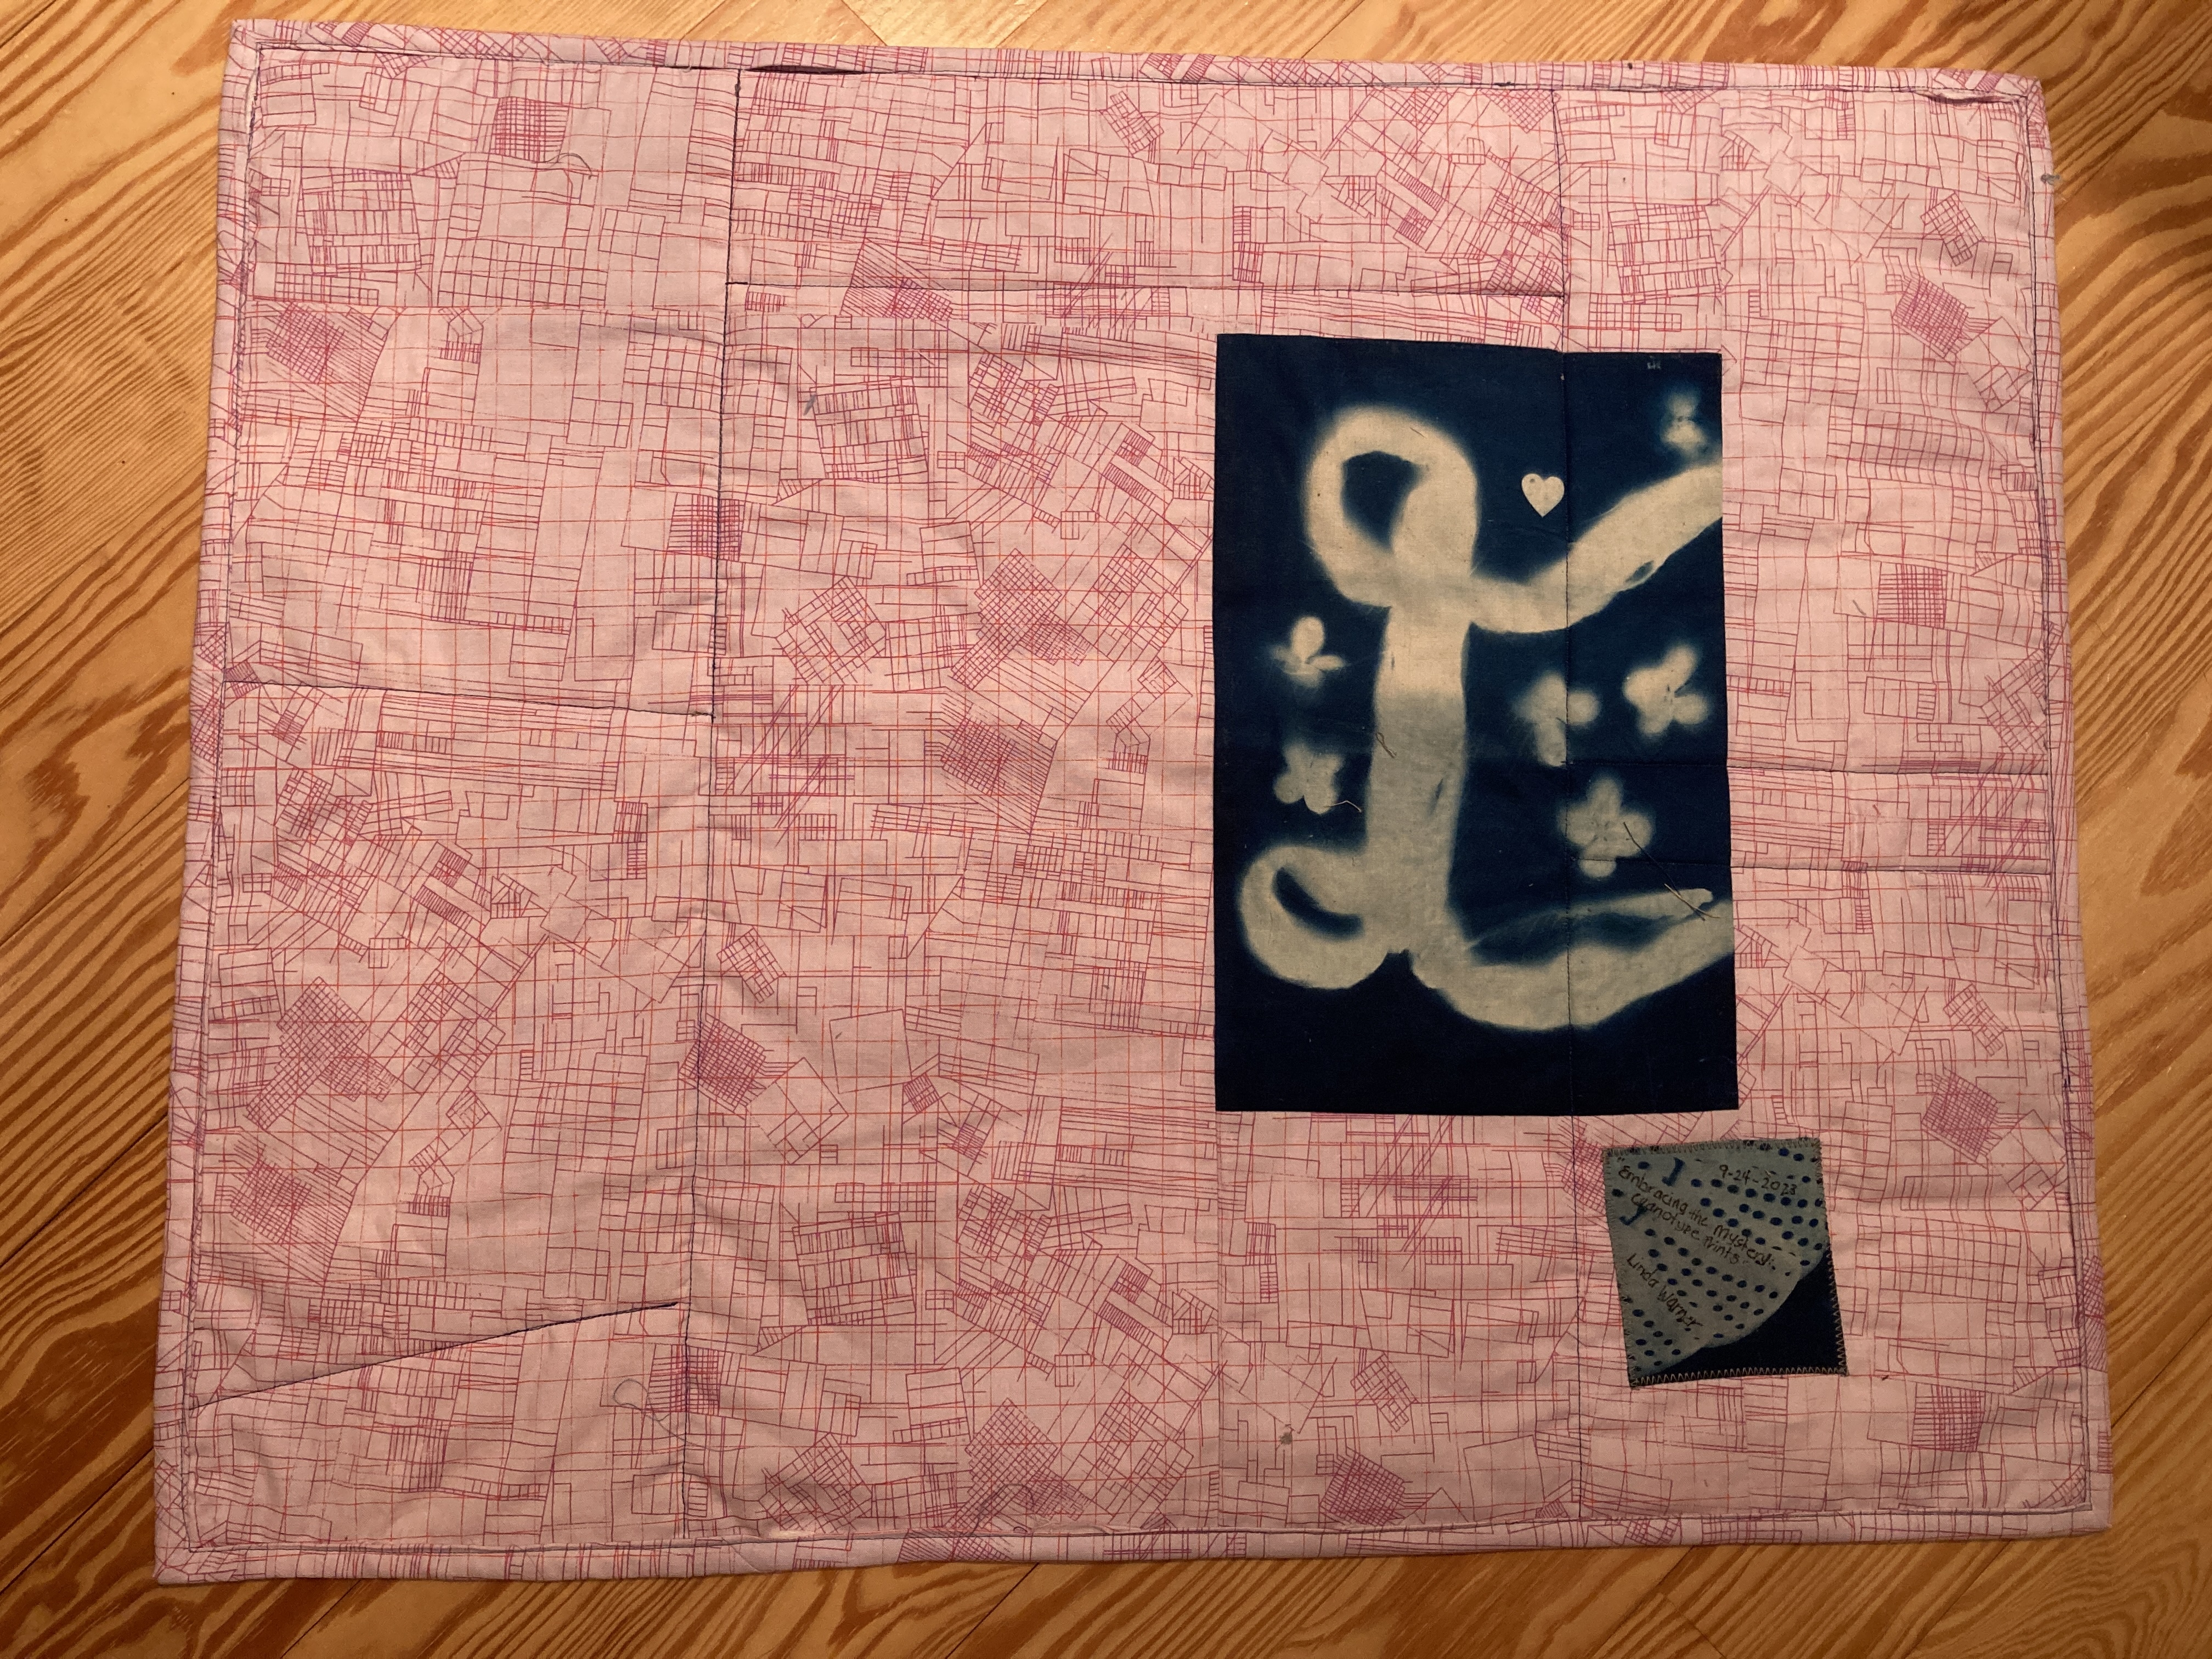
I then pieced the backing fabric. I wanted to incorporate the last print that I made, my self portrait, in the quilt somehow so that I didn’t bring home another piece of fabric without a plan. I also used my little square that Katherine gifted to each of us as my quilt label on the back. I pondered whether I wanted to stitch in the ditch for the quilting or tie the quilt, decided on the former and then decided to put a proper binding on it. I cut 2.5 inch strips for the binding, sewed them together and stitched them onto the quilt. I also stitched in the ditch around the outside of the quilt to attach the second part of the binding.
It’s not perfect. There are a couple of places on the back where I didn’t catch the binding and where the backing wiggled out of the binding but I am pretty sure I’m comfortable leaving it this way because the whole exercise was embracing the mystery, right? I’m consciously embracing the imperfections as part of the process of learning and meeting myself where I am.
Here is the finished quilt on my studio floor. I only need to hang it up somewhere in our house. I’m so grateful to have a house that is a true home with a partner who encourages my creativity even though dinner isn’t always ready. I have found my home here with him.
I’m grateful to my friend Lori who inspired me to take the opportunity and this workshop. I’m also grateful to my new friends who inspired me along the way. I am grateful to Katherine for making the opportunity available for us all together, learn, explore and embrace the mystery!
We started our day today with coffee on the porch but it was too warm for a bathrobe. We must be heading into a few days of summer heat again. It’s all good. We have thoroughly enjoyed the cooler mornings over the past few weeks.
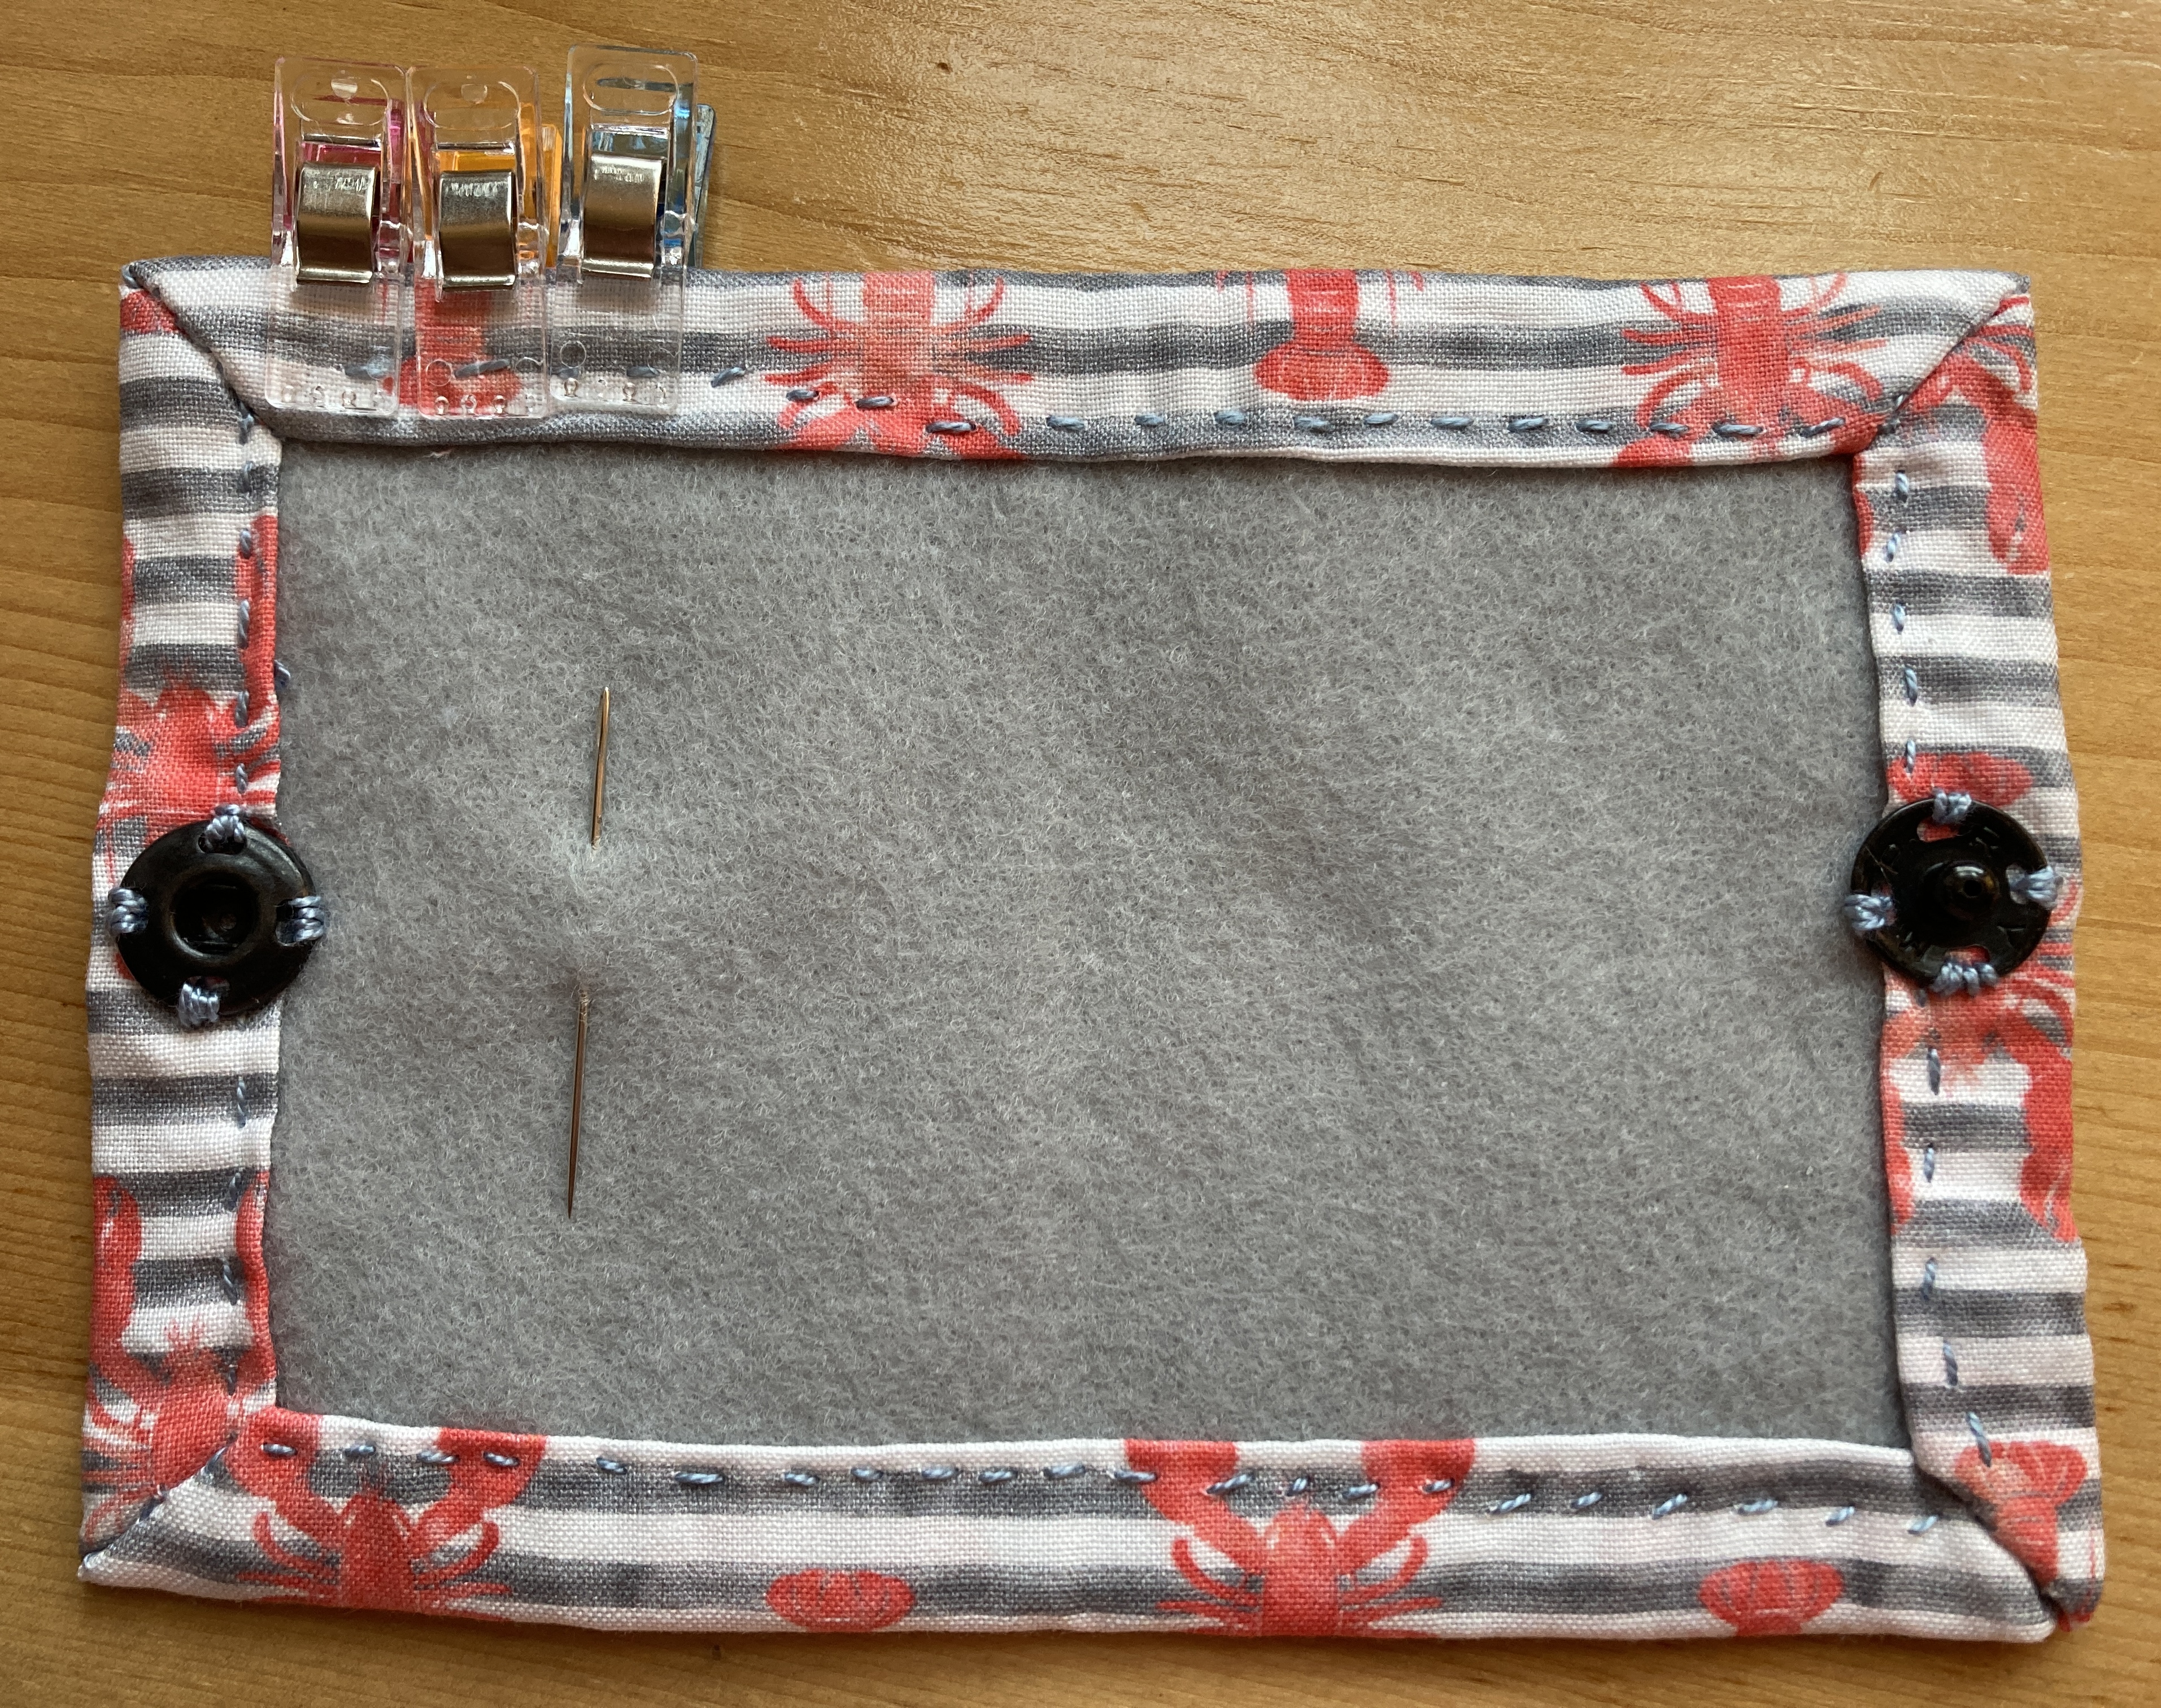
I’ve finished a few more little things and wanted to share them with you. I’ve been taking classes from Creative Bug – they had a special deal going with 60 days free to try it out – and I’ve taken a couple of Cal Patch’s classes and a couple of Heidi Parkes’ classes and they’re all sewing classes. While I was watching Heidi’s class on making a needle case, I was inspired to actually sew it myself right then. I went to my fabric stash and found two favorite fabrics – a lobster print and a hummingbird print – both from the days when I was making fabric masks for the family. I made a lot of masks. I appliquéd the little hummingbird patch onto the lobster fabric and then bought a piece of felt to sandwich-ish in the fabric to make the little needle case. I’ve learned a lot about needles, stitching, hand-work and sewing from these classes and while my FOs aren’t big, they’re mighty. They mark a stepping off point for me and a new potential passion, too.
OutsideInside Finished!
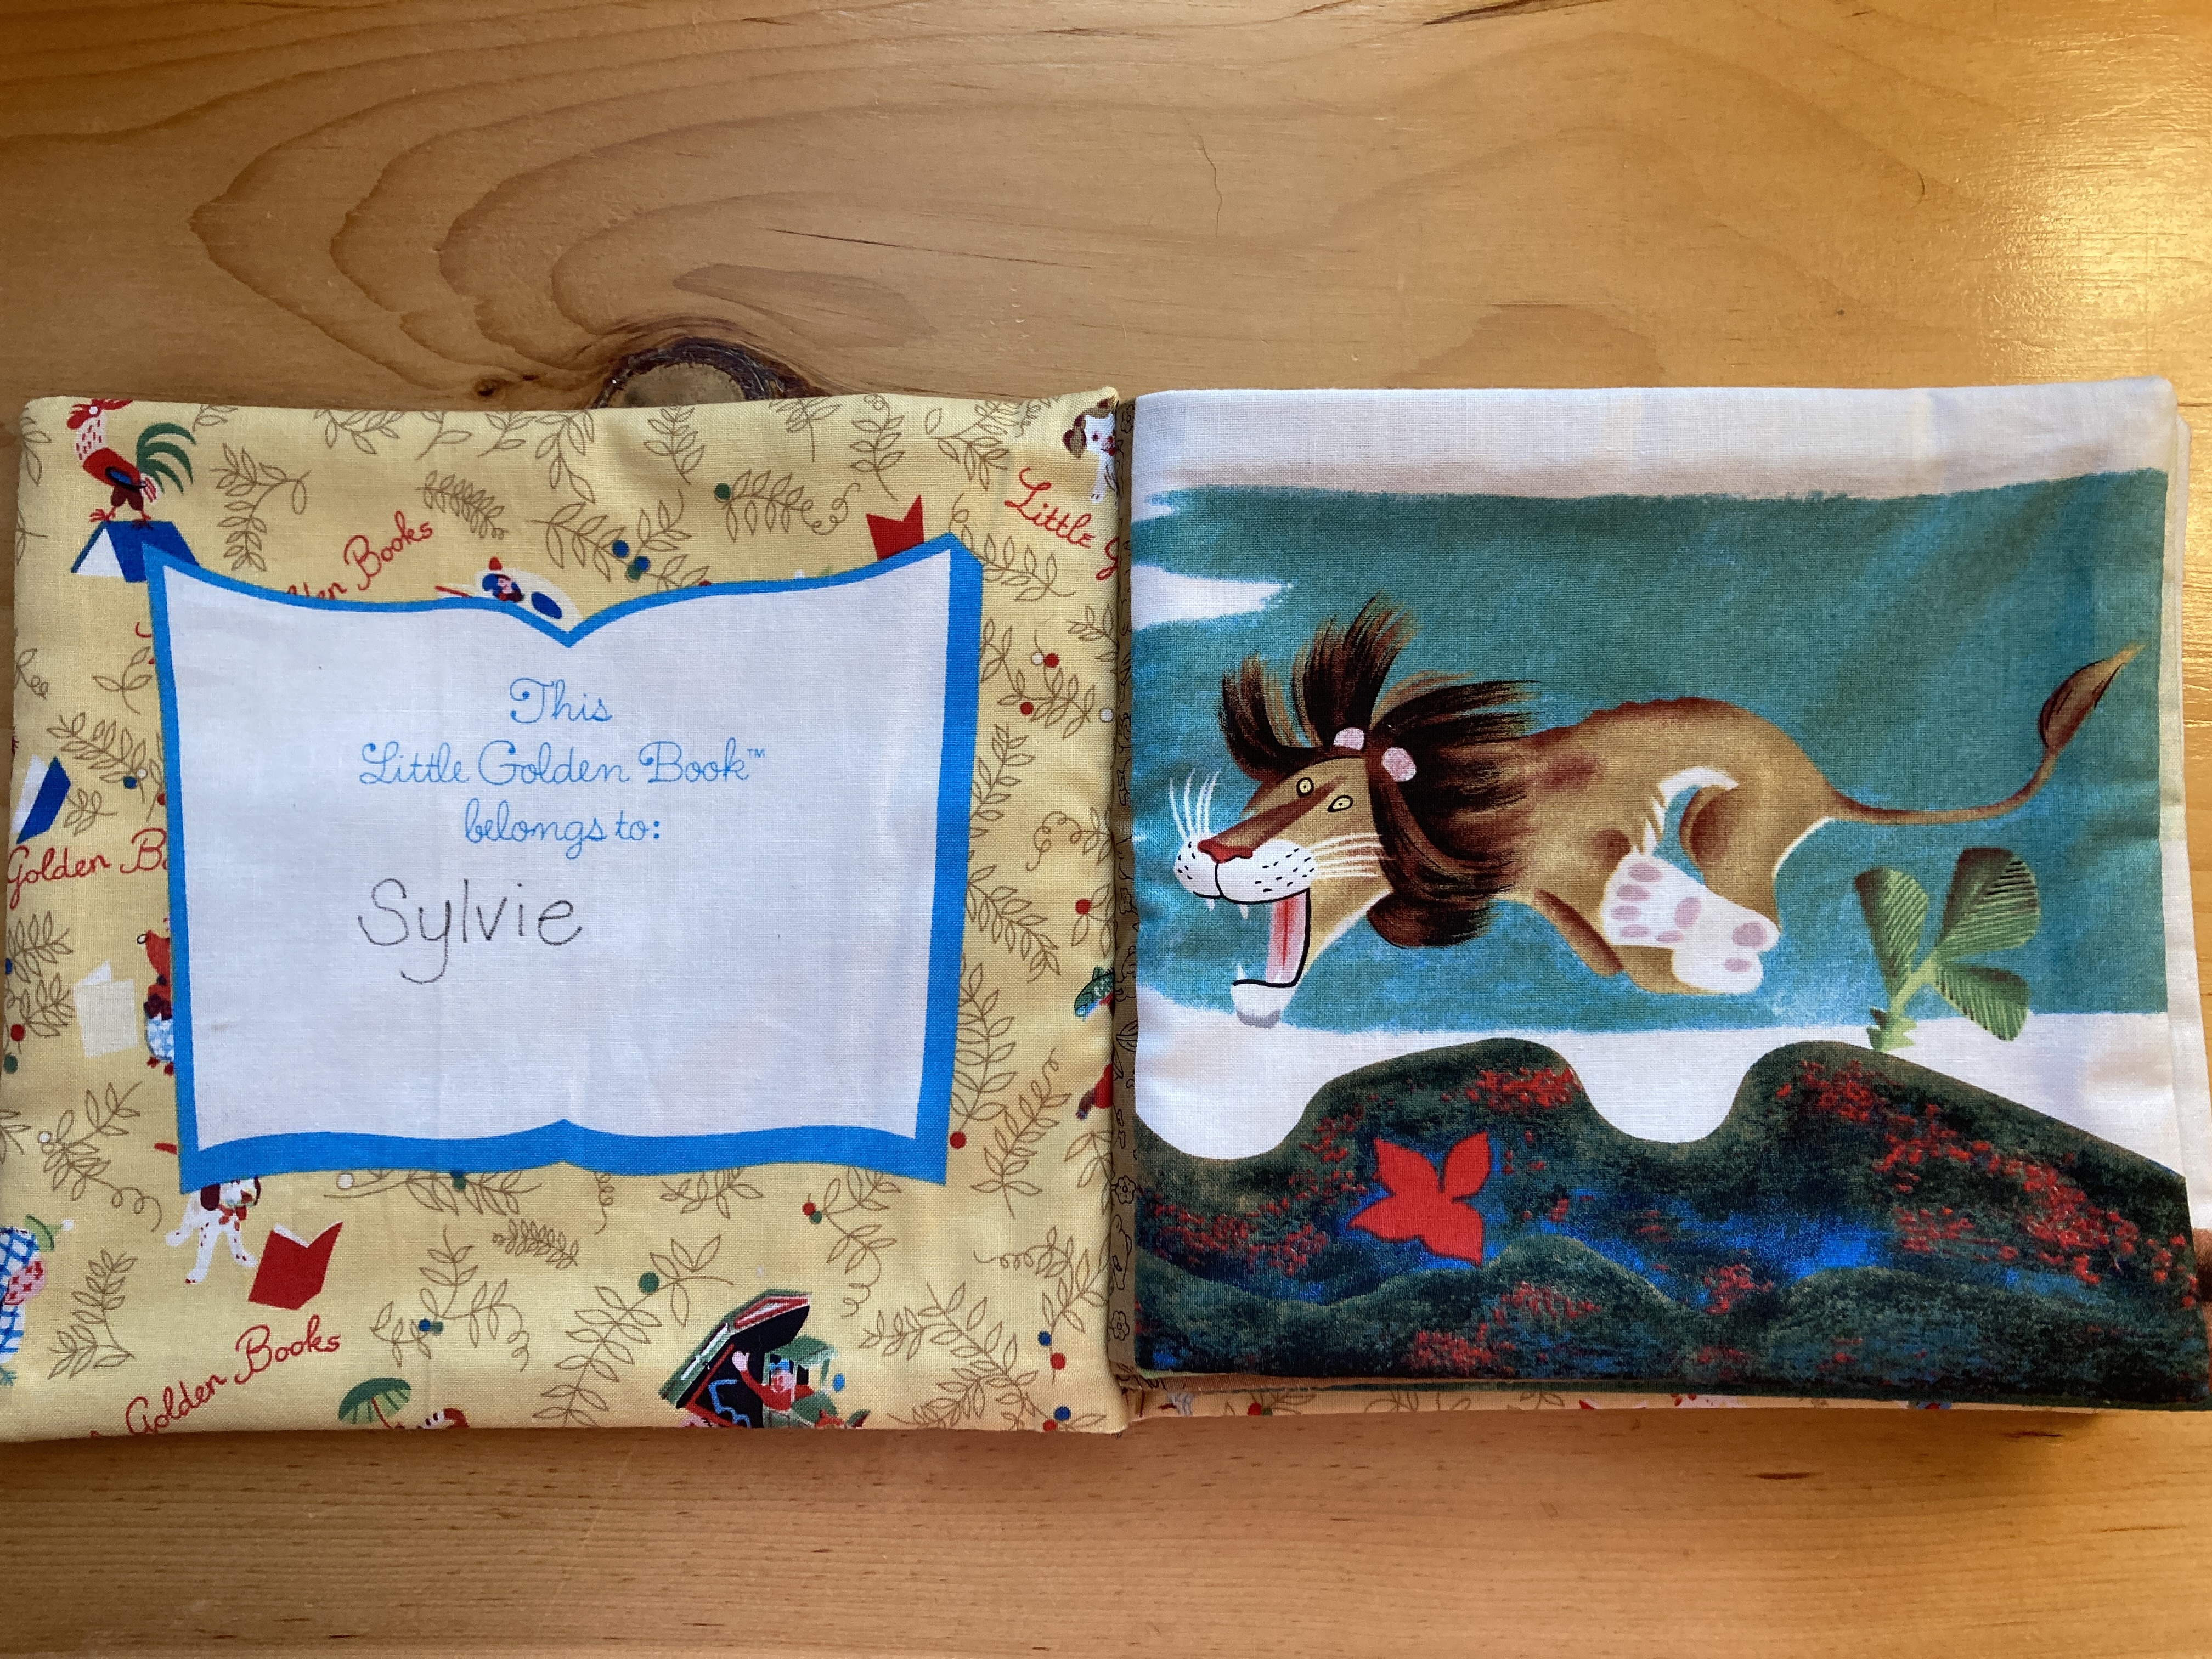
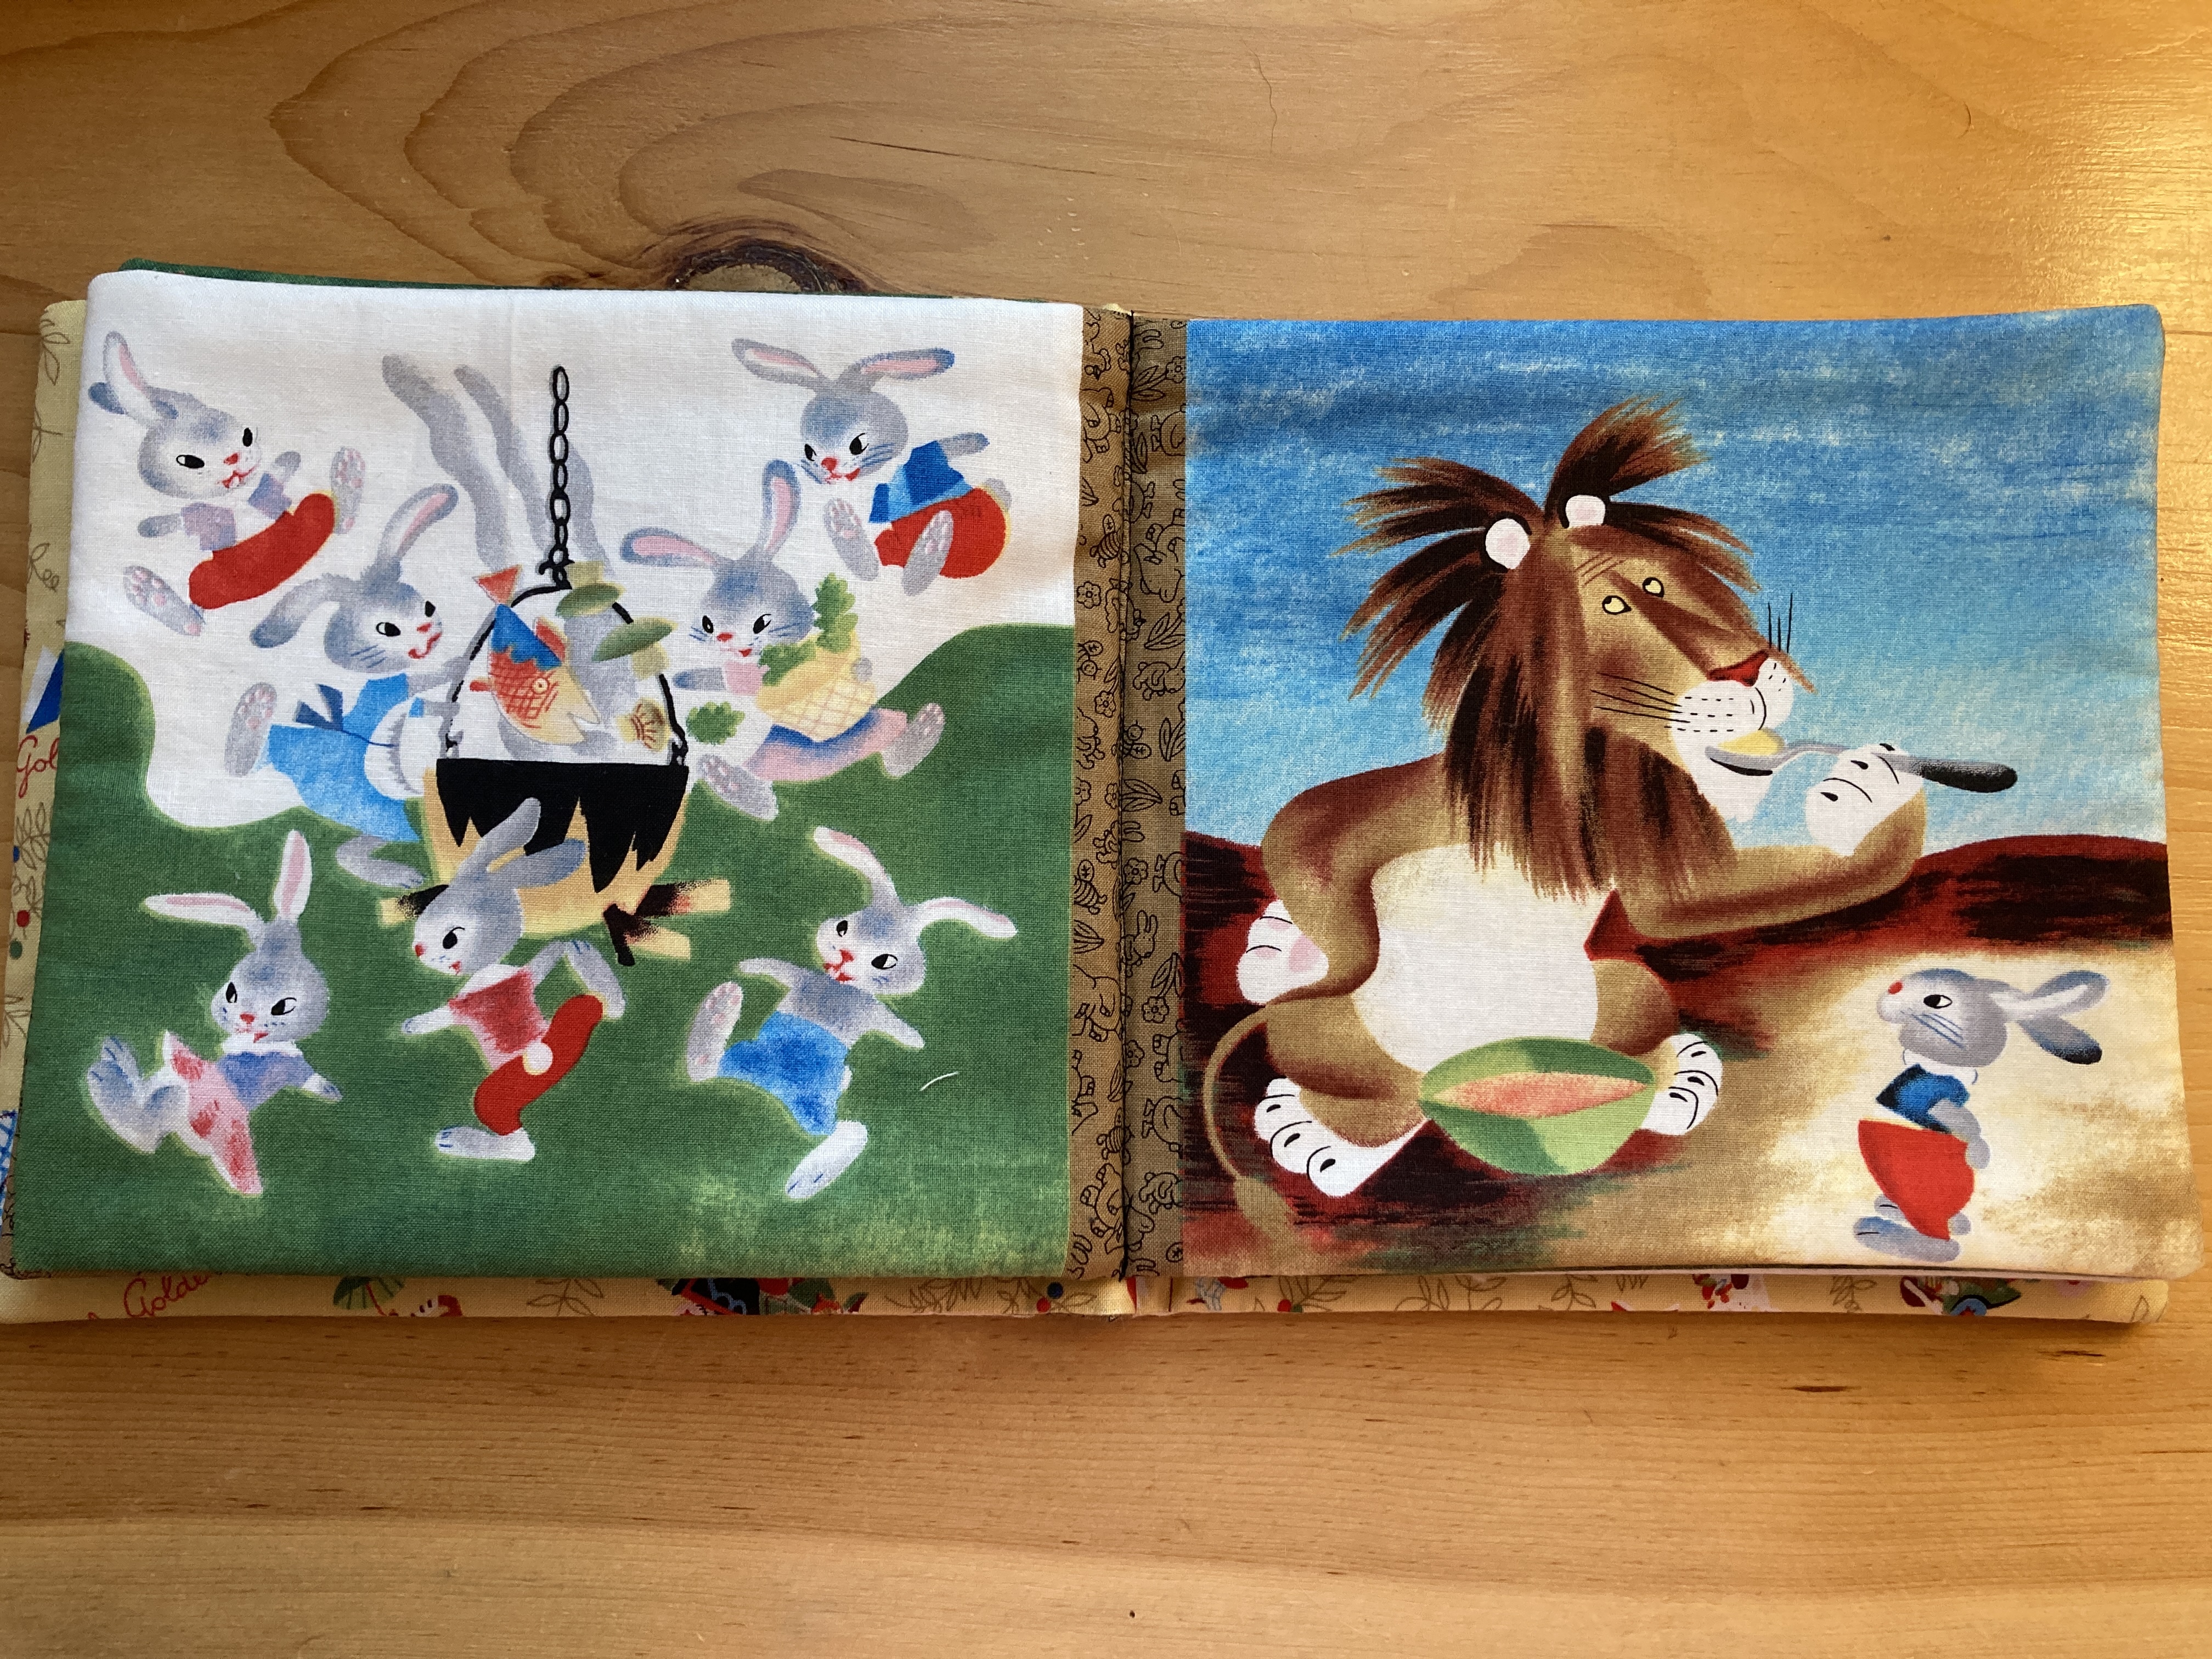
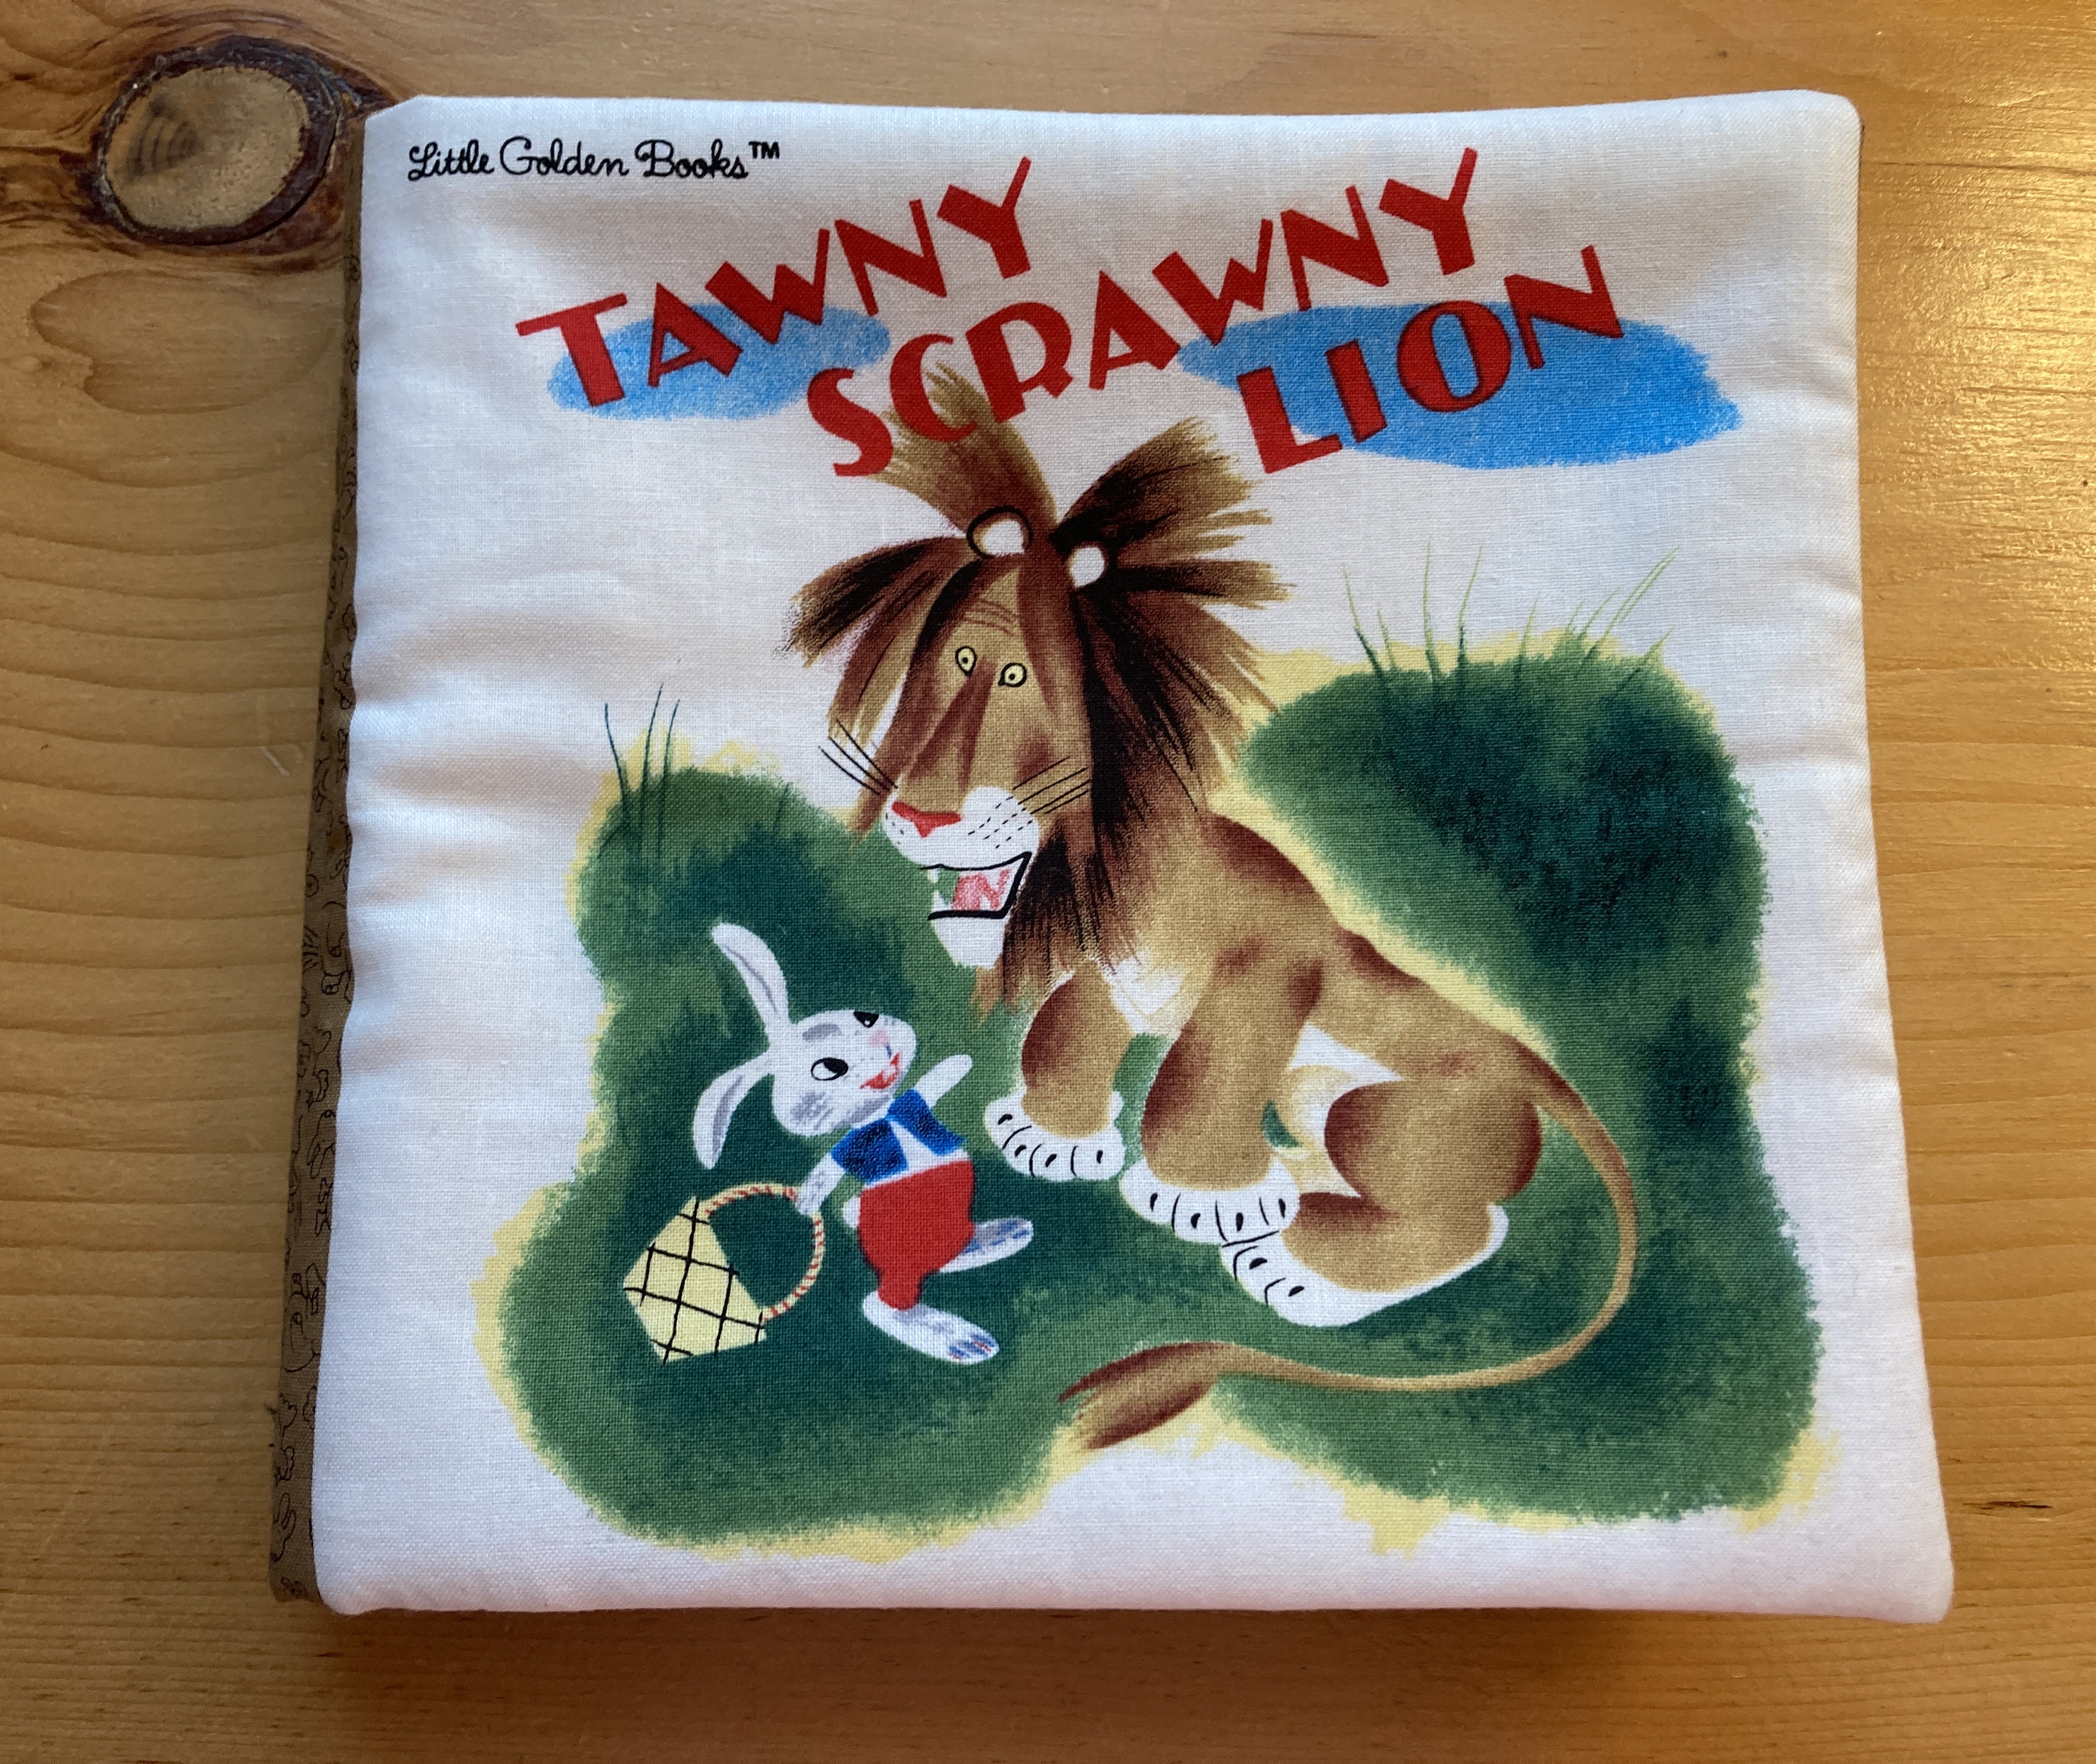
My second FO is also a sewing project. I have had this little panel since attending the quilt show in Augusta, ME probably 10 years ago. I bought a few similar panels and remember making one as a gift somewhere along the line, but this one has been sitting in my cupboard for almost (or maybe more than) a decade. It was time!
This is a fabric (much edited) version of the little golden book, The Tawny Scrawny Lion. I wasn’t familiar with the book but I love the idea of little books without words. The reader can make up the story to go along with the illustrations (or the reader can Google the book and tell the same story.) Regardless, this little book will be winging its way to New York City to a very special little girl who is so deeply loved by her Yaya! I know that she’ll love this little book and she won’t rip the pages.
Pom Pom Socklets by Purl Soho
Last but certainly not least, a pair of “peds” as we knew them back in the day … but these aren’t the sedate peds of my past. I decided to knit up some fun, bright, color-blocked shorties and this is the first pair for my daughter, Kate. I decided to make them all crazy and different. The only thing missing from these finished socks are the pompoms that will be attached at the back of the heel. Just like my mom did in my childhood days … and I did, too. I’ve got several more pairs to knit. My thought is to make a pair for all of the “girls” at our family beach gathering in September. Think I can do it? Three more pairs before September 5? Time will tell. This is a free Purl Soho pattern that I used to make the U of F socklets for my favorite graduating (graduated) senior that I cared for when I was a school nurse. The kids used to ask me to knit them socks when they came into my clinic and my answer was always, “no!” (and emphatic no to be sure!) But this kiddo was different and I’ve stayed in touch with her family and when she graduated, I knew just what to send her for a gift (and a gift certificate to the U of F campus store.)
My sweetie and I took a brief road trip to the coast yesterday because I needed to get some sewing supplies. I thought my time at Fiddleheads would be brief but I was looking at the fabric store with new eyes – the eyes of a garment sewer. It was exciting and intimidating. There is so much to learn about garment-worthy fabrics. I’ve learned that quilting cottons are not always a good garment fabric because they don’t have the same drape. But I managed to do some damage and bought a bit of a cotton lawn and a pattern to make some harem pants for my Sylvie. And I also bought some hand-sewing needles and wool felt to make more needle cases. They’re fun and quick. I found a basket of bolt end cuts of fabric and they had two pieces of linen that I had to take home with me, too. One is a 3-yard cut of a khaki colored linen that is enough for a dress, I think. The other was only a bit over a yard of fabric but it’ll make half a shirt or a pieced shirt … time will tell. I feel so fancy talking sewing!
I spent last week at Medomak Retreat Center in Washington, Maine at A Gathering of Stitches first retreat of the season, Slow Stitching 101. There were 35-ish women attending from all over the country and from Canada and Italy.
My friend, Lori Versaci “talked me into it” and I went because I want to make clothes for myself similar to the ones she makes and in particular that orange and white linen check dress! I was a bit anxious and intimidated before I got there because I have never sewn garments before and my quilting is pretty limited. But I like sewing and I realize that it takes so much less time to make something with a sewing machine than it does with sticks and string. So, I set my goals on the low side of reasonable as I perceived it and headed off to “camp”.
We arrived for check-in on Monday afternoon and were allowed to unpack once we tested negative for Covid. A reasonable ask for the safety of all. I was in a shared cabin and I didn’t take one photo of my spot. I brought my Orange Peel quilt for my bed and my special silk pillowcase and pillow so it felt like home. Each cabin has a full bath and two single beds, two reading lamps, a fan, and two bureaus. It’s spare but comfortable. Our linens, blankets and towels are all included as are all meals. More on the food in a bit.
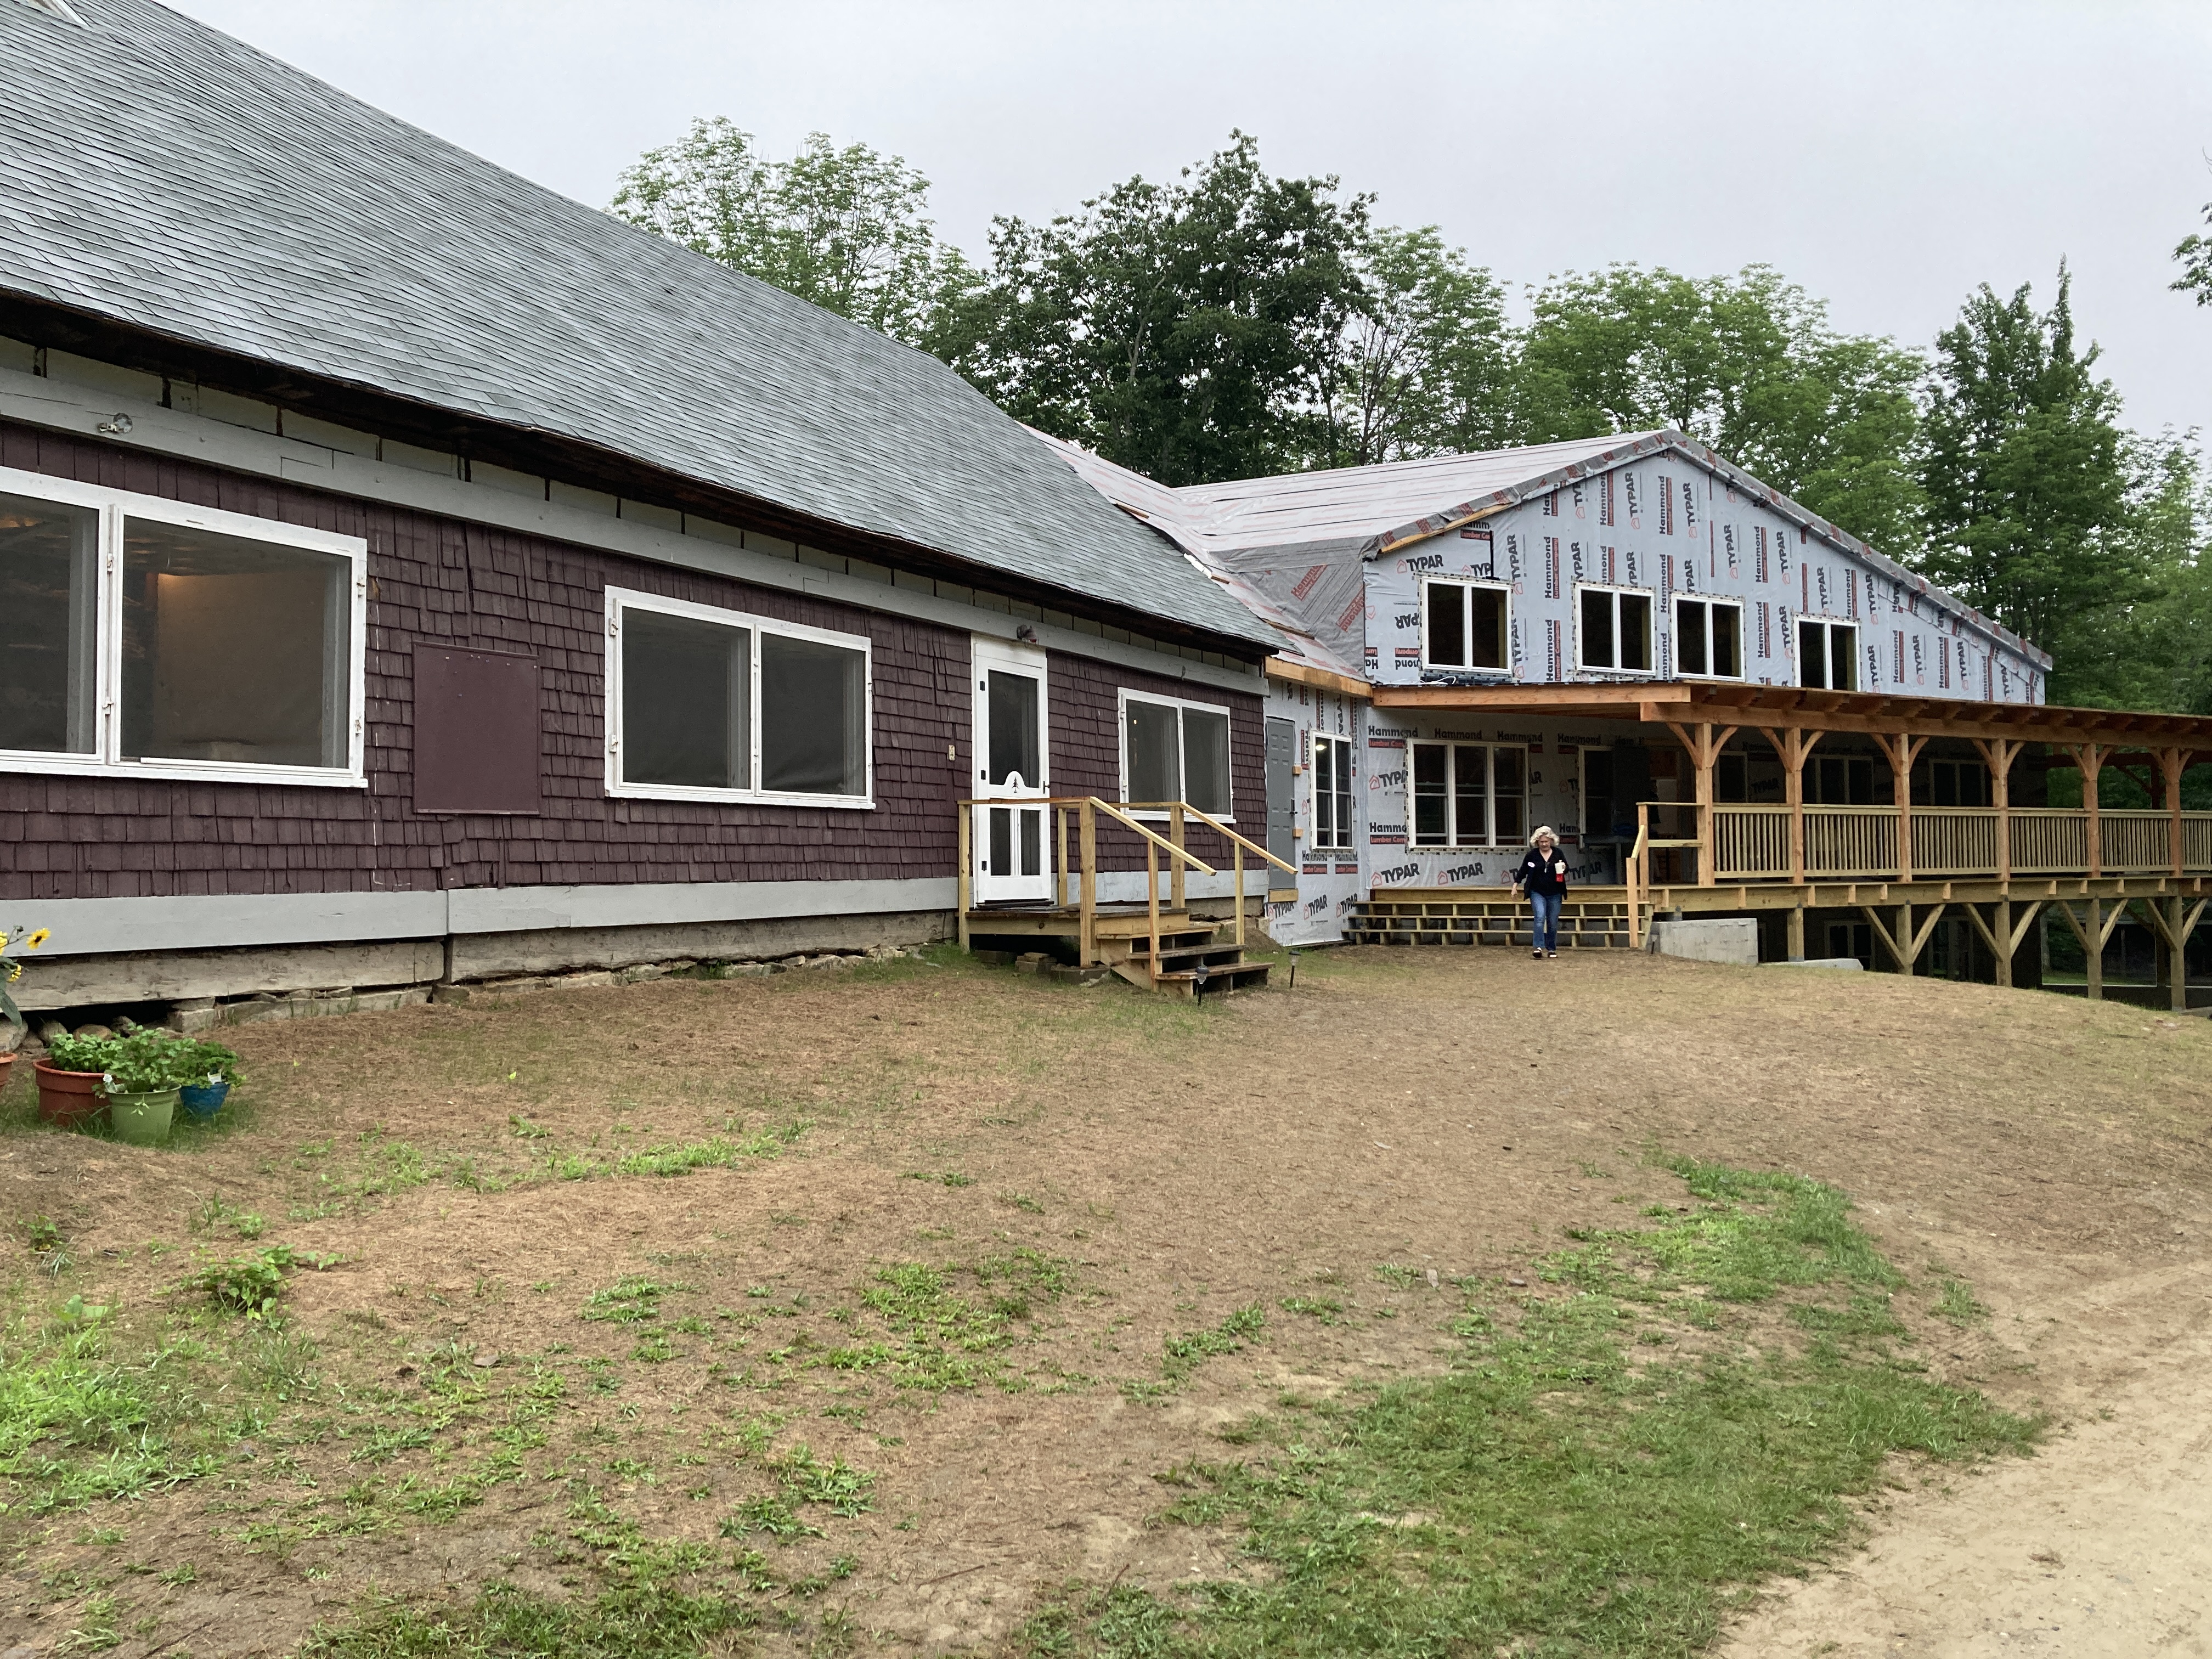
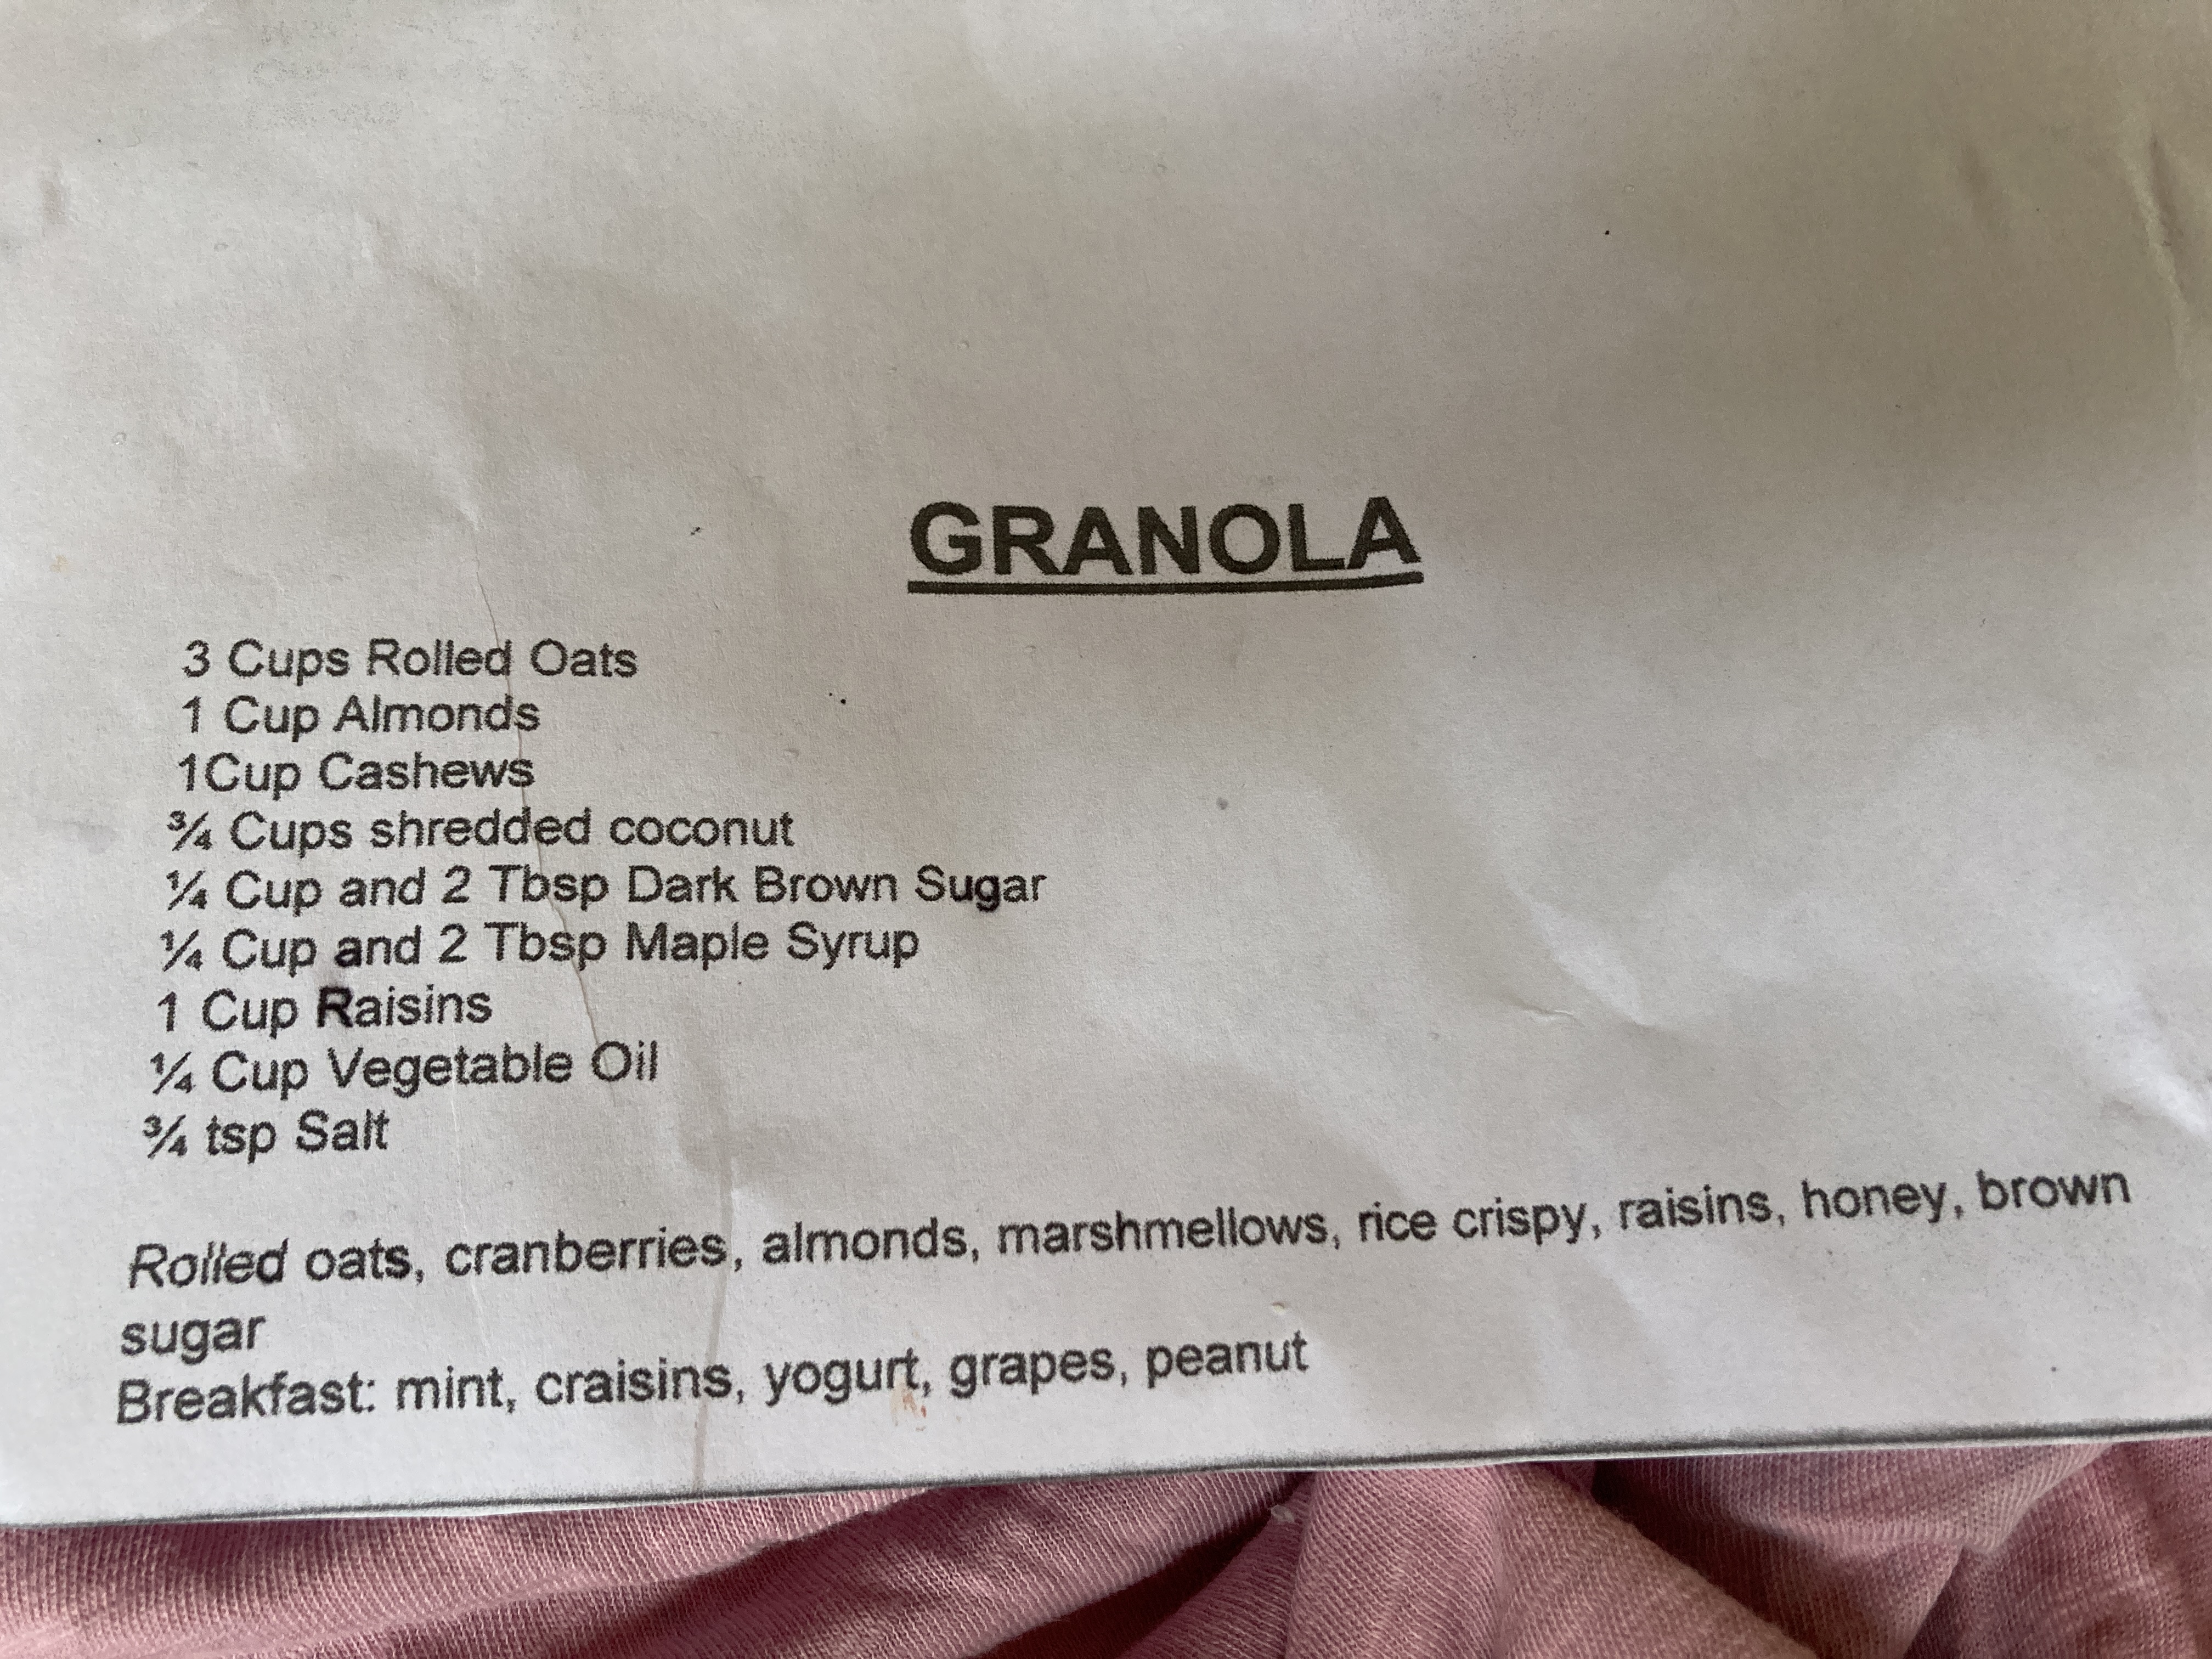
Monday night dinner was our first gathering. Meals are served family style at big round tables in the dining hall which has recently been completely rebuilt. The foundation under the original dining hall wasn’t strong enough to support the much-needed new roof so … an entirely new post and beam building was constructed and is nearly finished. For the first time, there are two restrooms in the building and that alone was worth the cost of admission. The food is incredibly tasty and healthful and they cater to everyone’s individual dietary requirements (gluten free, vegetarian and vegan, etc.) I don’t remember the specific meals each day but breakfast is typically choice of cereals, yogurt, a hot something – bacon and eggs, quiche, pancakes … you get the idea. Coffee and tea is available all day and a water bottle filling station is available, too. Lunch was often a wonderful hearty salad of grains, roasted vegetables, and greens with soup or grilled cheese and tomato soup, buddha bowls with grains or noodles with grains, roasted veggies, etc. I loved our lunches! And dinner was spaghetti and meatballs or roast chicken or similar, potatoes, veggies, and always a tossed salad. The last night, Saturday night, is lobster dinner – lobster, mussels, cole slaw and corn on the cob. There’s always dessert, too! And it was always good!
The Barn the Barn (side view)Dining Hall The Lodge (porch is coming back) and Dining Hallnew bathroomsign where the mirror isn’tGathering on the porch
Tuesday was the start of our workshops. I was a Chickadee (we were divided into three groups, Blueberries, Chickadees and Pinecones for classes) and our first workshop was Hack It with Cal Patch. I’ve taken crochet and embroidery with Cal at the Medomak Fiber Arts Retreat but this time it was taking a simple boxy shirt pattern and “hacking” it – changing it in some way: the collar, the sleeves, adding pockets, change the length, etc. I had partially made a muslin version of Cal’s Boxy Tee from a virtual class she gave and my hack was to make a tunic length top with a pocket. I learned how to make french seams, how to use bias tape to finish the neckline and, once finished, by top was too boxy so I learned how to take it in. AND I finished it at camp! Cal is wonderful. She’s so experienced and encourages each student to be creative and individual. I am eager to try hacking another top or two before I head down the pattern buying path!
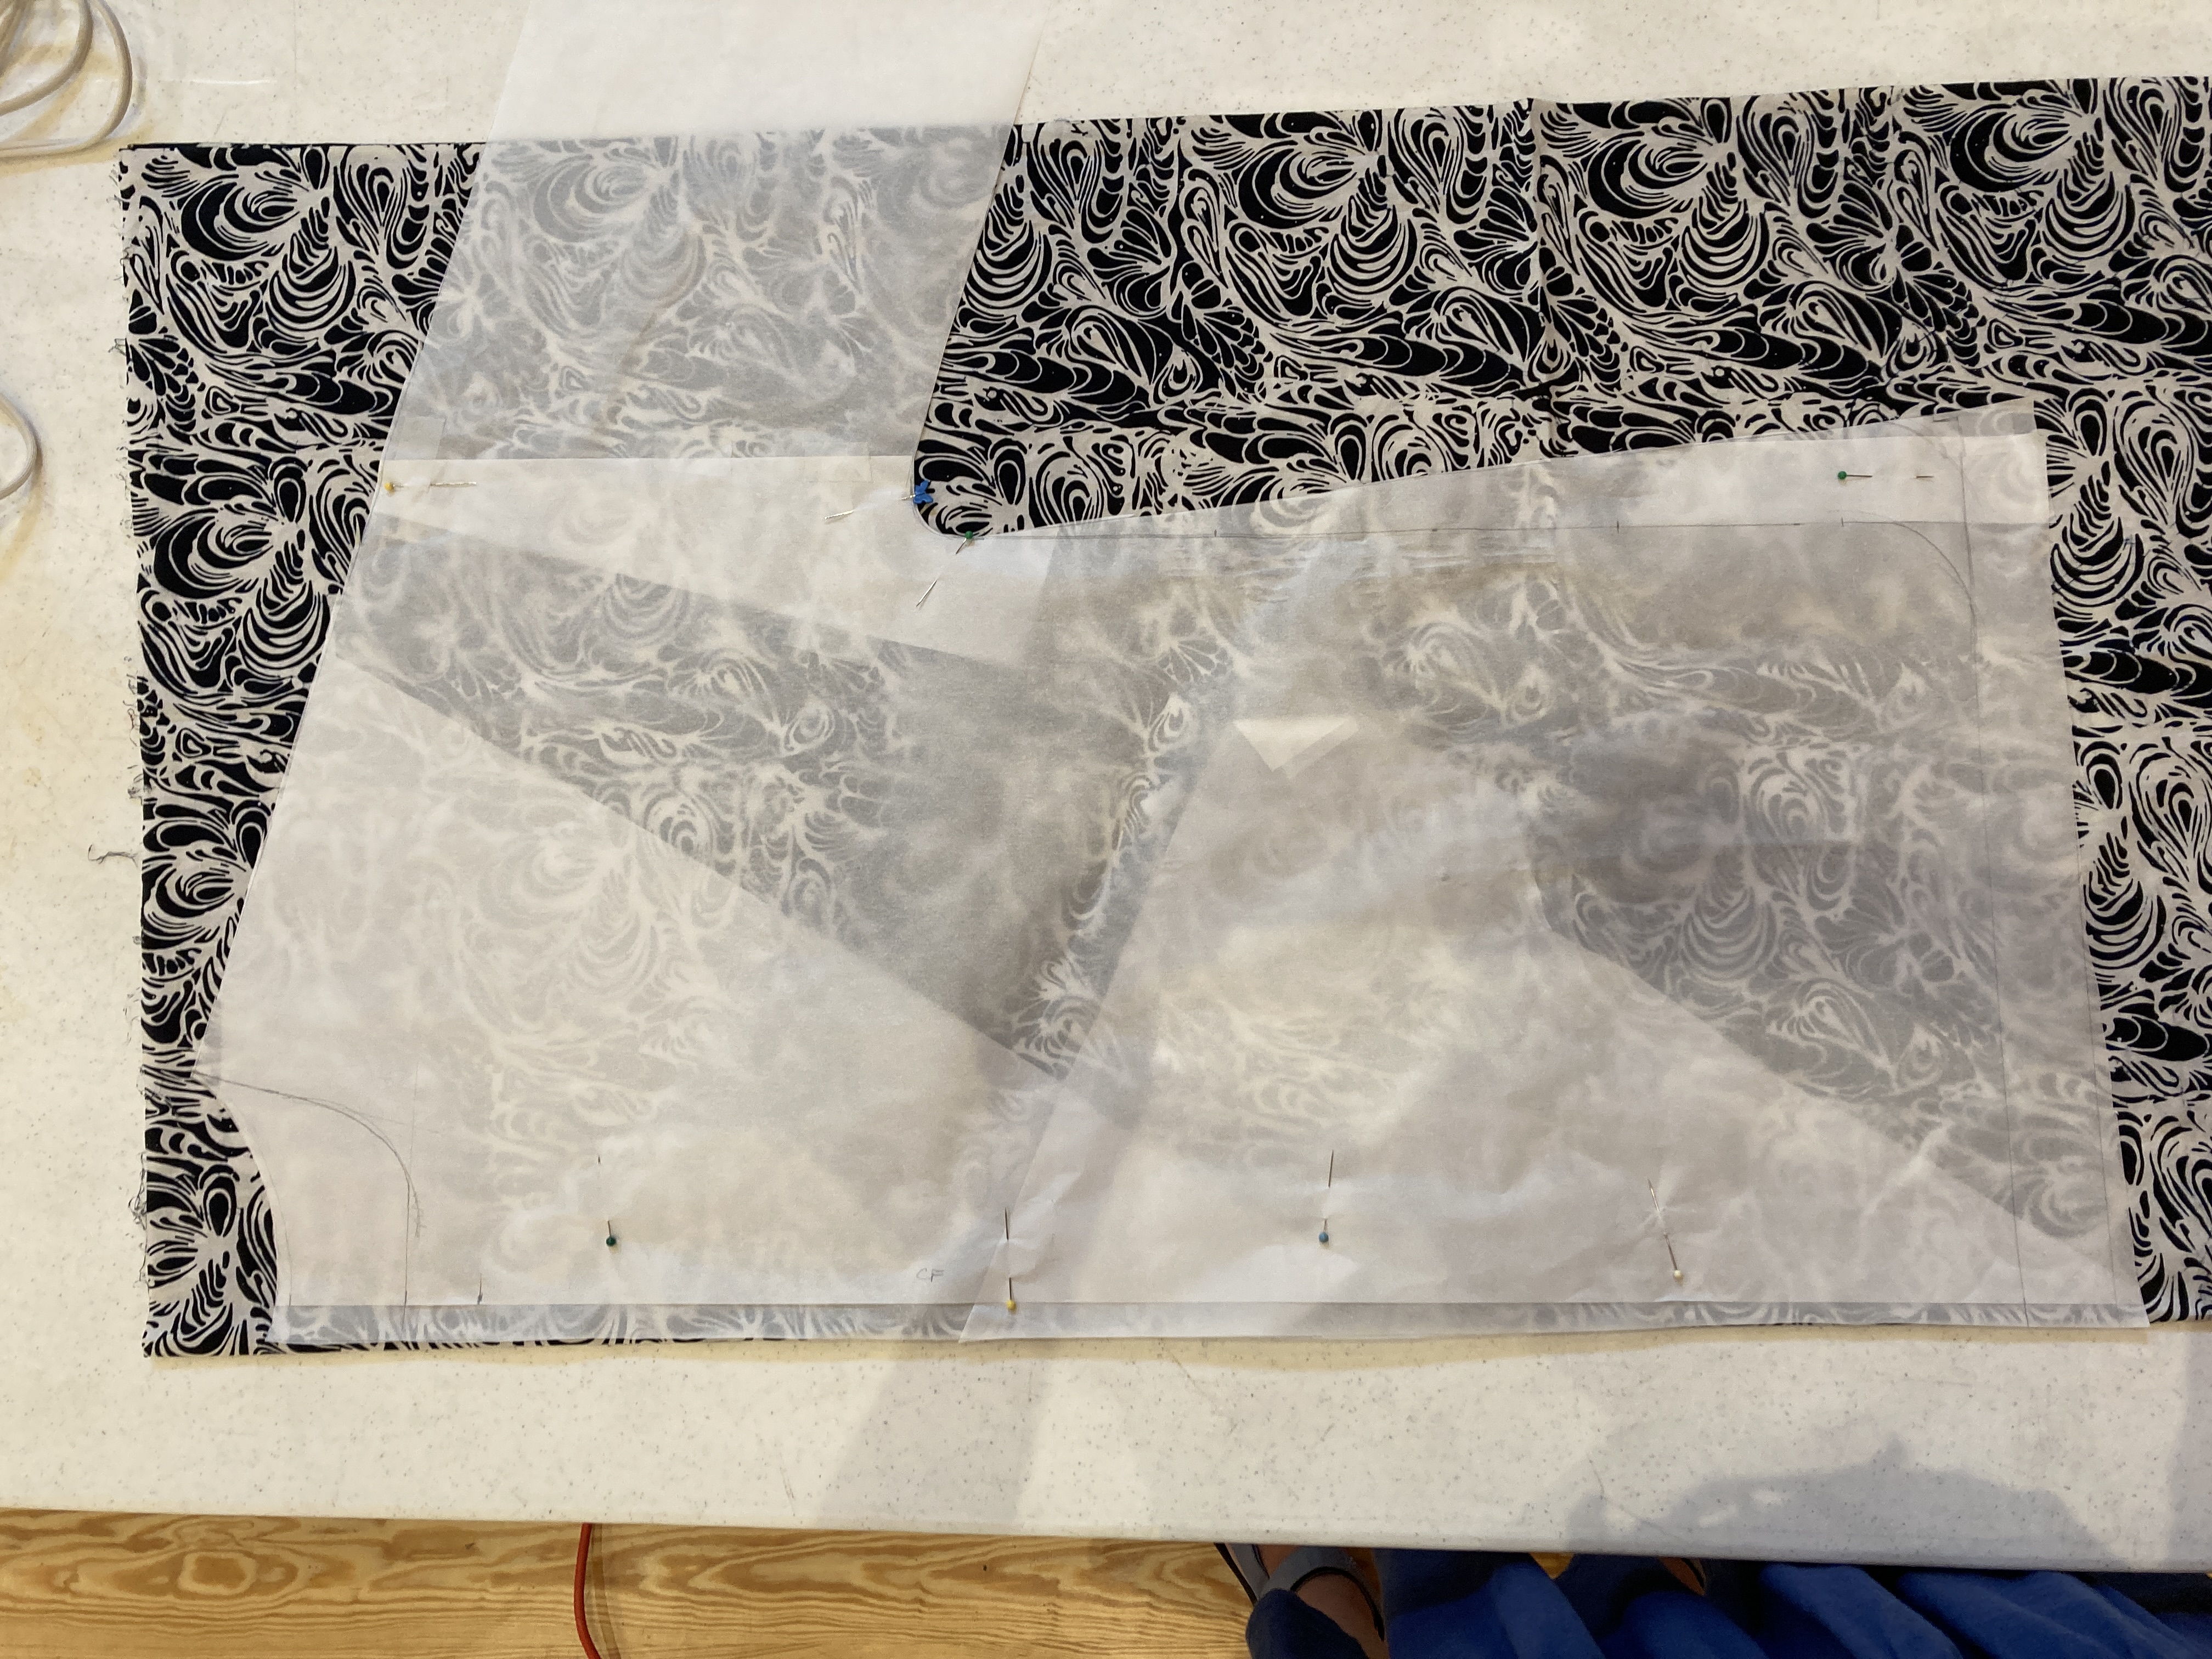
Wednesday we had a workshop with Alexis Bailey, Hand sewing the Photinia Top. Photinia is a pattern designed by Alexis to be zero waste … every bit of fabric is used to the max. I made the simplest view of this shirt having never done any hand sewing of garments. But I learned how to cut out a garment, how to make my own continuous bias tape and then how to hand sew shoulder seams, gathering a neckline and sewing on at bias binding … I’m not done with this top and I may decide to sew some of the long seams on the machine. I am the boss of my sewing, too. Alexis said this was her first teaching gig and she was very patient with us and her patterns that use up all of the bits of fabric are really smart. I look forward to finishing my top.
Thursday and Saturday were “free” days to do whatever you wanted. I chose not to go to Belfast with a large group because I am only an hour-ish away and can go any time. I spent the morning on the porch knitting. I’m working my way up the sleeves of my Lane’s Island Pullover and am knitting two at once to make it go a little bit faster (and to guarantee that the sleeves are the same.) I love sitting on the porch at camp. It evokes a simpler time without great internet access and I really did disconnect and slowed down. It was glorious visiting with women who were hand stitching: some worked on their camp projects, some were embroidering or knitting. In the afternoon, I worked on my Photinia top and got the collar sewn on (rough edges together, haha!) On Saturday I finished my Cal Patch hack in the morning and then stitched the collar of my Photinia together to get it ready to turn and then worked on my knitting in the afternoon. Several of the women at camp are sewists and knitters, too. They were good company.
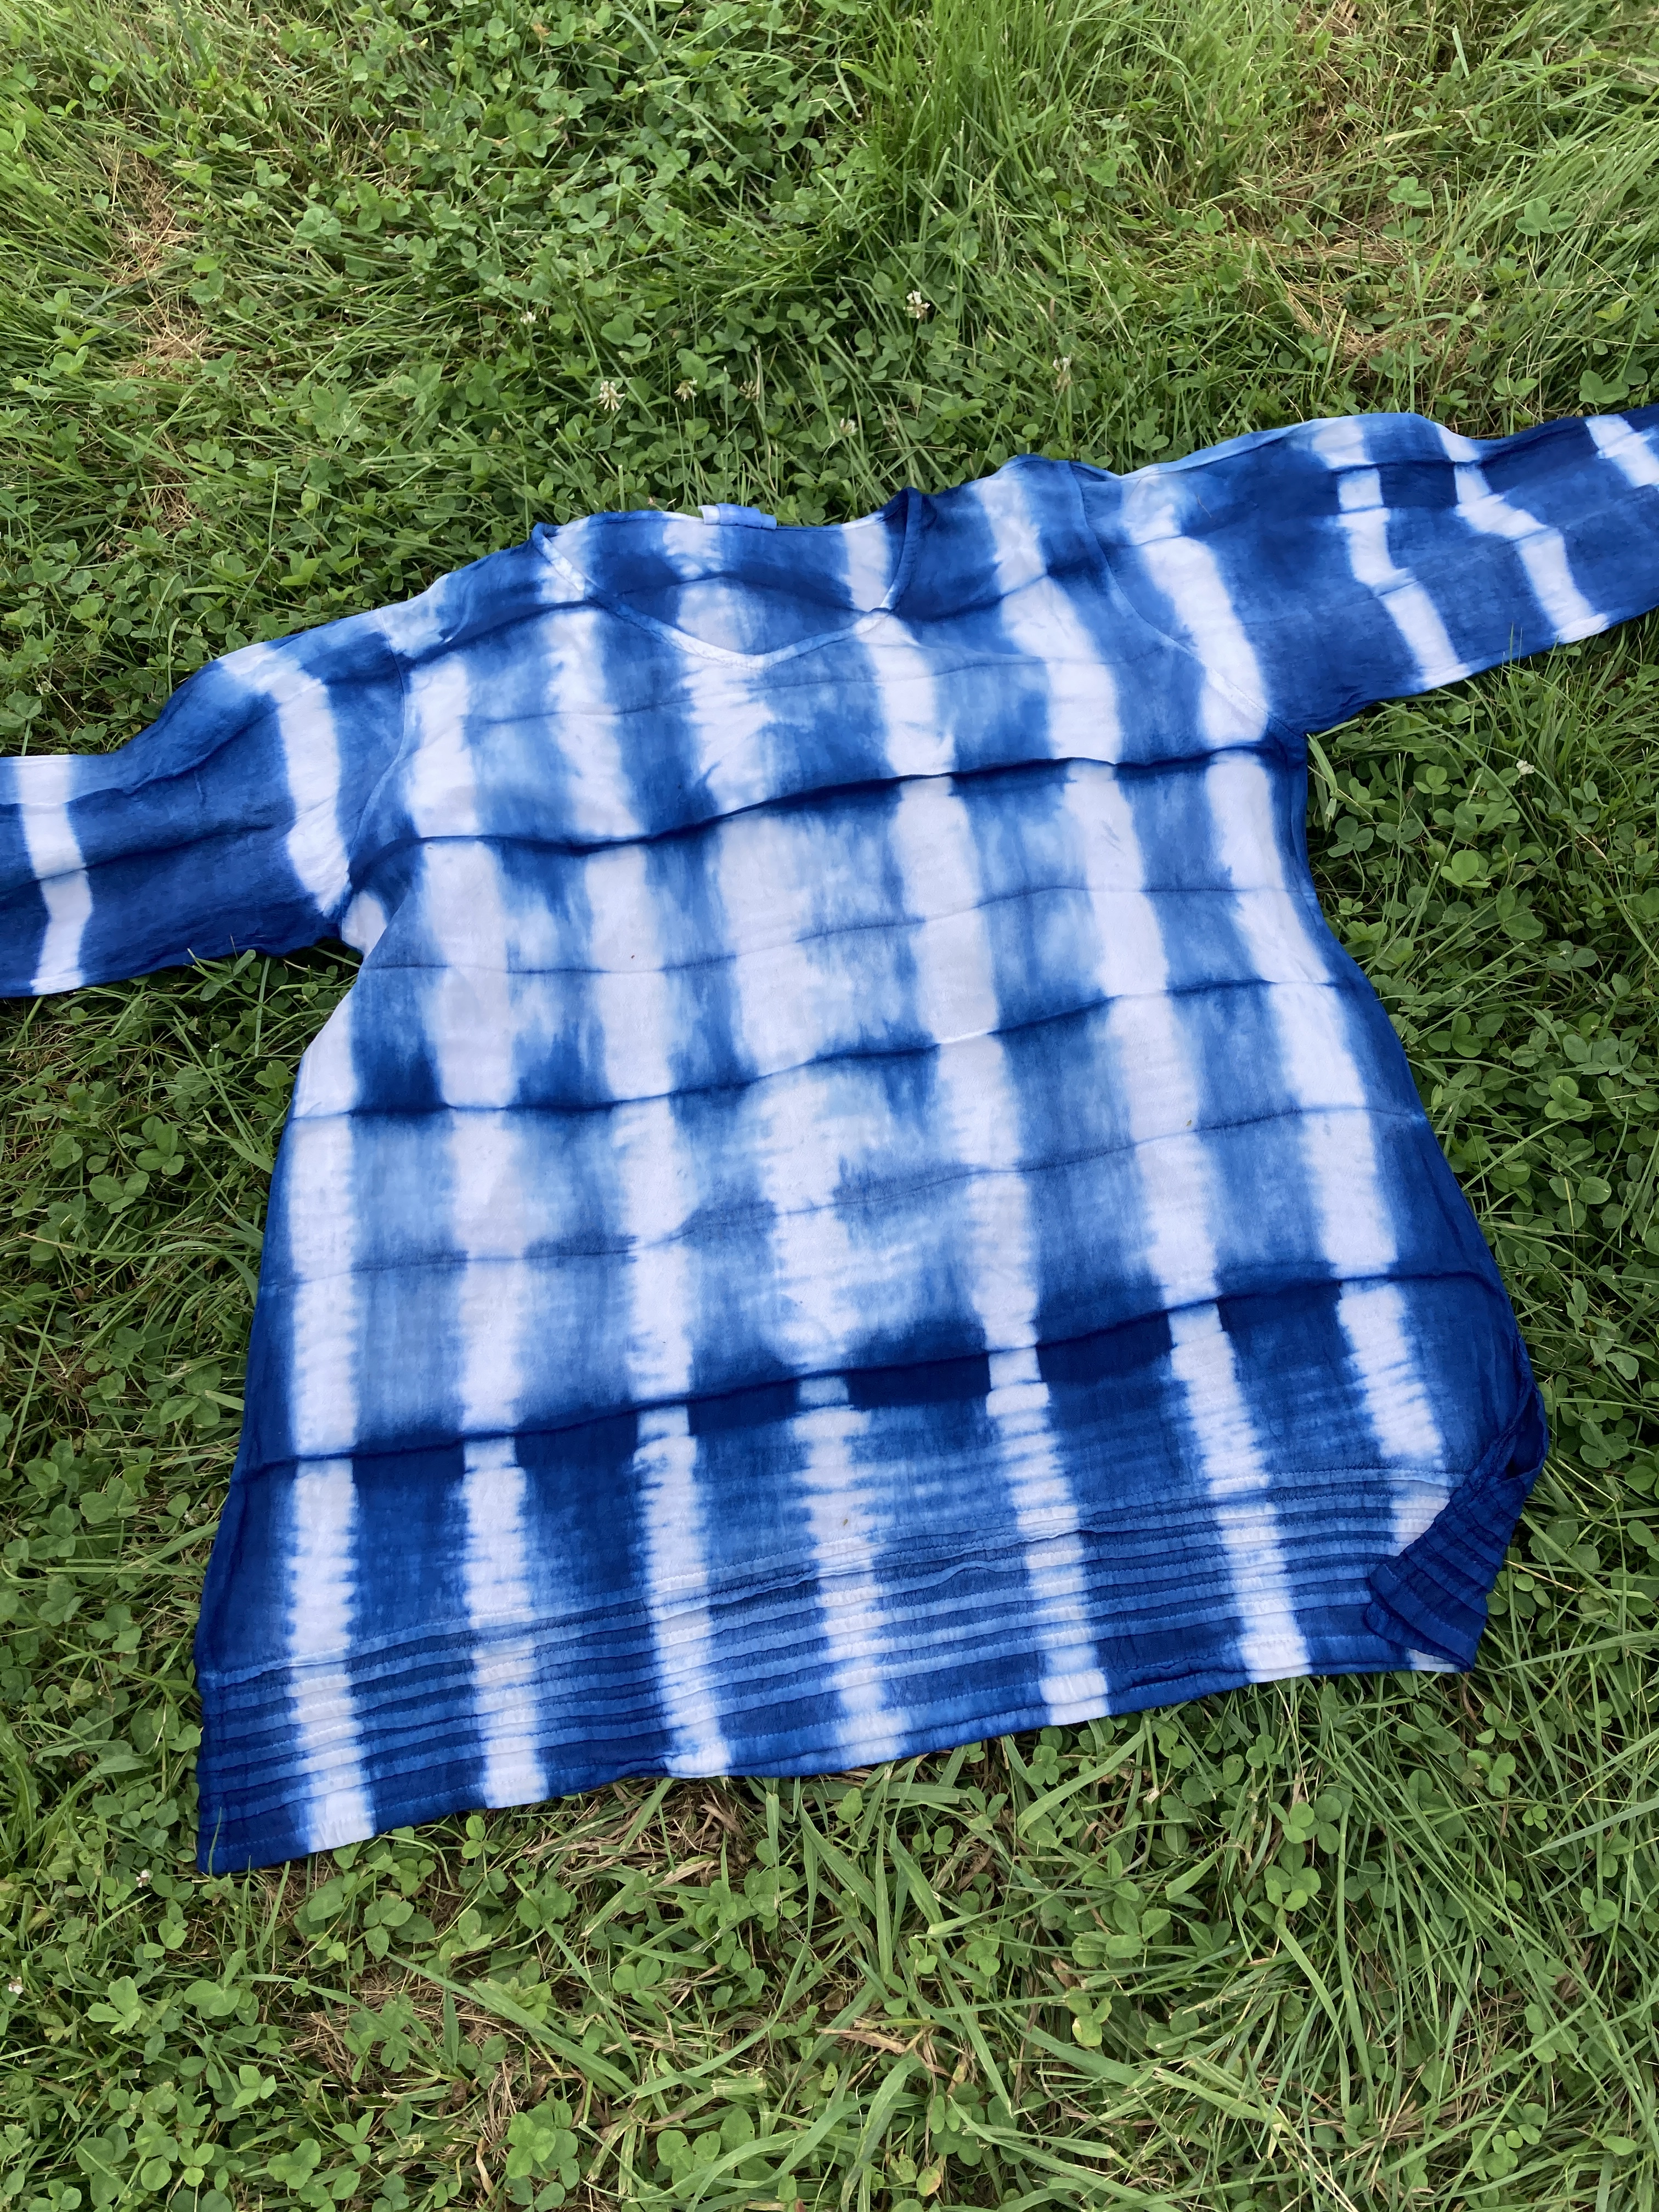
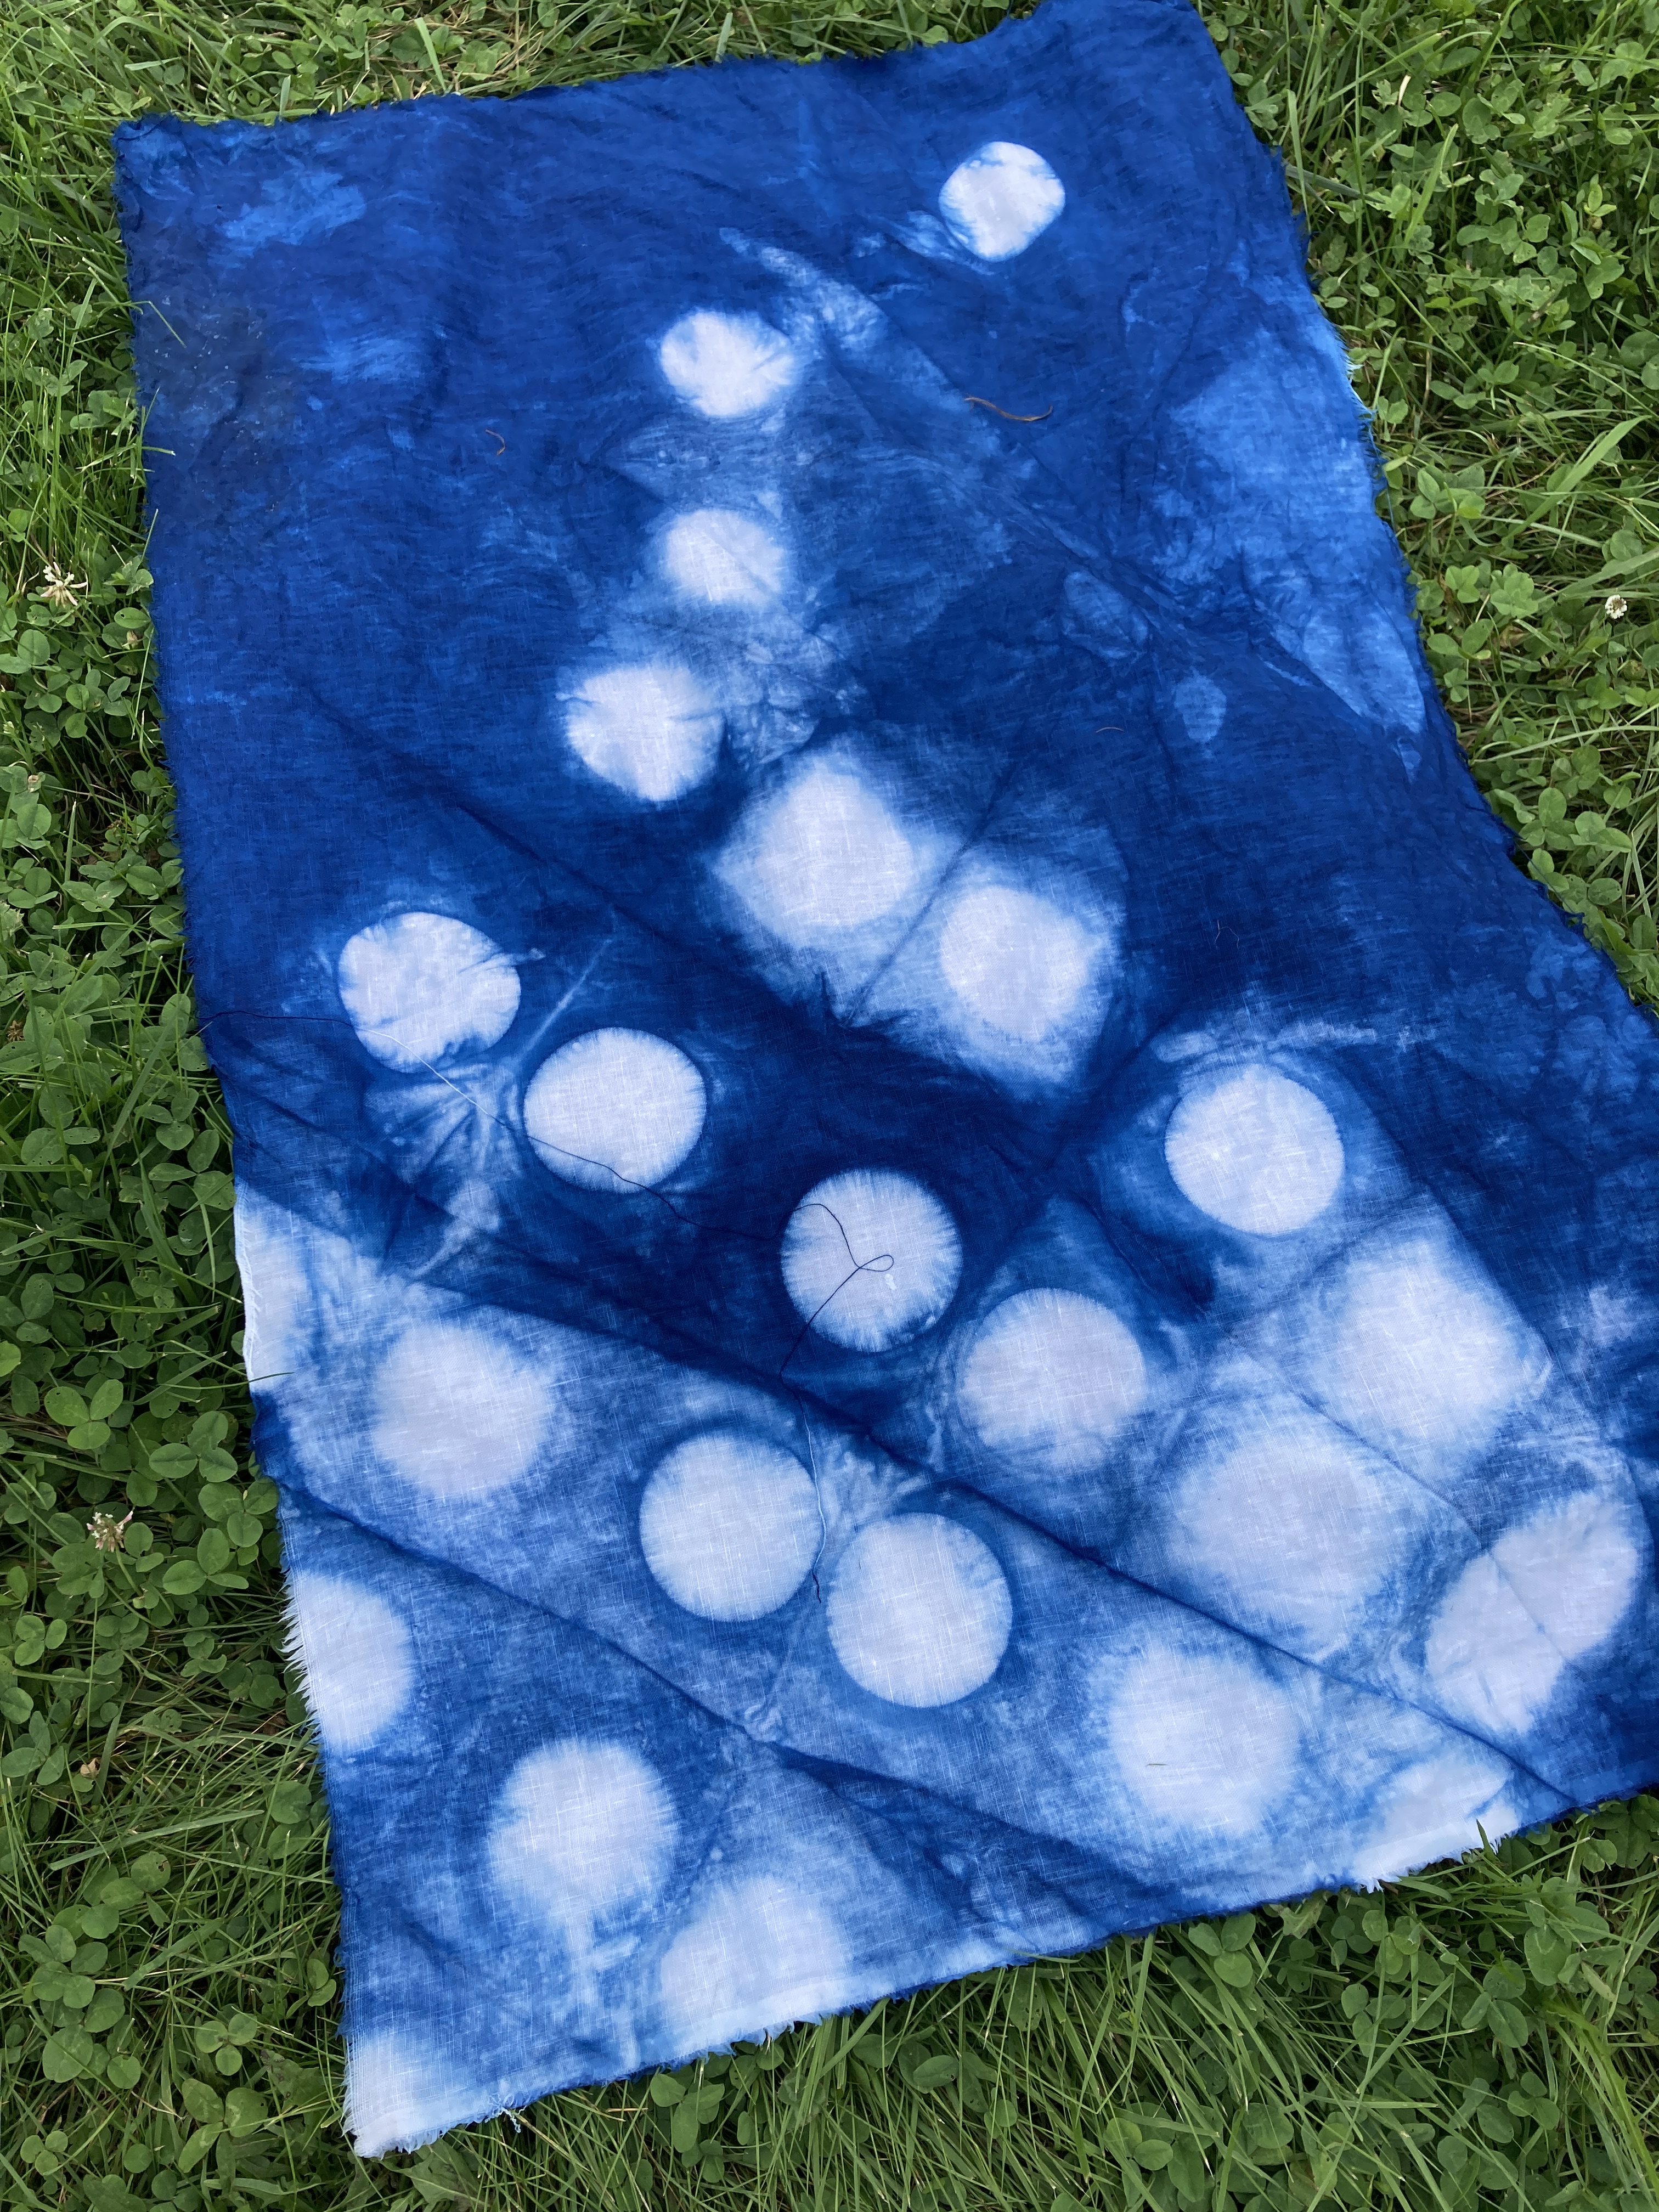
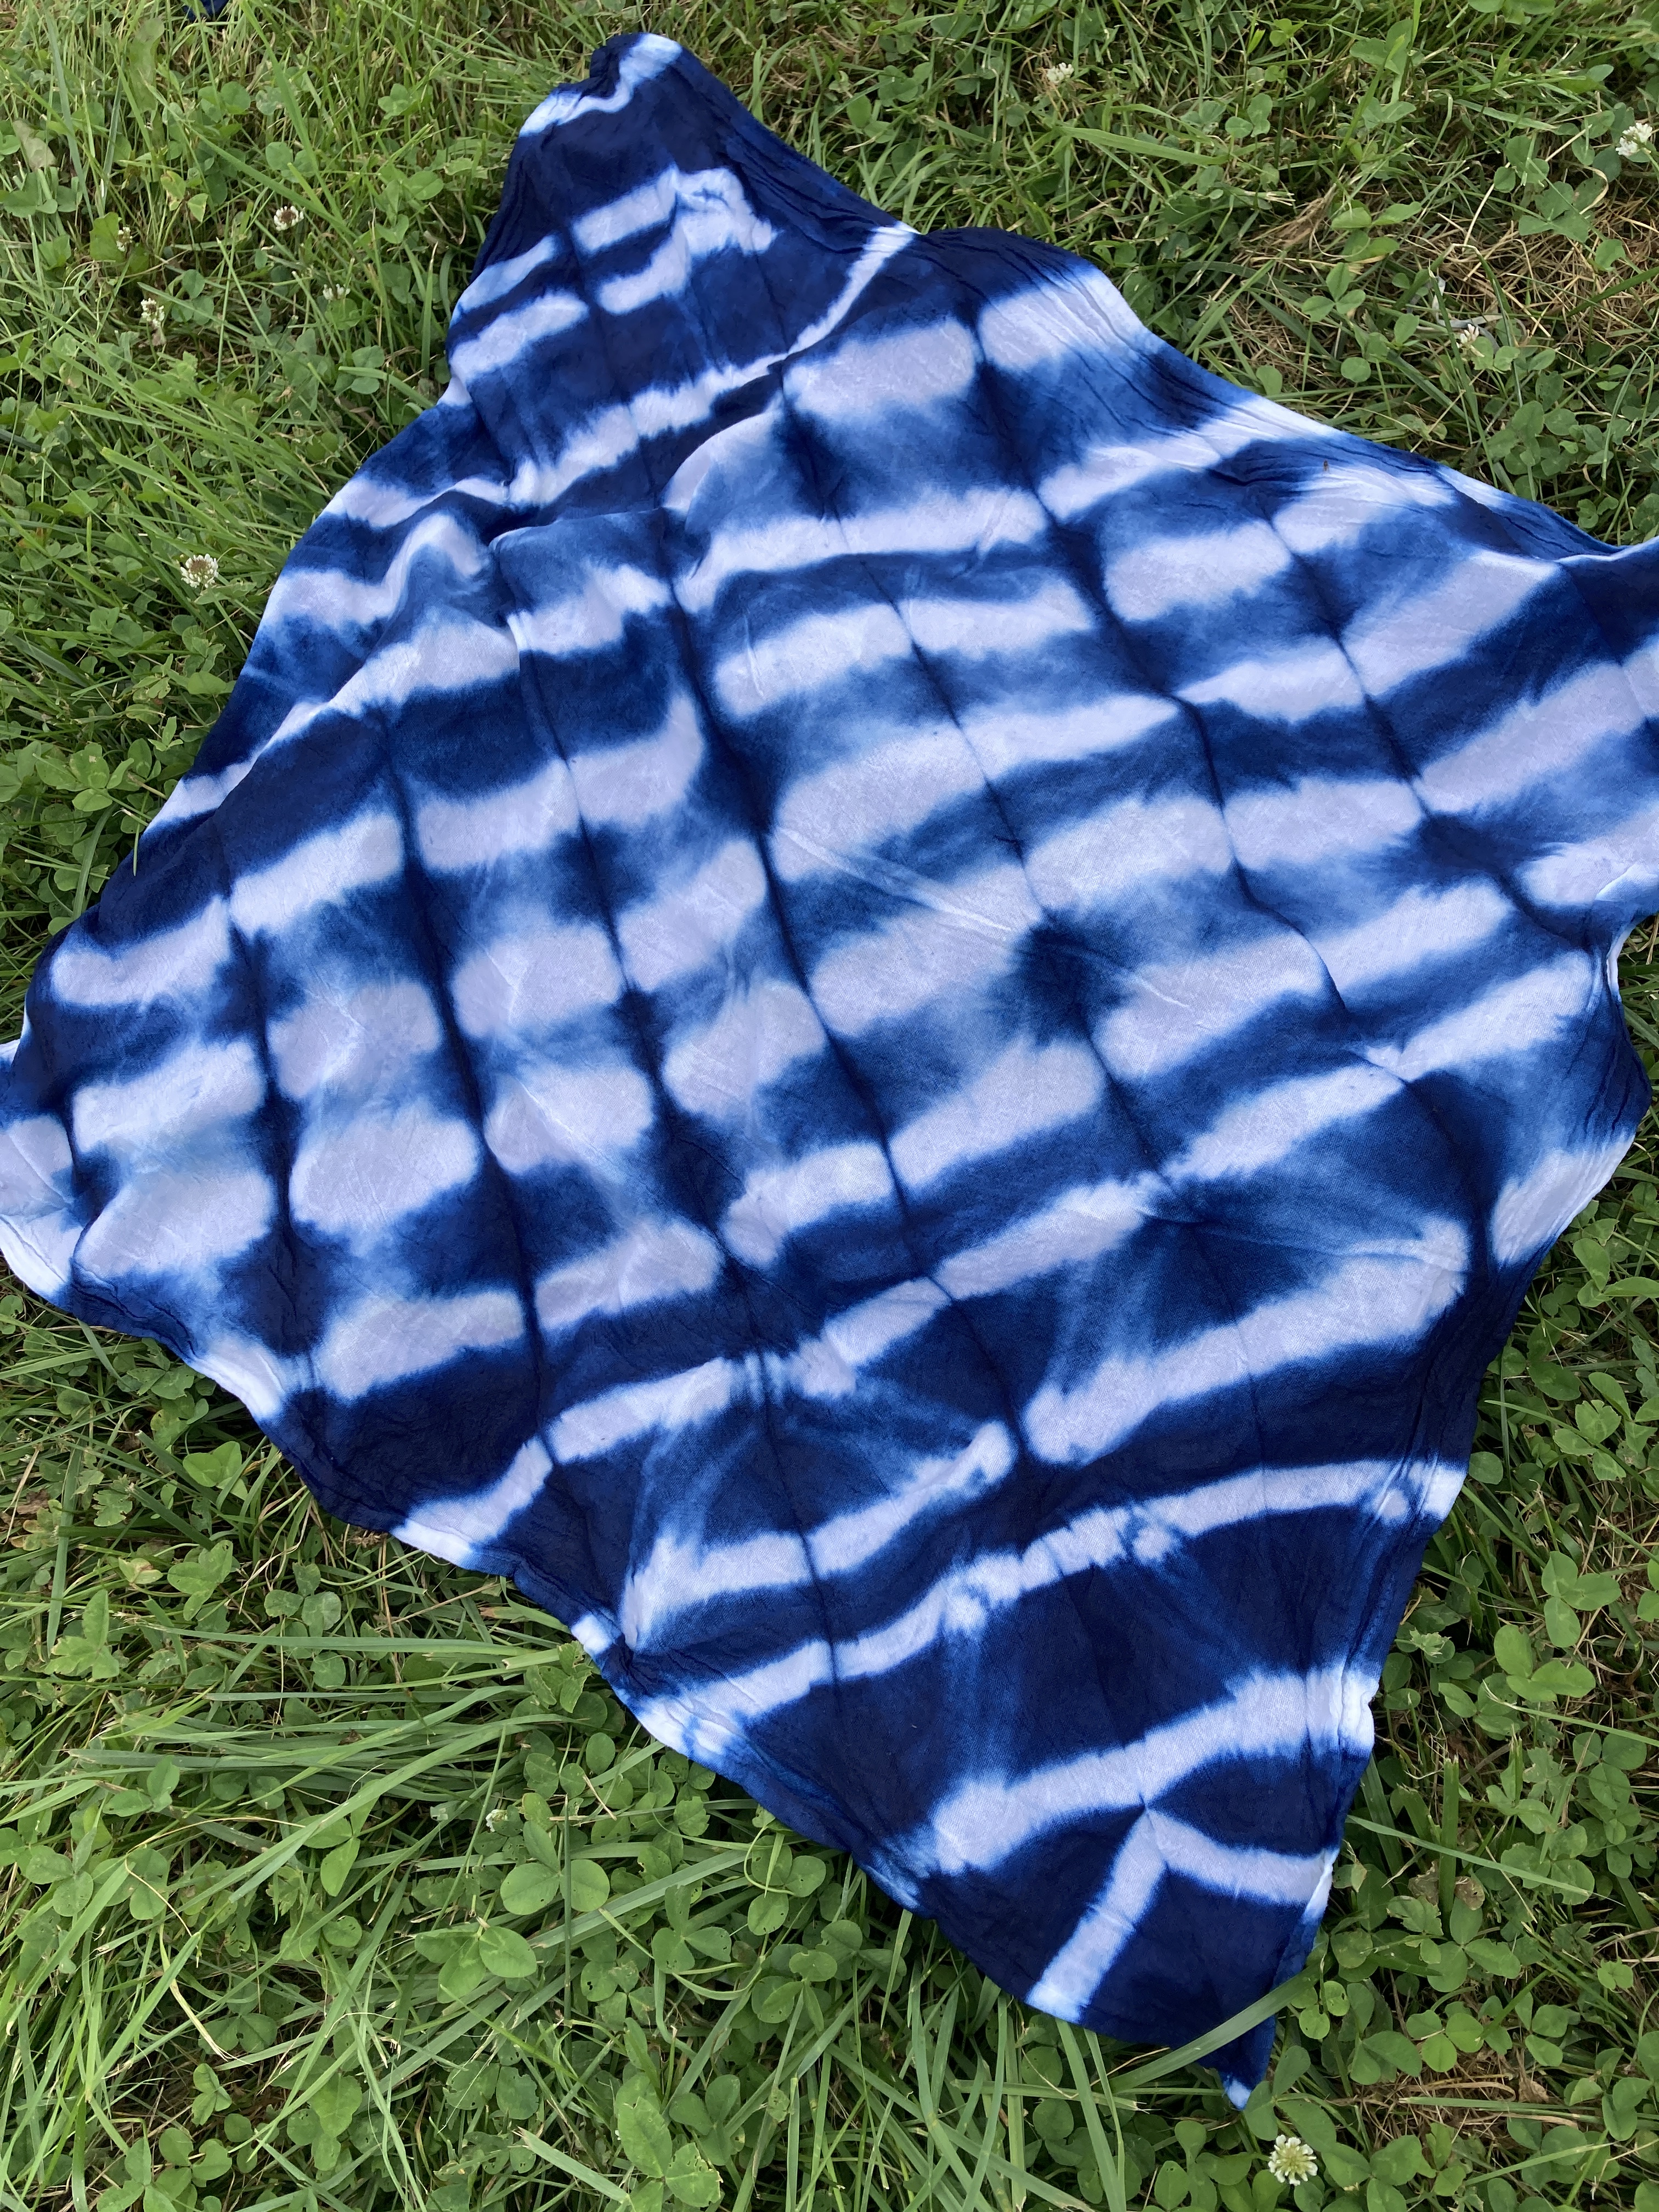
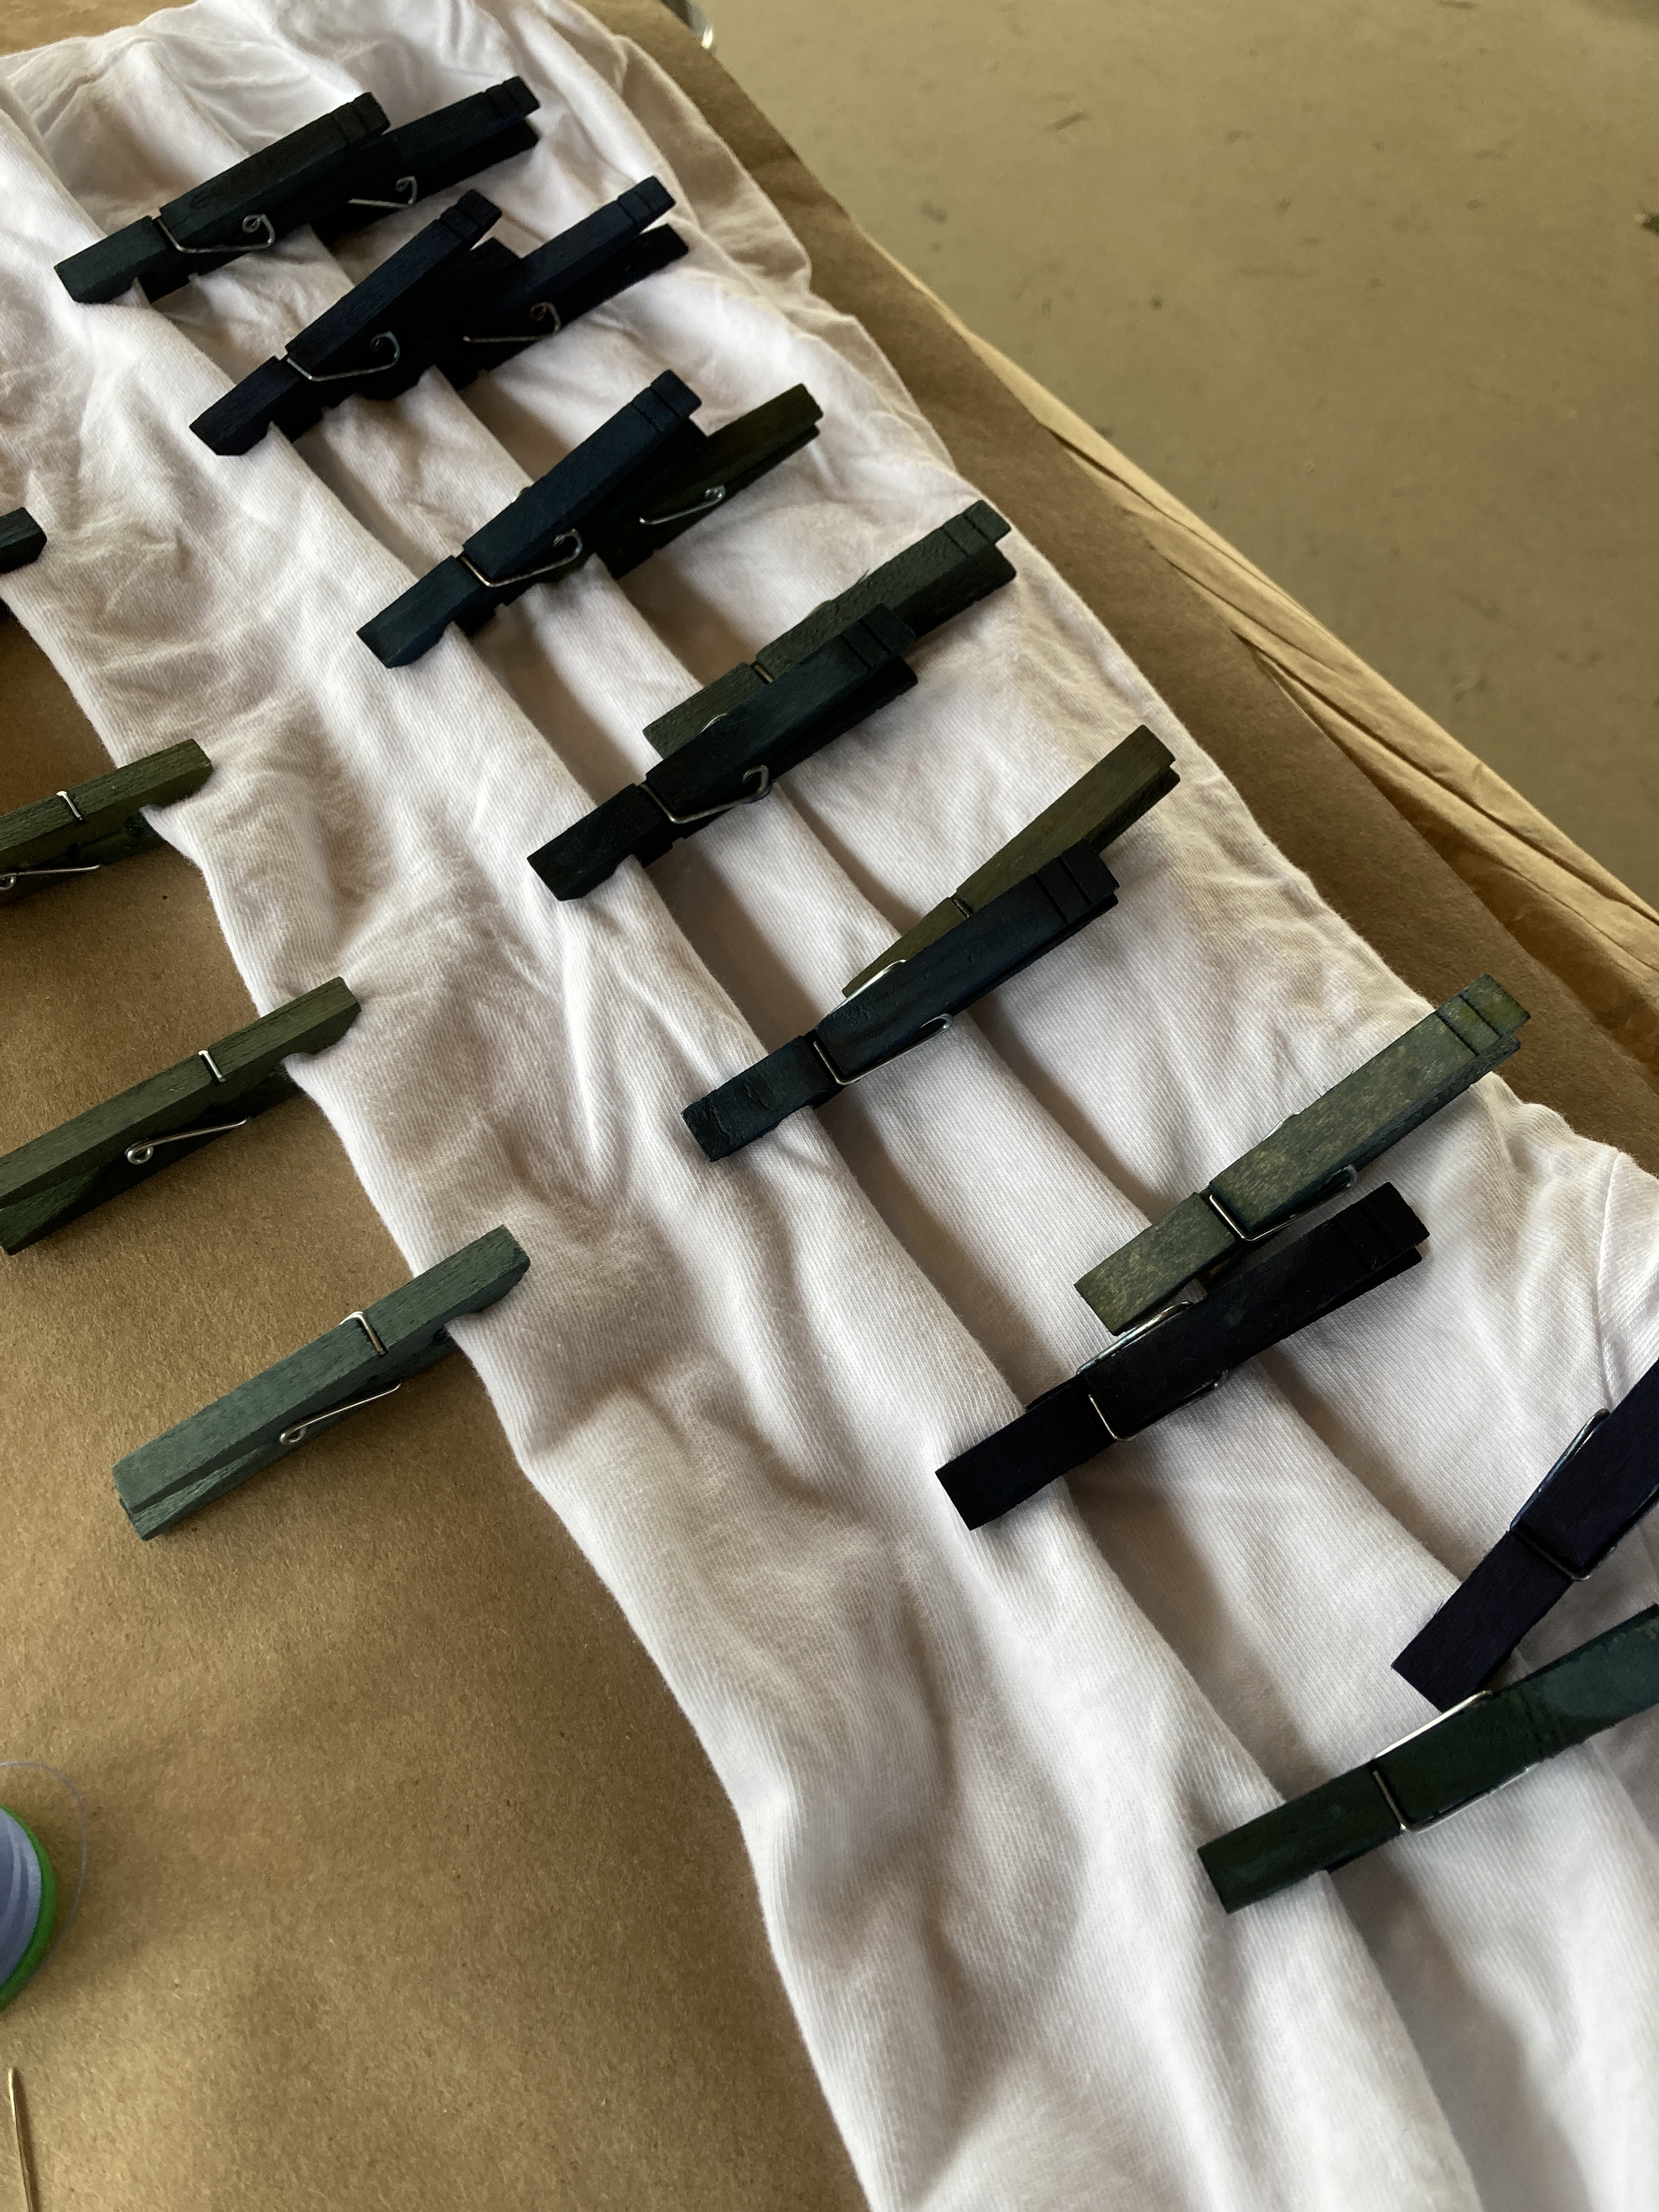
On Friday we had a Natural Dying workshop with Kristin Arzt. We learned about mordants (both aluminum and iron) and had a chance to experiment with different techniques for decorating fabric. And then we learned a bit about indigo dying and Shibori techniques. I had never worked with any natural dyes and Kristen was a knowledgeable and generous teacher. It was fun to try different things and see what happened. I over-dyed a dress with a stain on it, an old white shirt and some linen pants as well as some fabric. We all had fun with this class.
indigo dyed fabric – rope techniqueshirt dyed with tongue depressorsdyed with circlesmadder with aluminum and iron madder and weld dye potsweld dye with aluminum mordantcochineal dye with aluminum mordantshirt ready for indigo vat
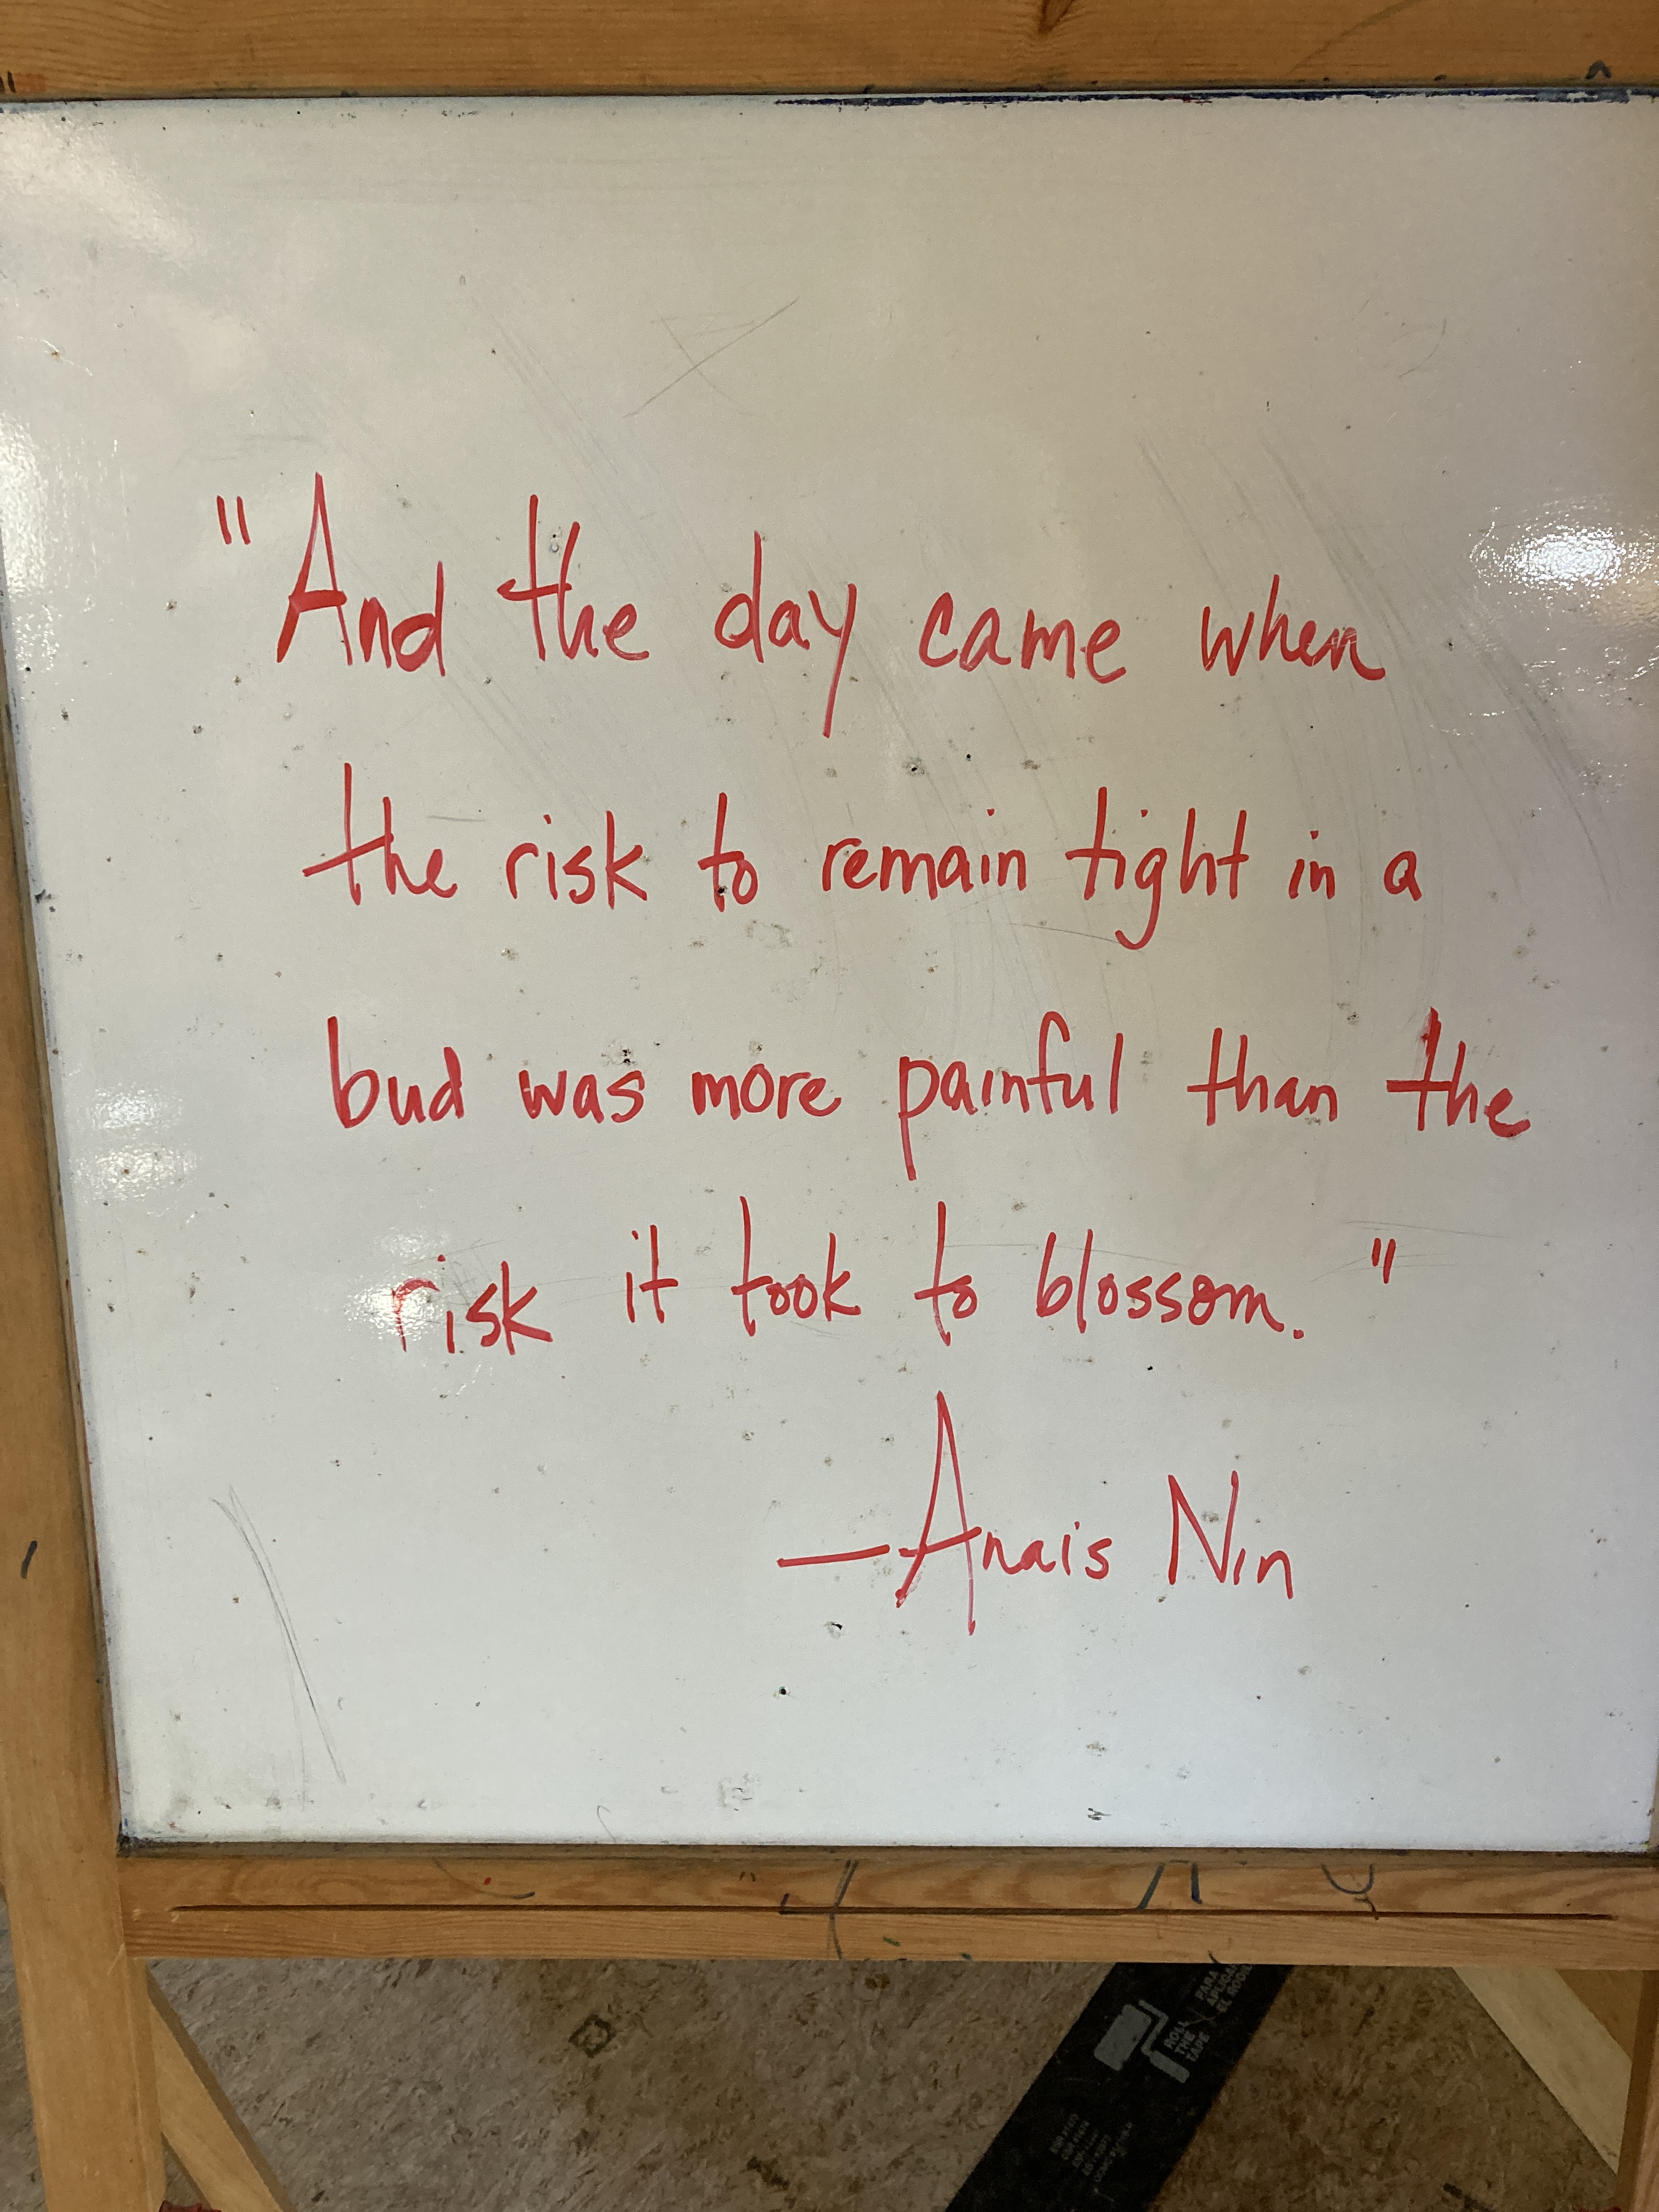
On Thursday afternoon I attended a mini-class with Katherine Ferrier called Making, Being and Being Made. It was an opportunity to become mindful with our hand work, to take time to slow down and check in with ourselves. I enjoyed the class very much and it was not easy work – I was tired at the end of the day on Thursday, in part due to digging deep in this class.
There was one other mini-class with Samantha from AGOS about Garment Fabric Considerations. Sam had sewn a bazillion tops, mostly the same pattern (it’s not available anymore and it’s called the Wixford or something similar). Anyway, she went through all sorts of natural fibers for garments and what they are “good” for. I learned a lot and learned that I can wear my linen in the winter! Yay!
Sadly, despite every precaution, Covid reared its ugly head and one participant tested positive early in the week and had to isolate in a cabin alone. We voted to mask when indoors, changed to buffet style dining so we could eat outdoors. Thursday night was a clothing swap that was really fun and entertaining to watch. On Friday night we all tested before the garment stories evening event. All negative! And then on Saturday morning one of the teachers felt unwell and tested positive. She left camp to head home. I’ve been very grateful that I continue to test negative and hope that I’ve been able to avoid Covid this time. More will be revealed – I’ll test again on Monday night just to be sure.
All in all, it was a completely wonderful week at camp and I am excited to have one finished garment in my closet. I also bought (at the marketplace on Saturday) a Cal Patch dress. I’m wearing it today and I am so glad I did. I will have to find the pattern and make a couple more of these because it’s so comfortable and versatile, too. I am grateful to the women at camp who were kind, welcoming and so generously shared their stories as we sat and stitched. I was inspired by their skills and their finished items. I am looking forward to playing with fabric more as my confidence develops. I look forward to connecting on Instagram and I hope I can go back to camp again next year.
I was happy to get home this morning, unpack, kiss my sweet hubby, and have a good hot shower. It’s good to go to camp and it’s good to come home.
In the last twenty-four hours I’ve chosen two patterns that called for a CDD. I’m not sure that I’ve ever encountered a CDD before. No, really. It’s the truth.
That said, I do know what a CDD is! It’s a centered double decrease. Essentially, what it does is decreases one stitch on either side of the center stitch in a pattern. And they’re very pretty if used properly!
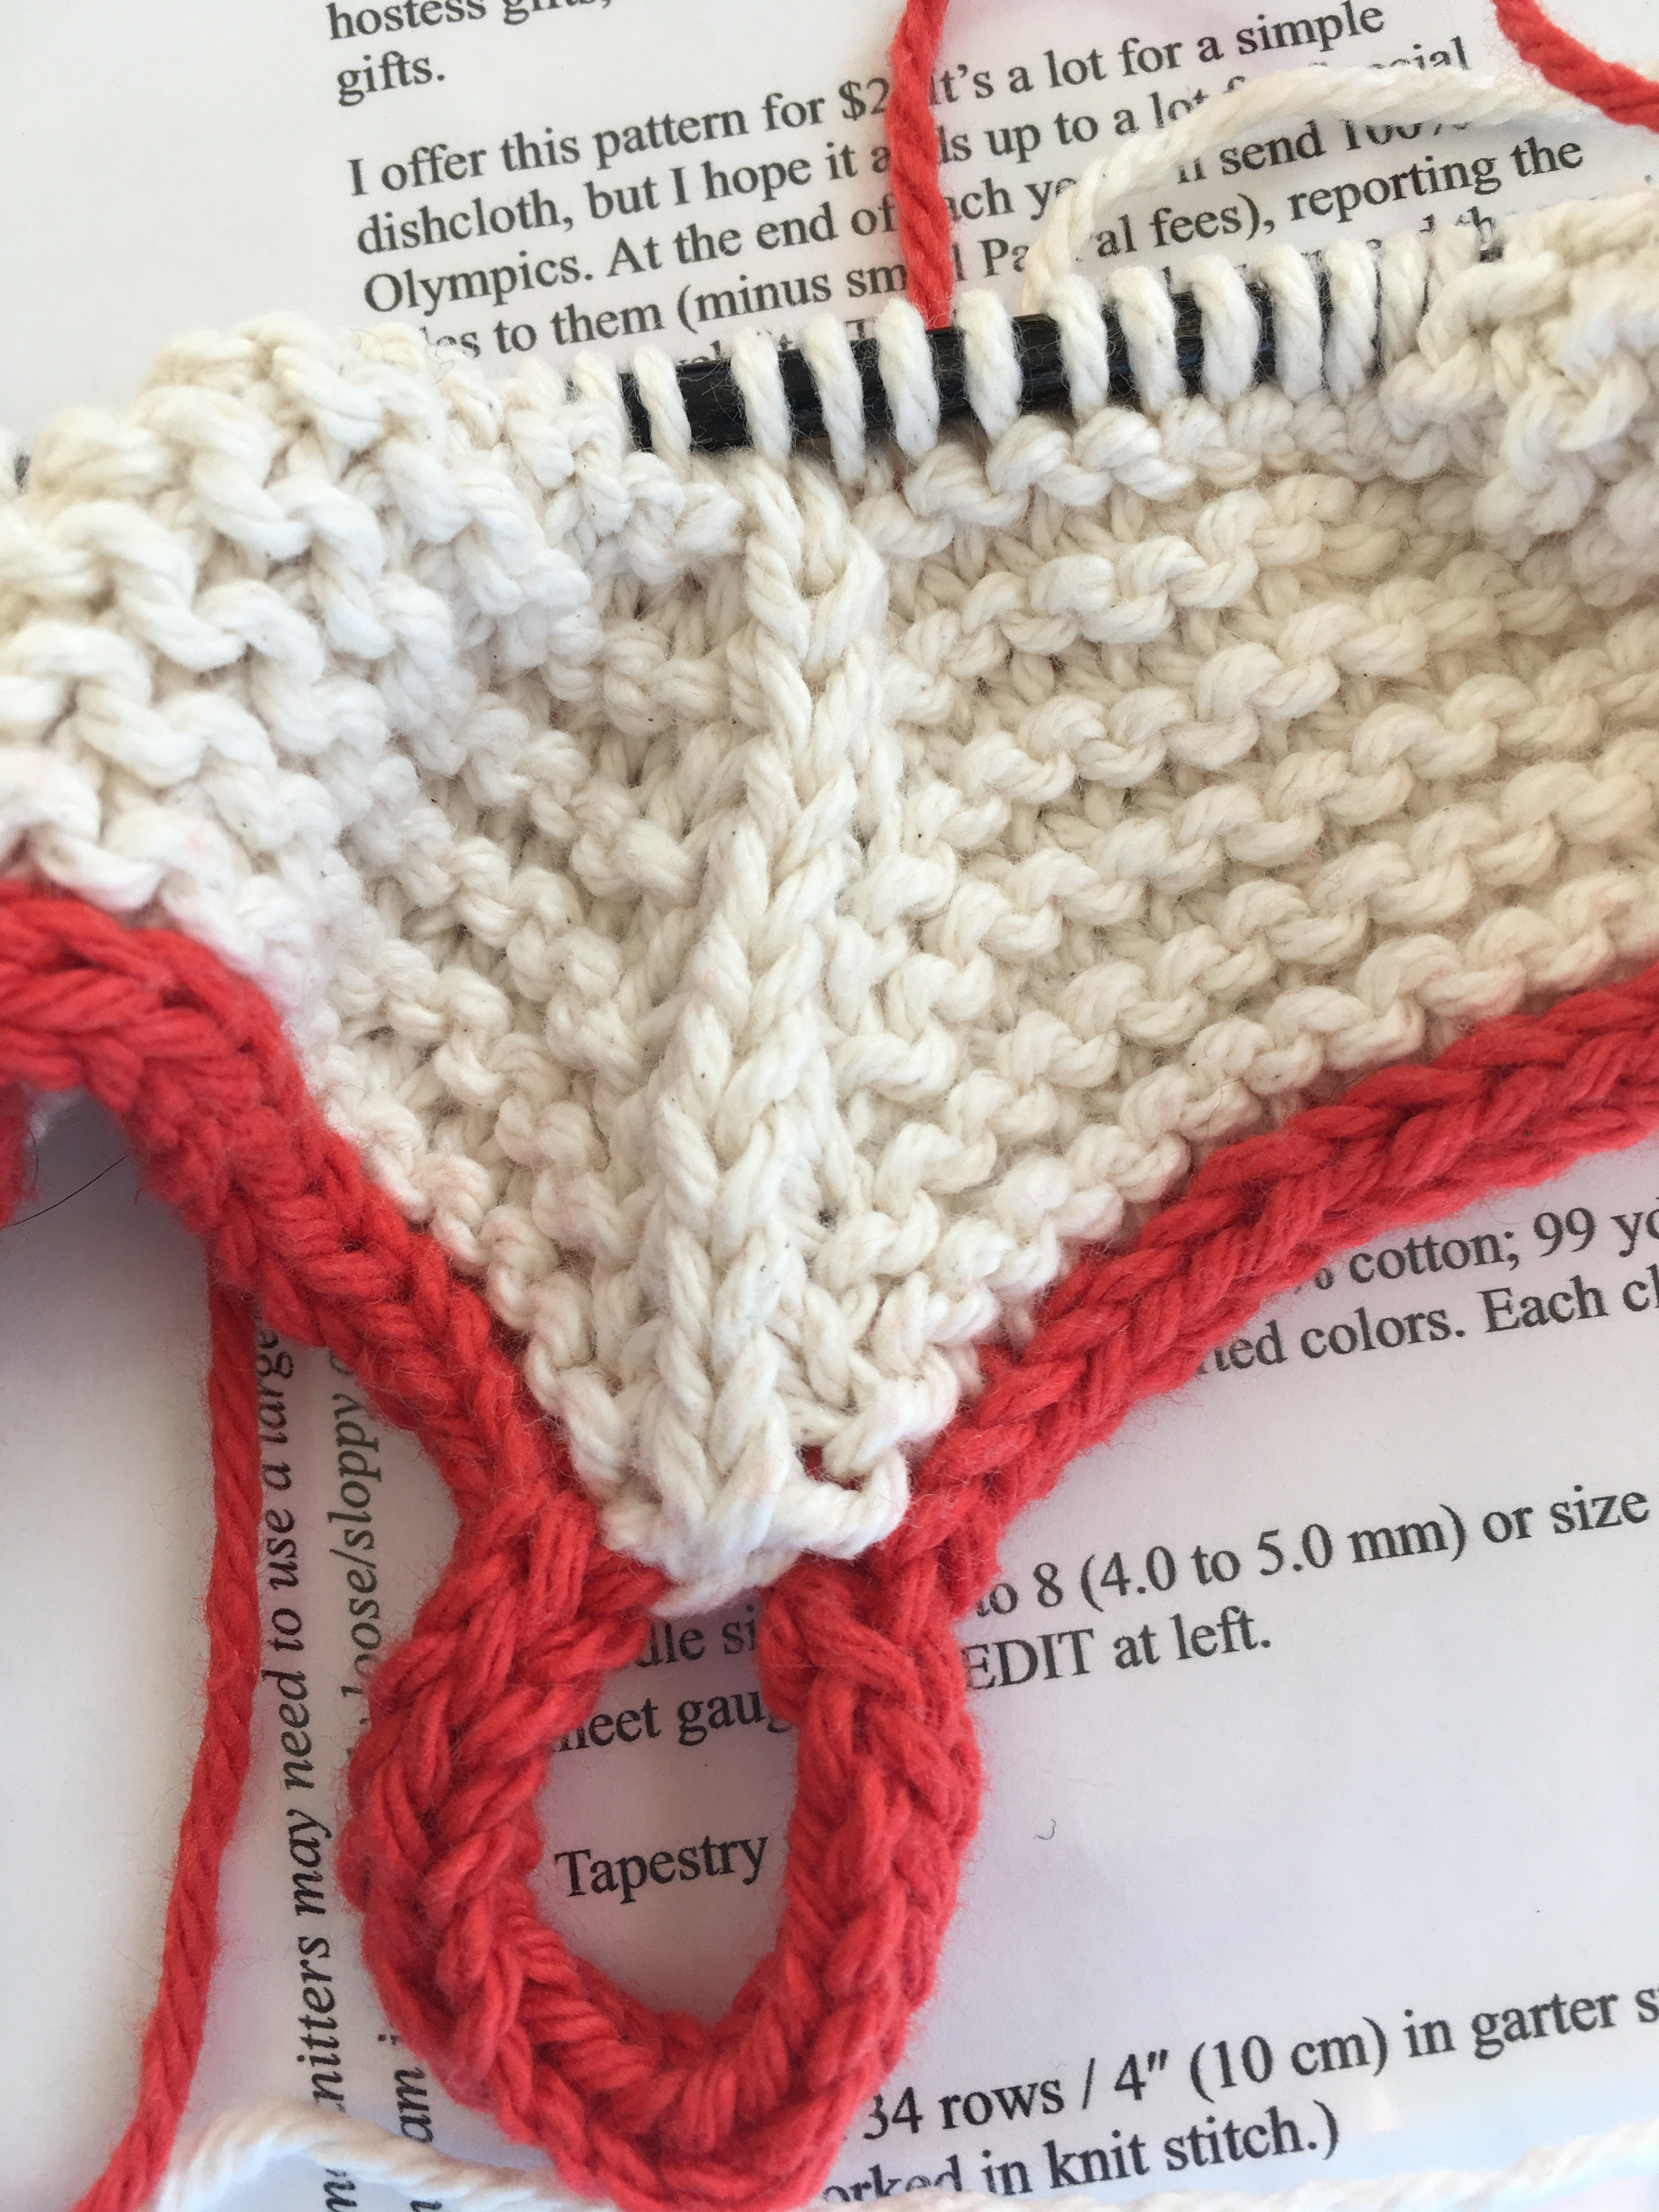
First up, a dishcloth pattern that I bought a couple of years ago to support the Special Olympics and it’s called Sinkmates by Lorilee Beltman ($2 on Ravelry). I had unrealistic expectations around this dishcloth pattern, having assumed that it was a mitered square. Wrong. It was a CDD! It’s fun to knit and the first thing I’d do next time is to make the i-cord on a larger needle than the rest of the project. Mine came out somewhat lop-sided. But it’s a dishcloth. Enough said.
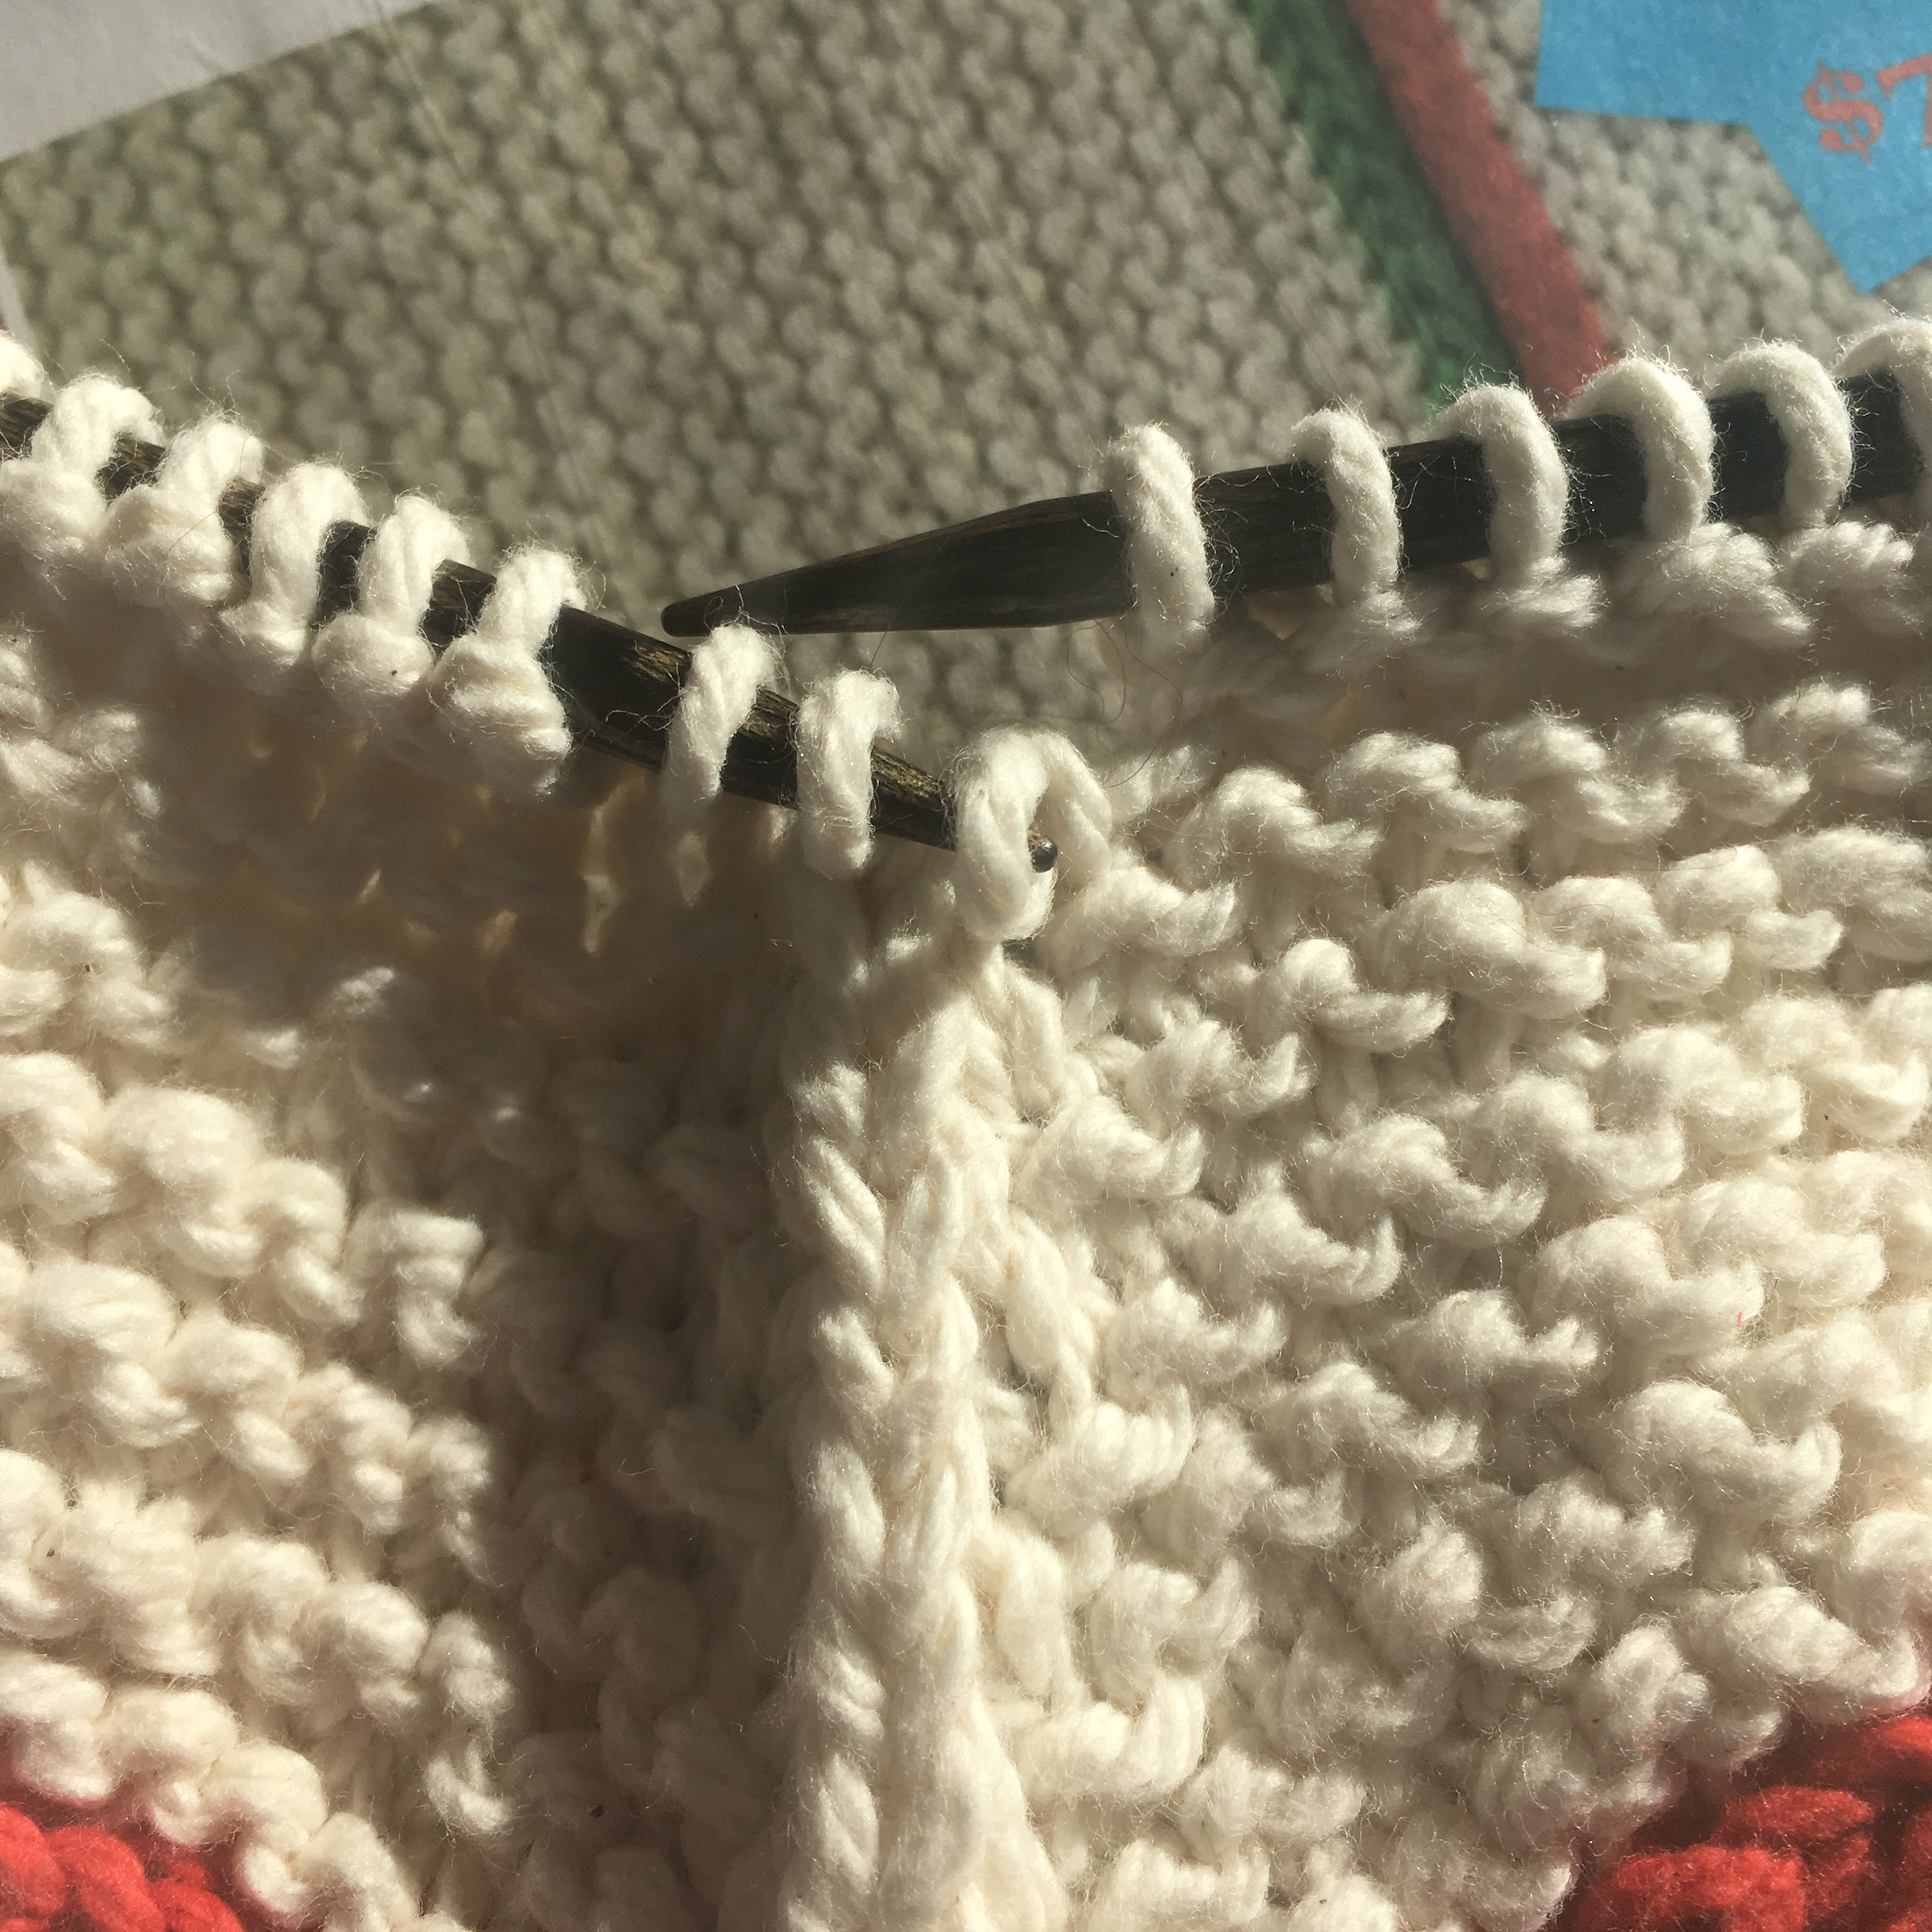
Next, Hartland Slipper Socks from Berroco Folio, Vol. 4. by Amy Christoffers. I loved these at first glance and knew I had to make them. Thankfully, they’ve got short cuffs and are knitted in worsted weight Berroco Ultra Wool which makes them knit up quickly. And since I had a whole weekend off this weekend, I have spent a lot of time in my studio. I love them and will be making more! There is a CDD in the “flower” design at the ankle. I’m going to show you my sequence of stitches on the dishcloth because it’s on almost-white cotton and you’ll be able to see the stitches really well!
So, here is my photo tutorial on how to do a CDD if you don’t know already …
The CDD on Sinkmates Dishcloth … rows of CDD straight up the middle!
Knit over to the stitch before the center stitch (the CDD “line”) … see photo below!
Remember, worked stitches are on the right-hand needle, stitches to be worked are on the left needle.
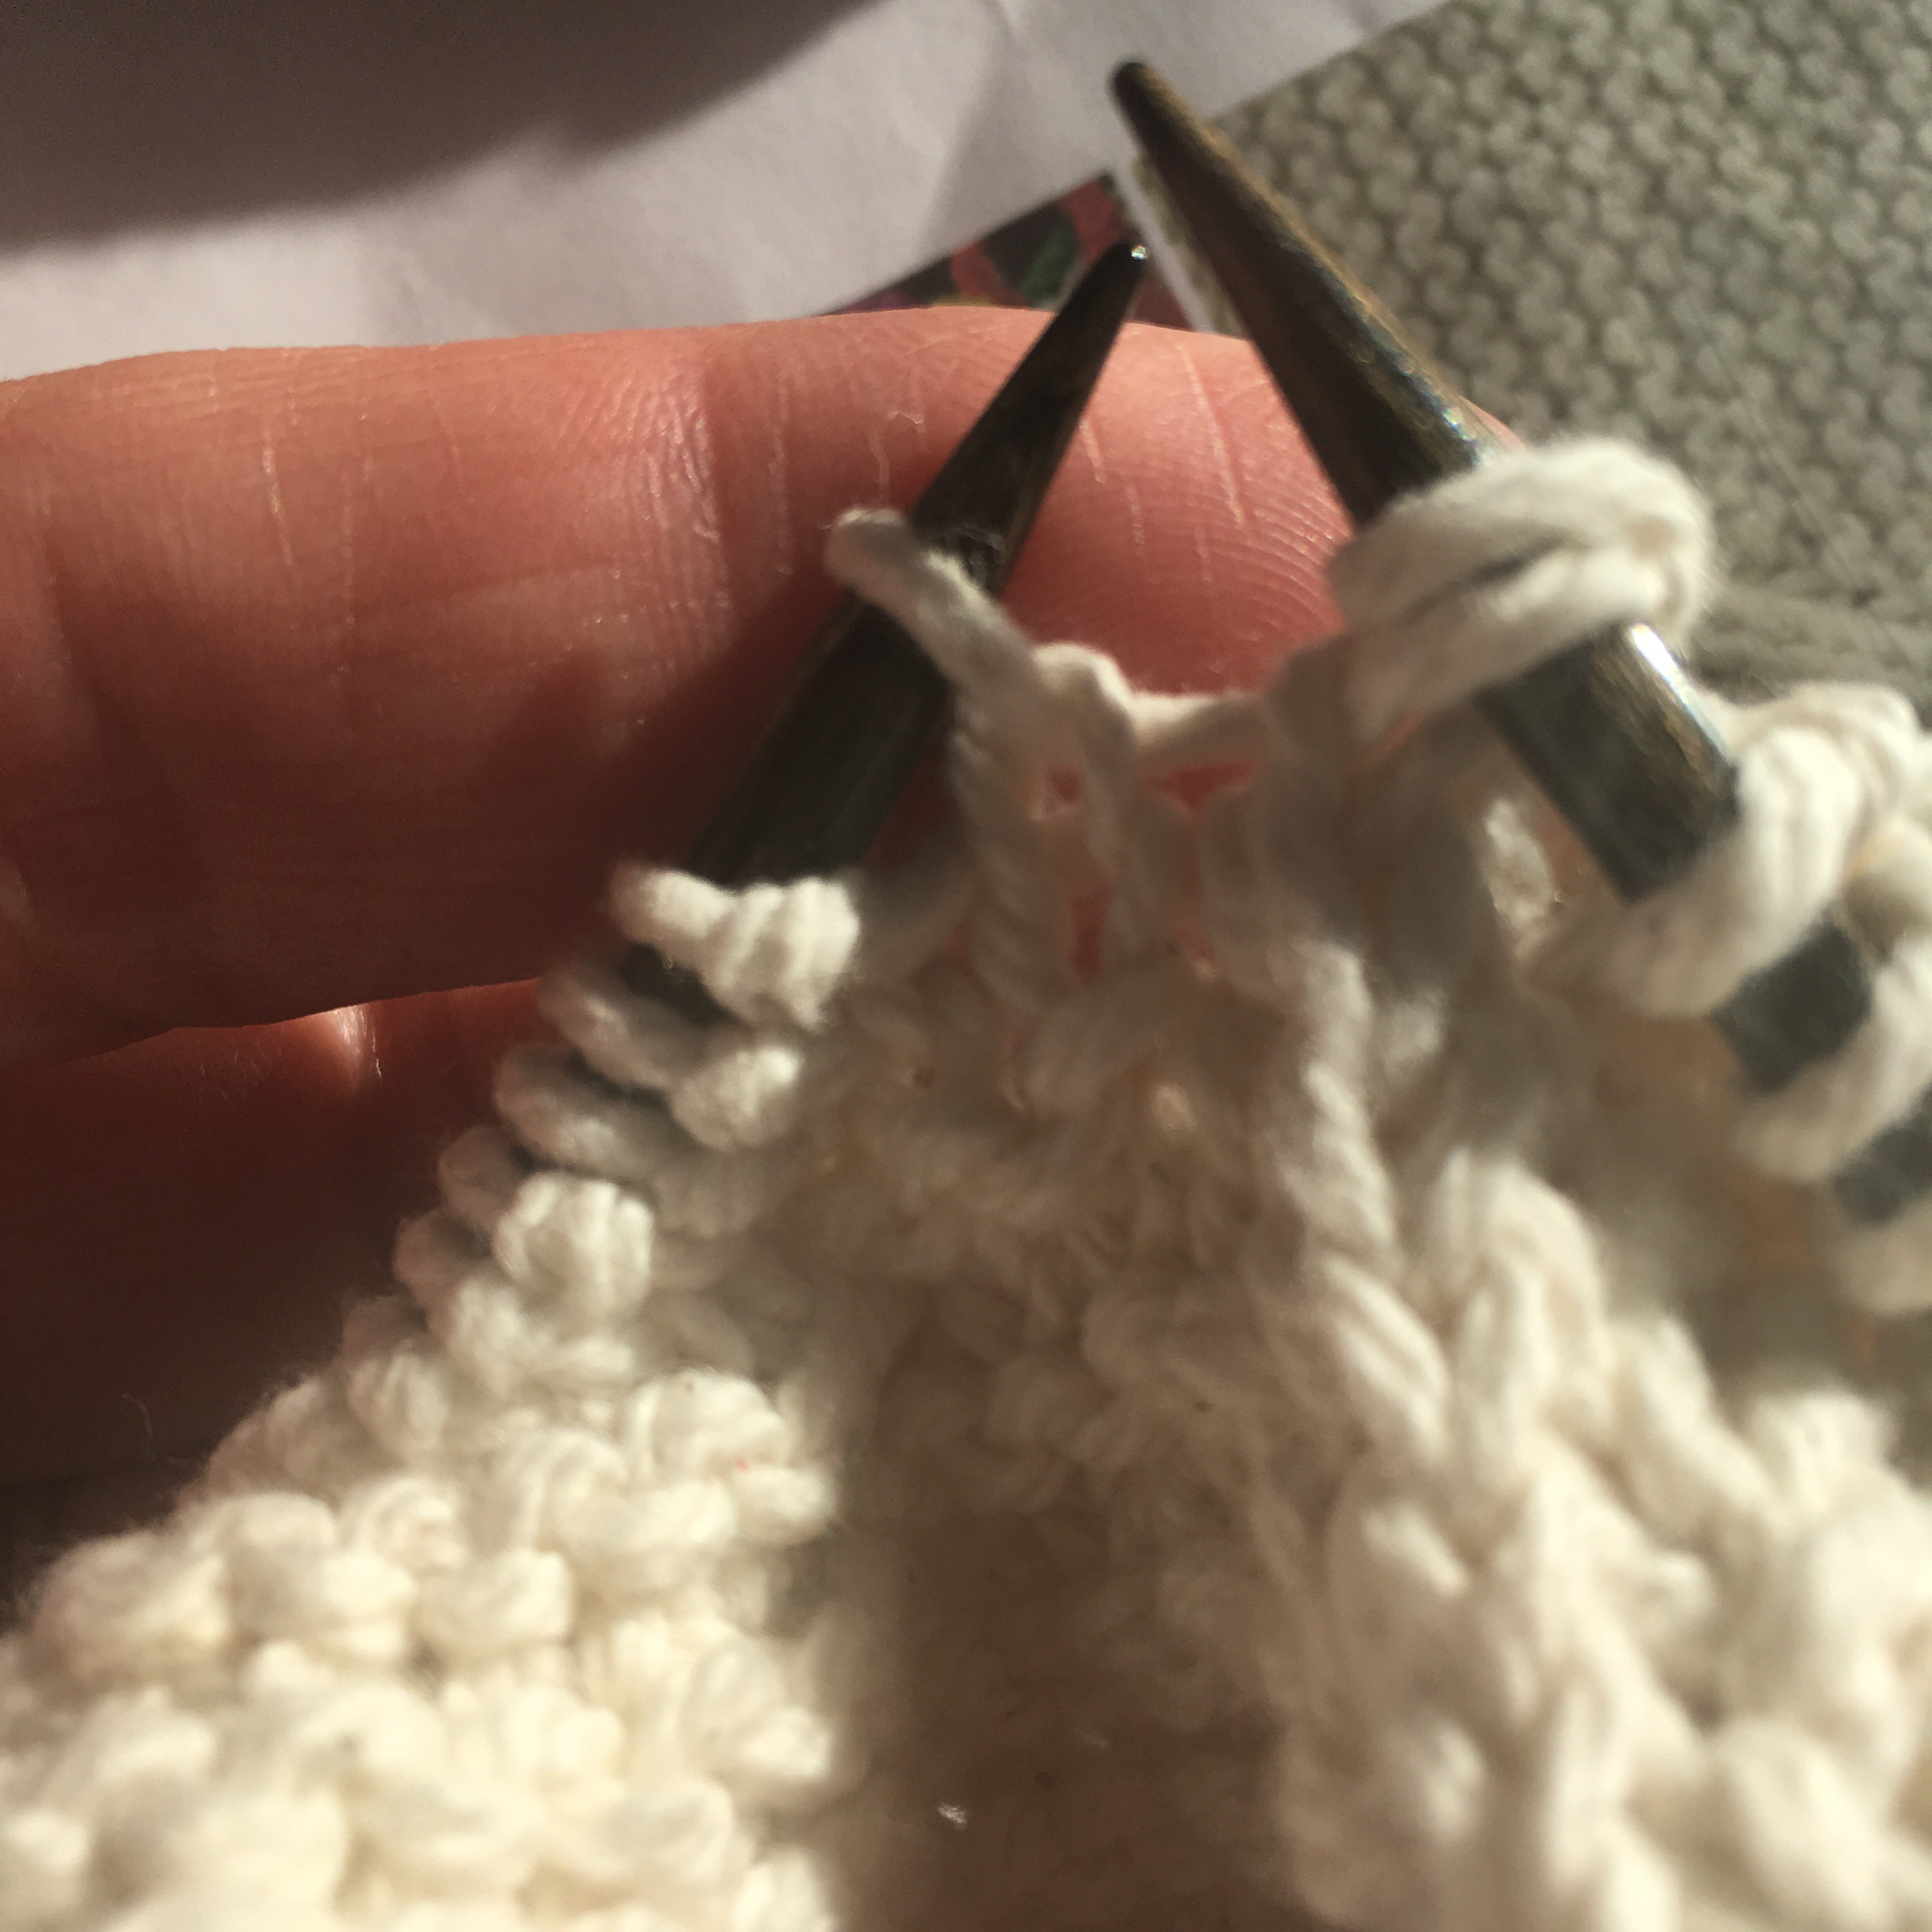
Knit up to one stitch before the center
You are going to work the stitch before and the center stitch together as if to knit two together (K2tog). (Insert the right needle knitwise into the two stitches at the same time from left to right as if you’re going to knit them together. Don’t wrap the stitches, though … see photo below.
You can see the ridges on my thumb nail. I need a manicure!
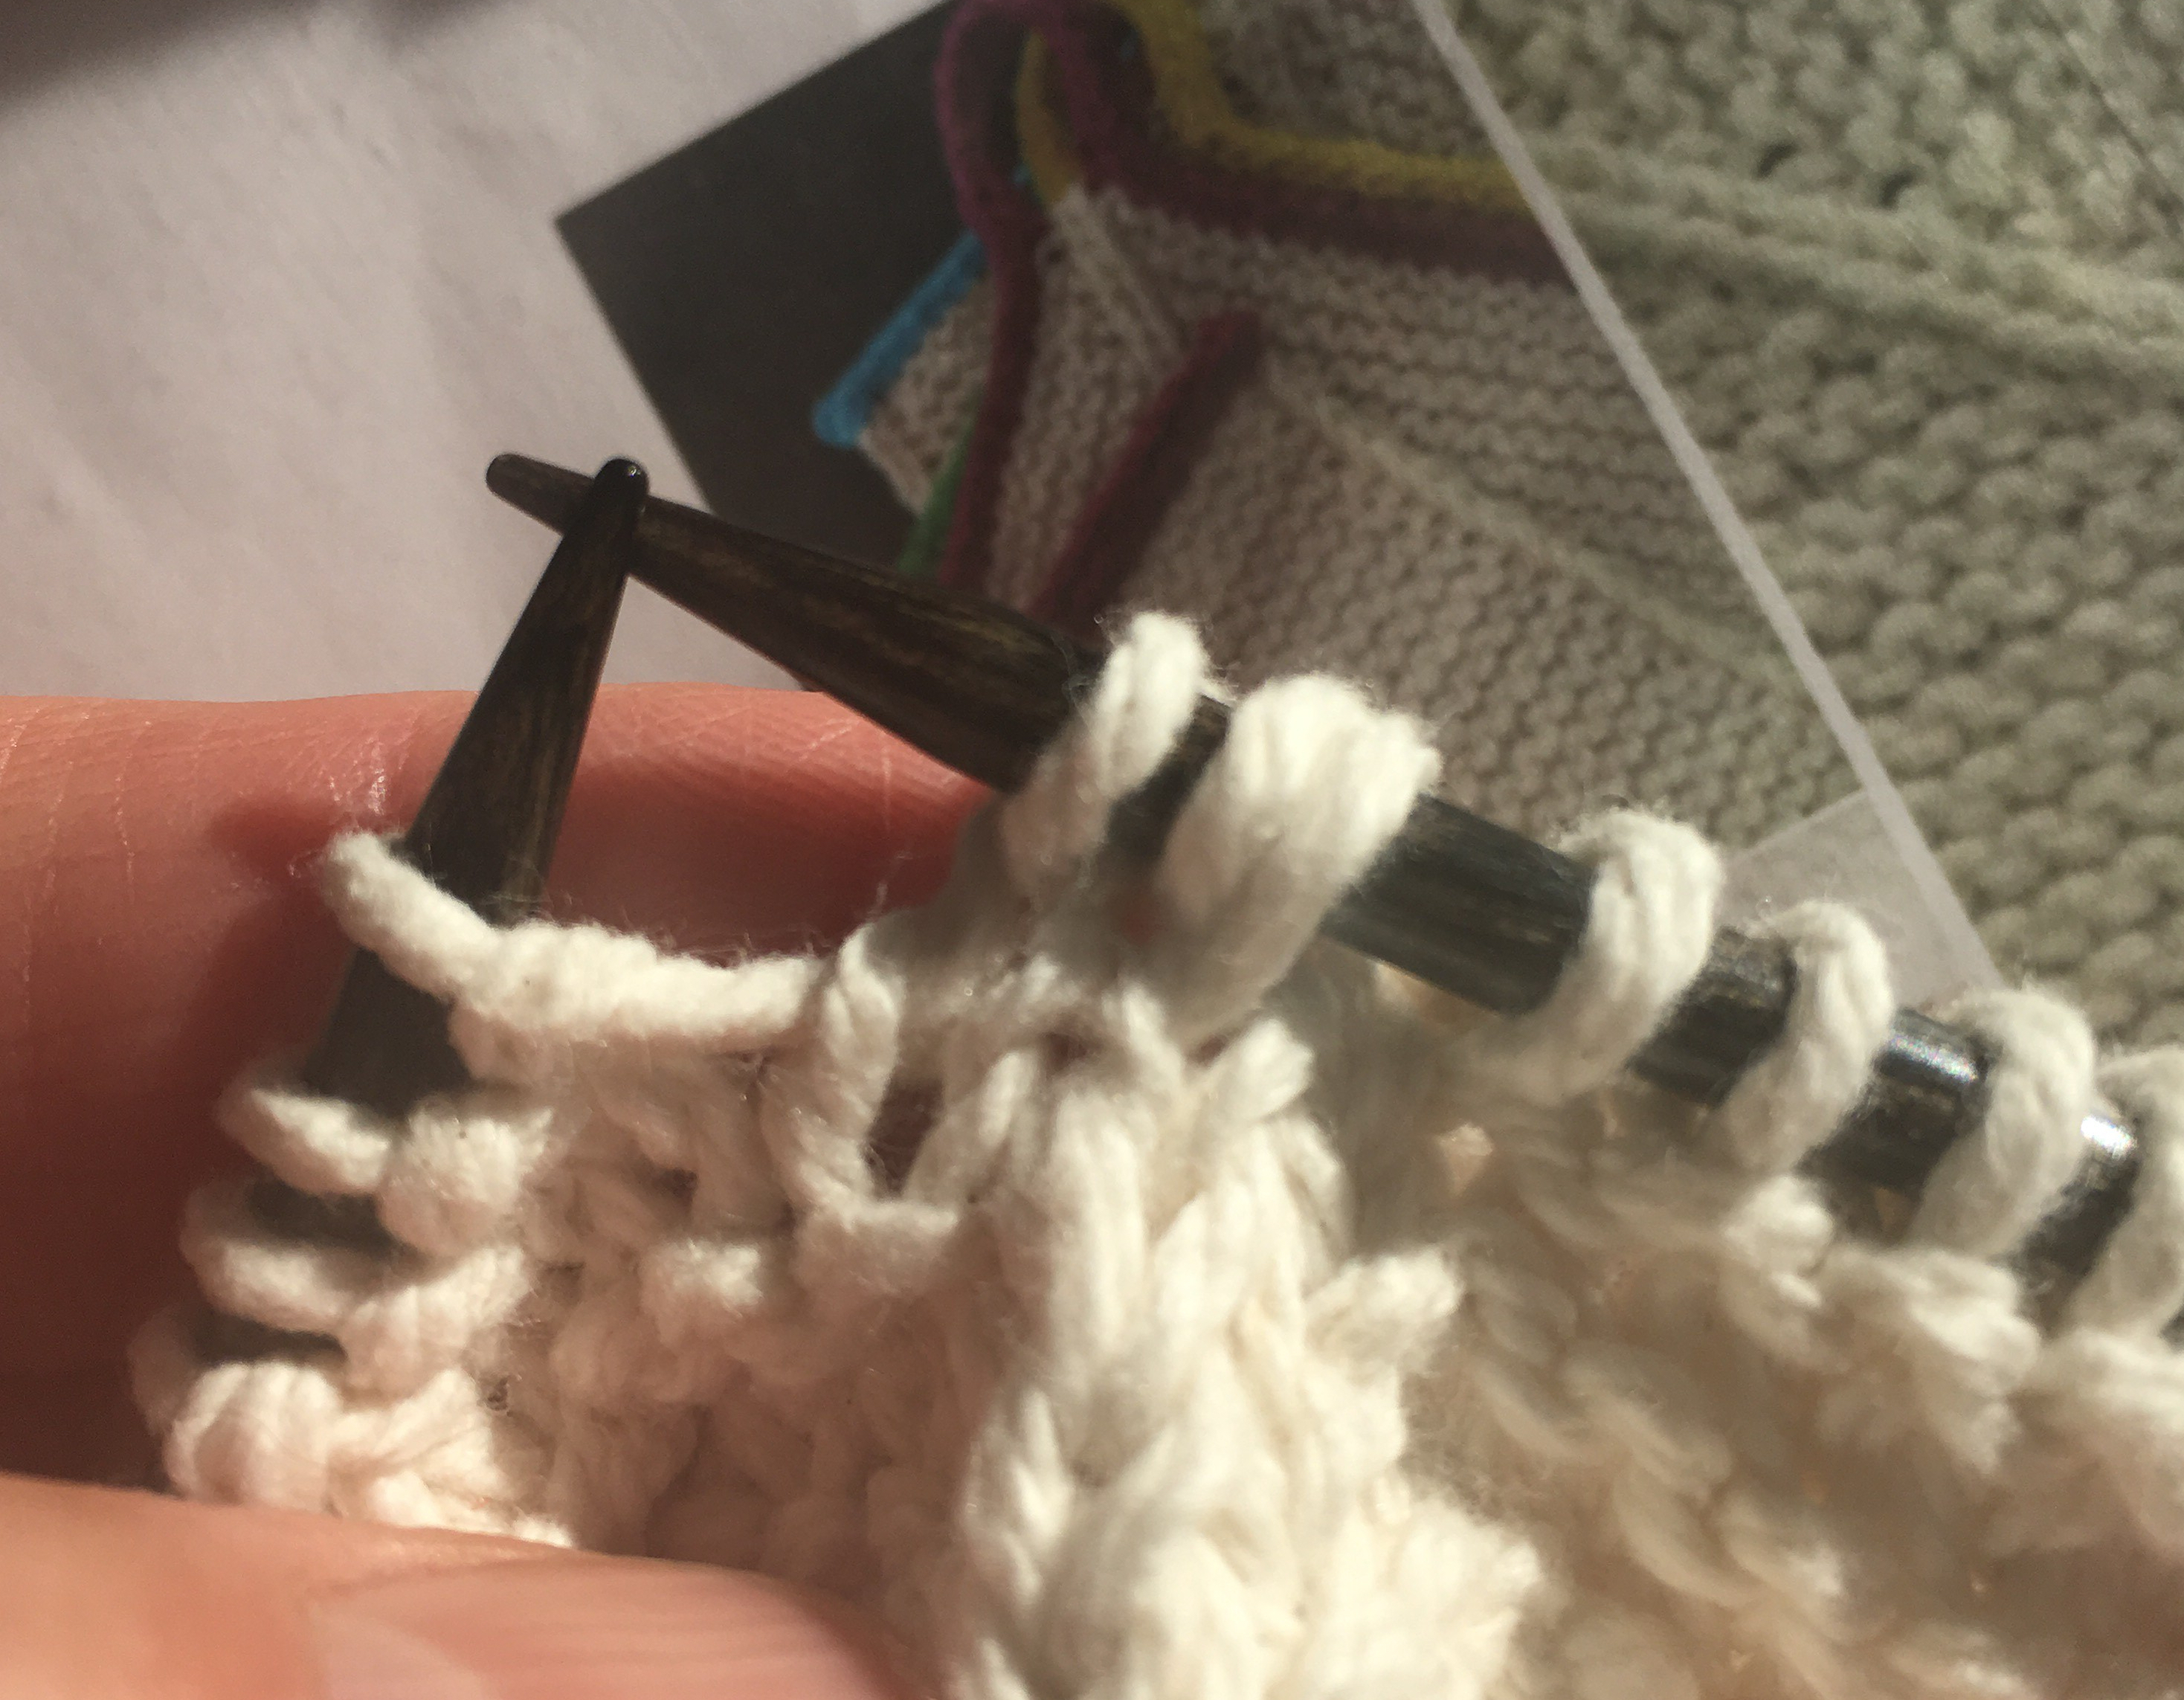
Next, complete the slip. Slip the stitches onto the right-hand needle by pulling the left needle back and out of the stitches, leaving them on the right needle. OK so far?
Knit the next stitch on the left needle. In the photo below you can see the two slipped stitches and then the knitted stitch sitting on the right needle. You can see them, can’t you?
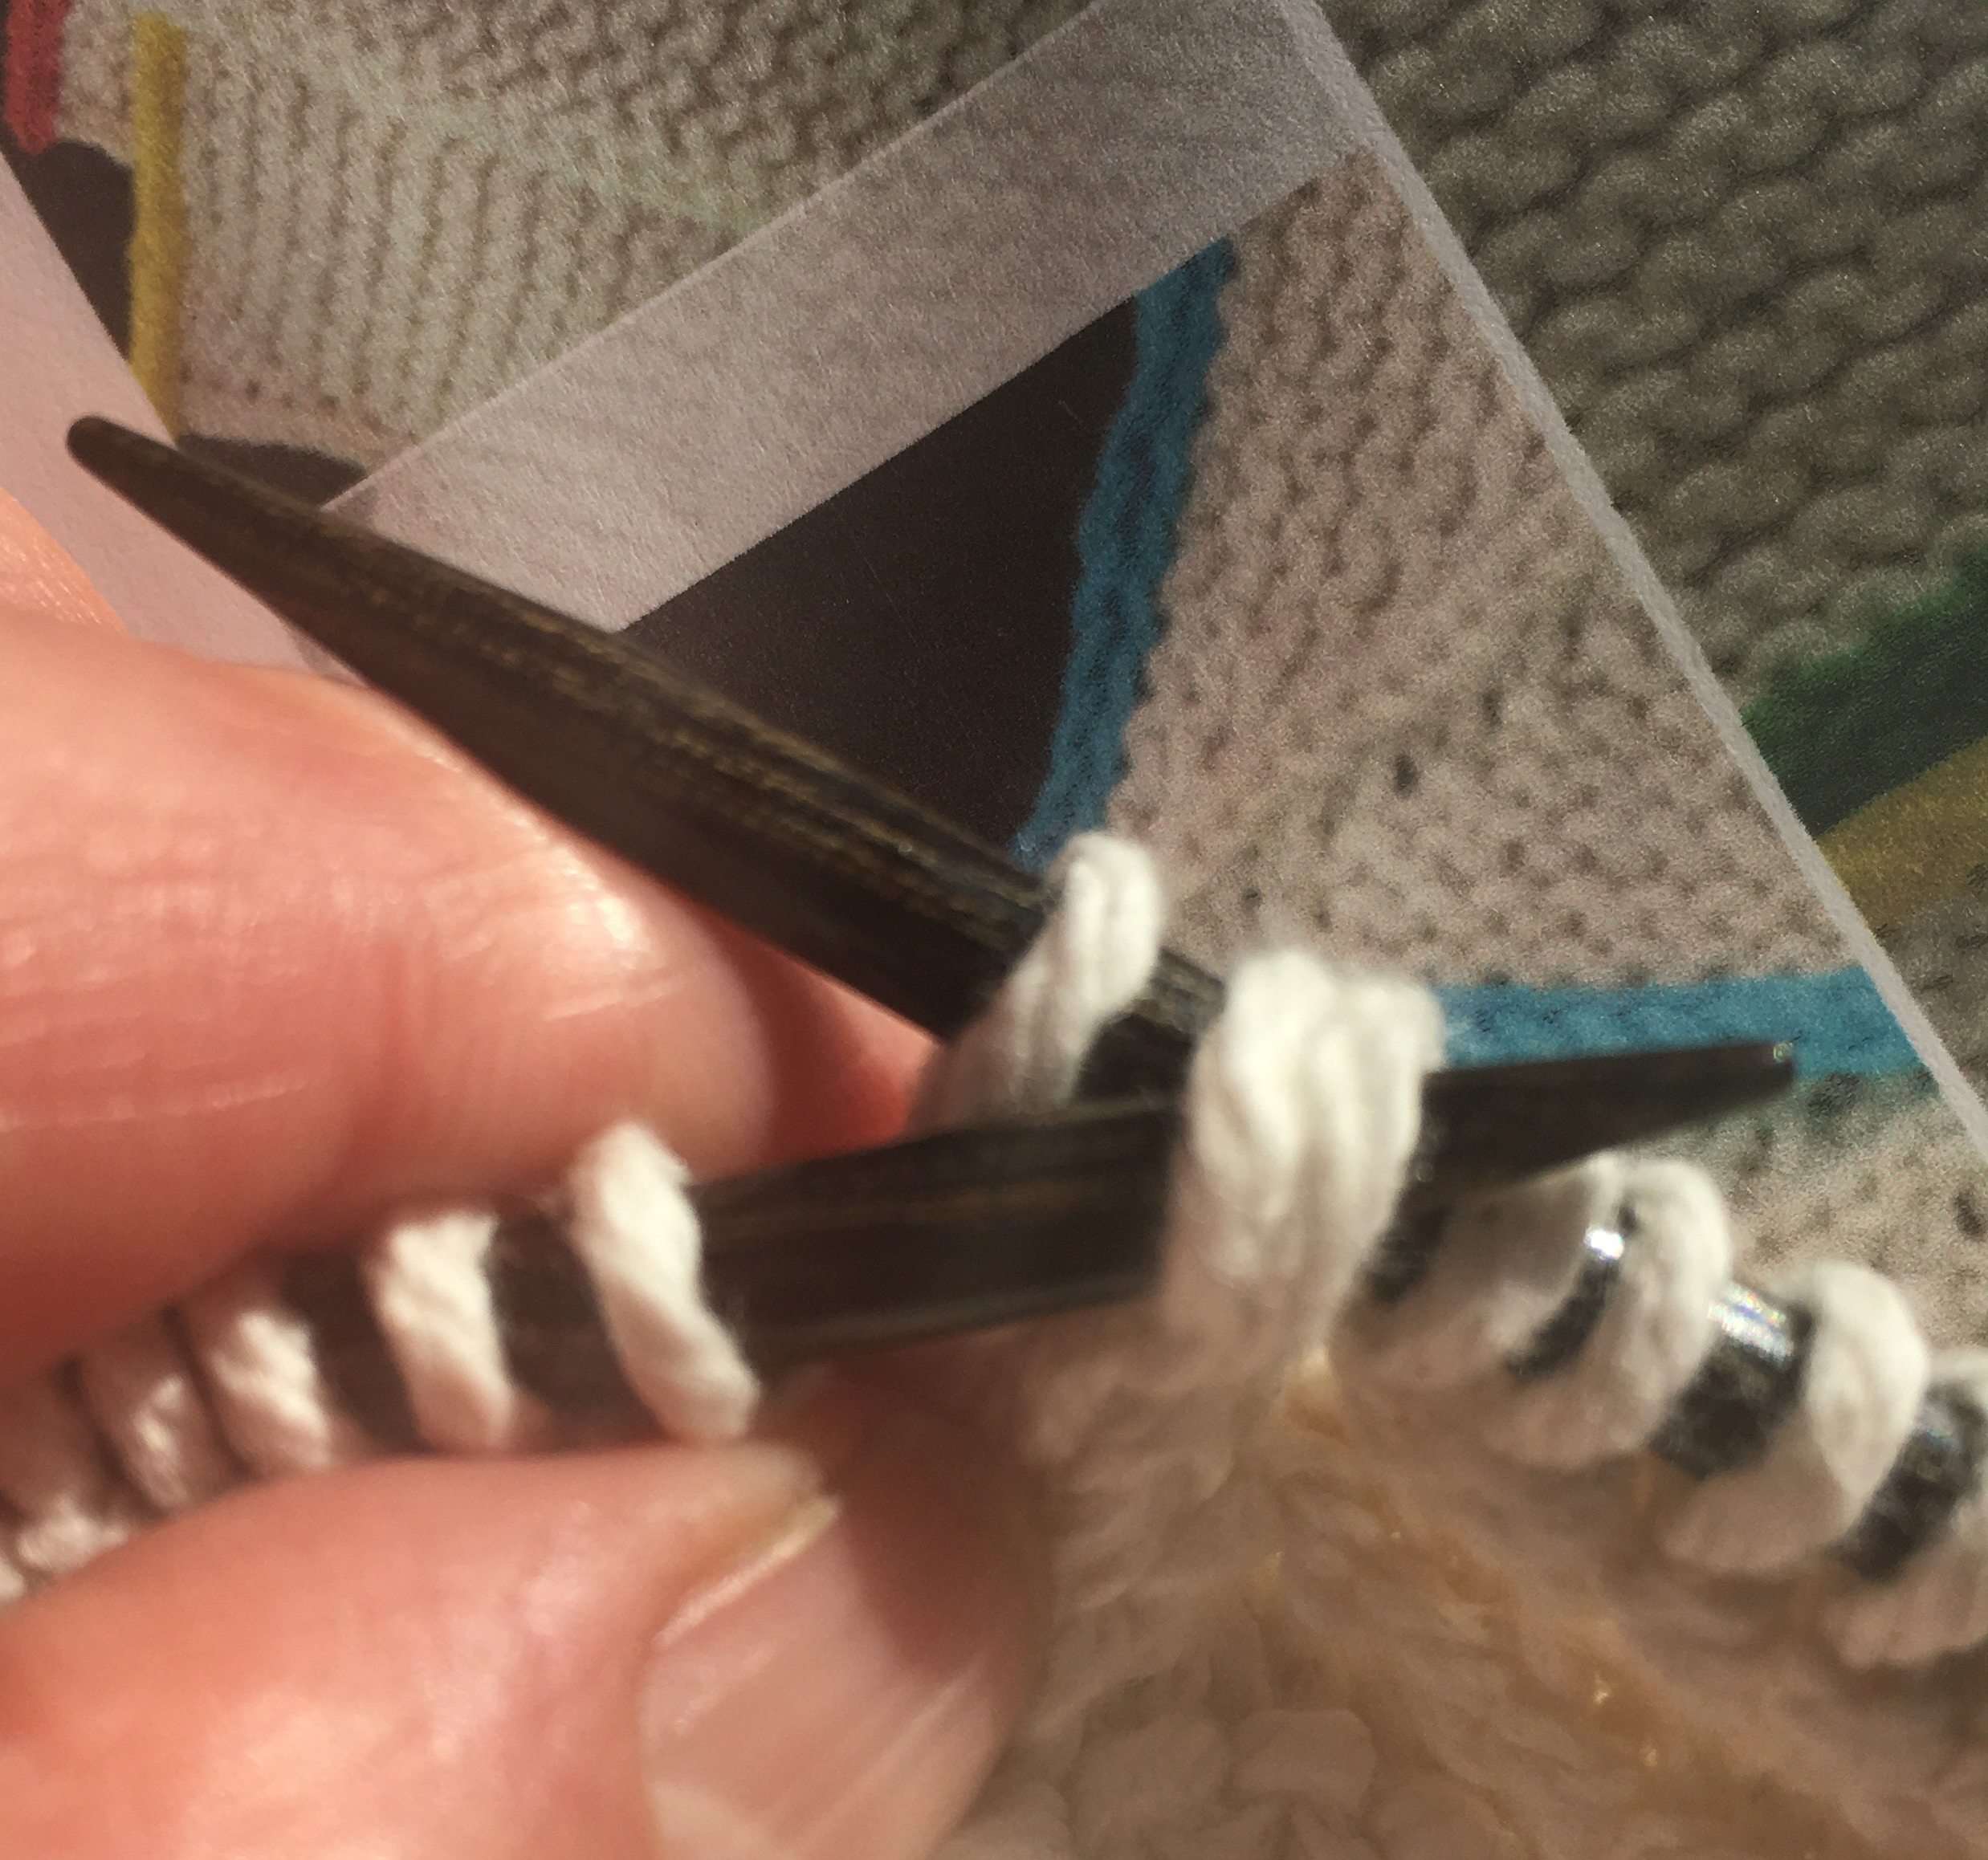
Now, get ready! You’re going to slip the two slipped stitches over the knitted one. (Insert the left needle into the two slipped stitches from left to right, holding your working yarn in your right hand and keeping some tension on the working yarn, slip the two stitches over the knitted one.)
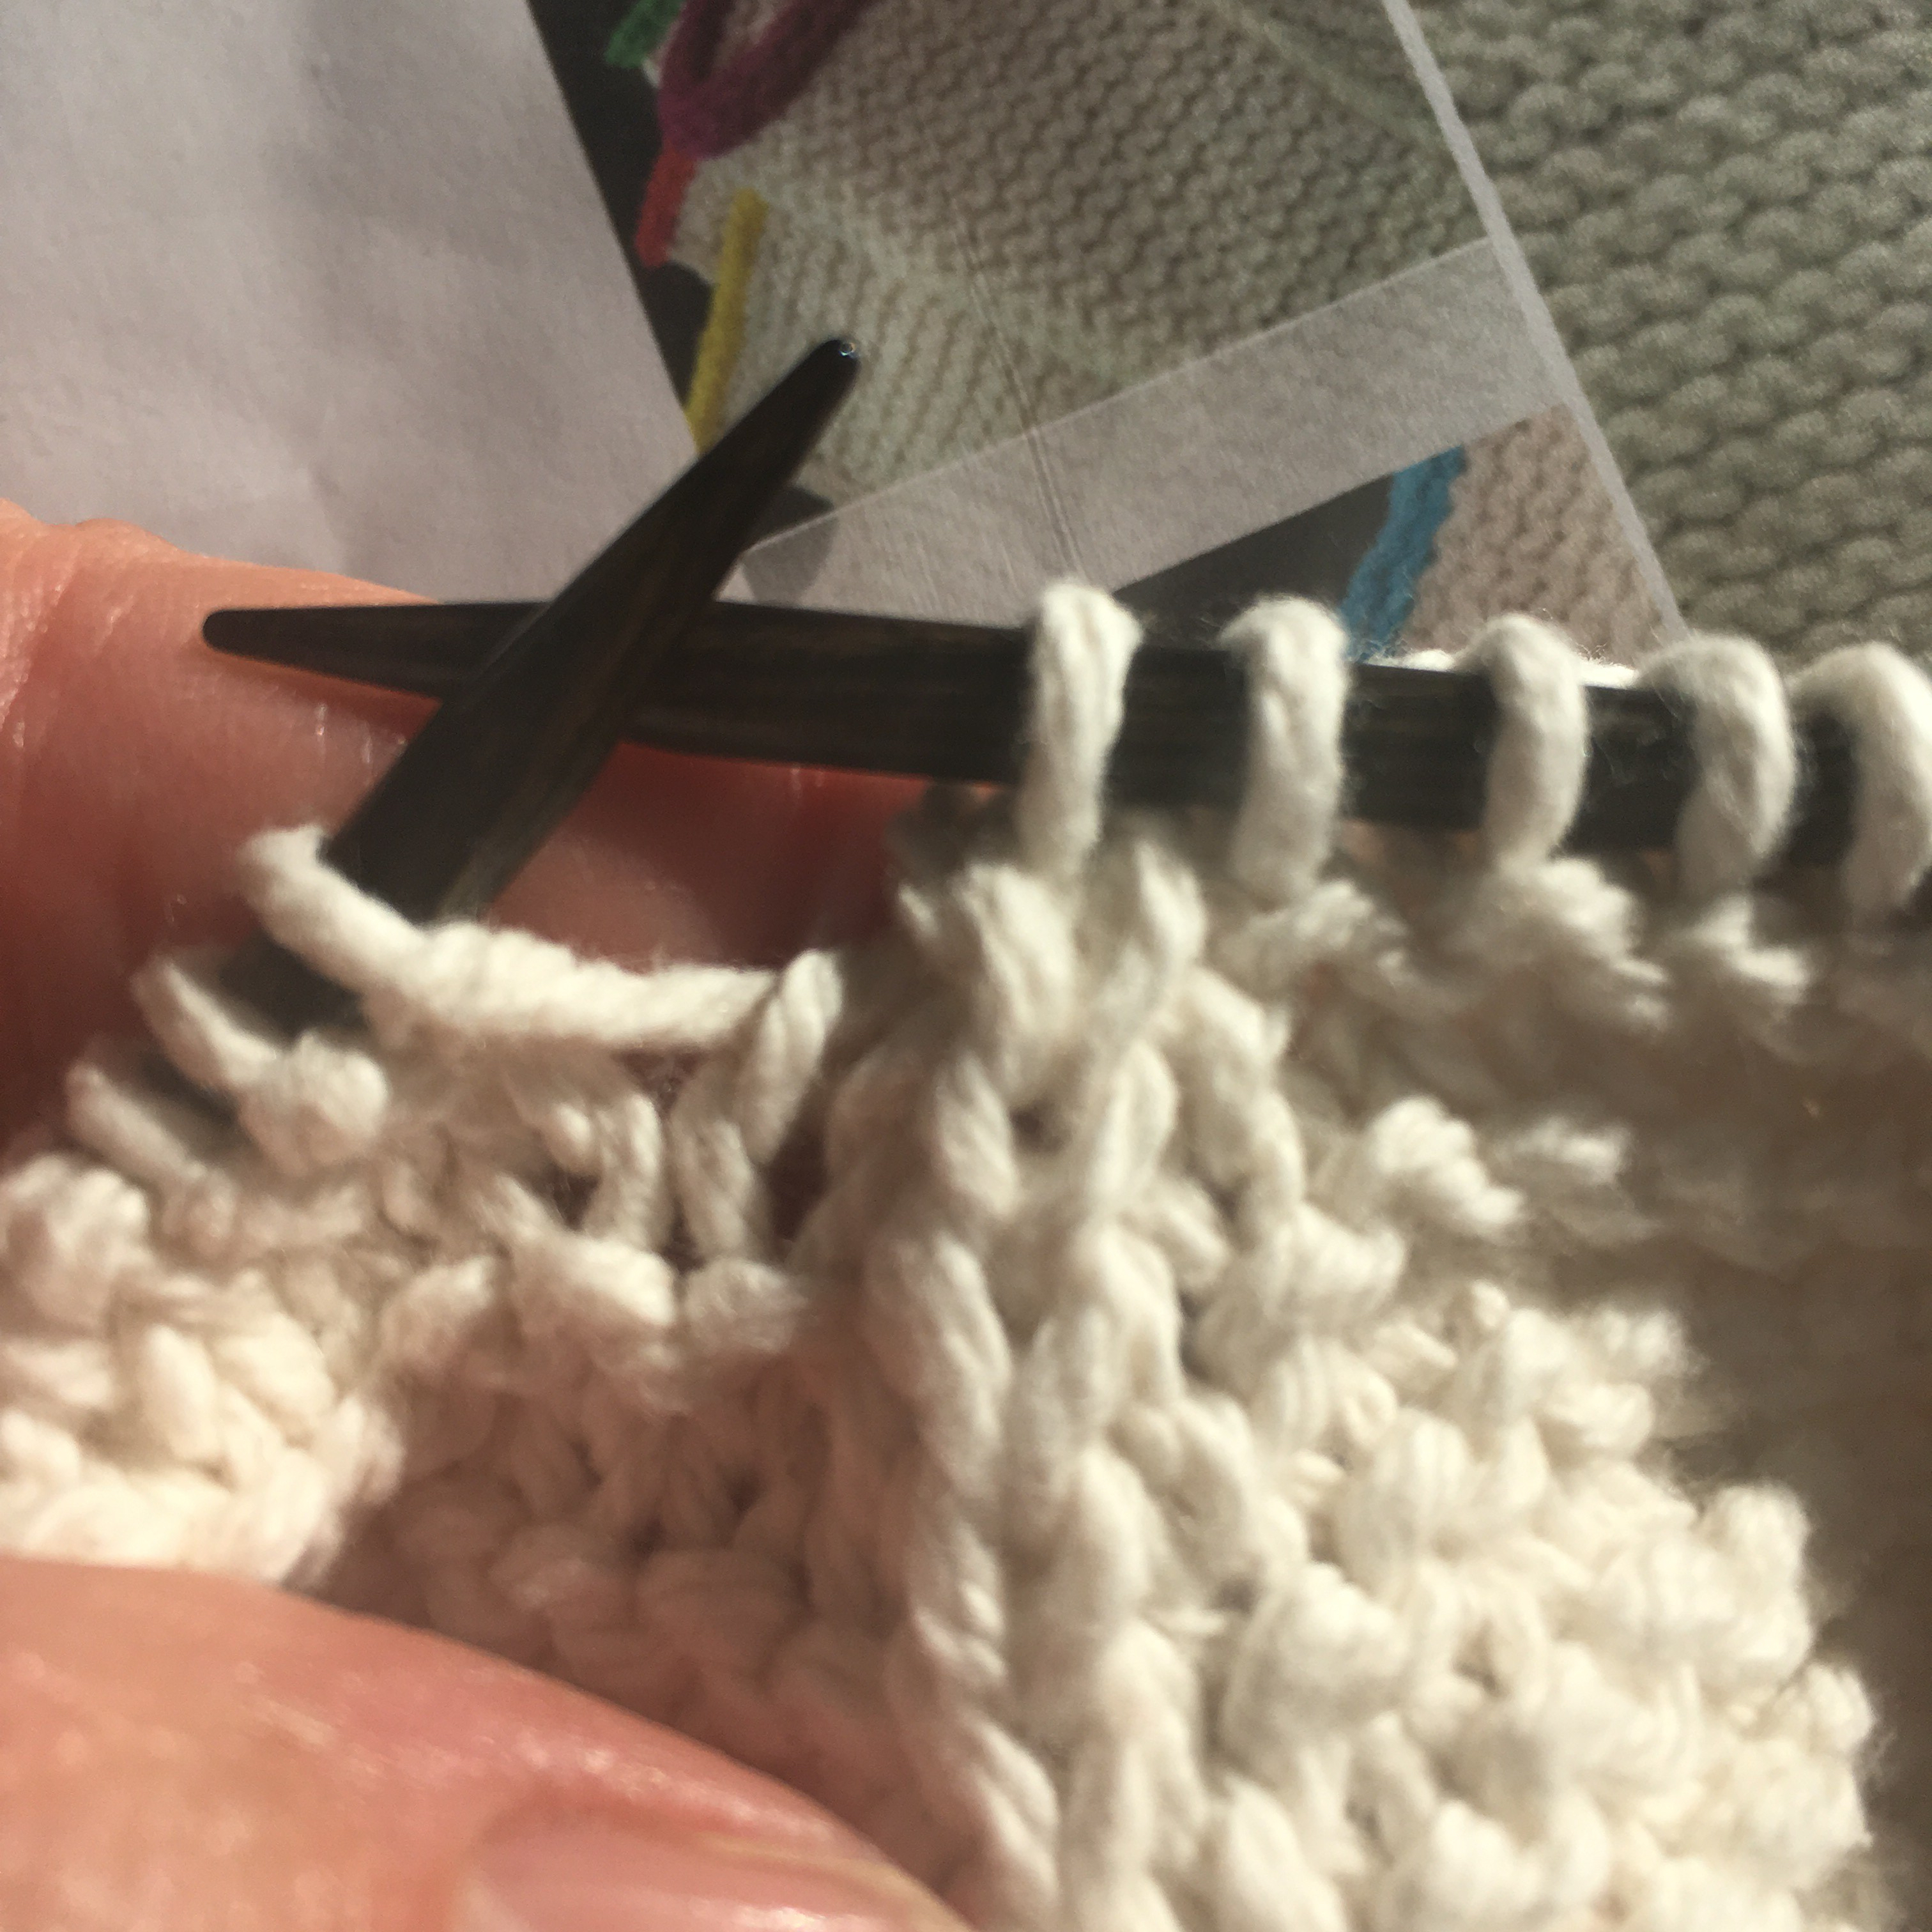
When it’s all said and done, and the stitches are slipped over, this is what you’ll see.
When the left needle is pulled out of the completed stitch, you will have something like this. Hopefully, it’ll be exactly like this! The CDD is in line with all of its sister stitches below and you’ll have two fewer stitches in total on your dishcloth.
See how pretty it is?
Go buy the pattern and give it a try! Share pictures with me of your attempts on my Queen Bee Knits by Linda Warner Facebook page! I’m excited for you to try something new!
Follow me on Facebook (Queen Bee Knits by Linda Warner) and Instagram @QueenBeeKnits. I’m also on Ravelry (lindar).