 I made a functional sewn item! Yes, I did! Me! The one who wasn’t allowed to sew costumes at my childrens’ school!
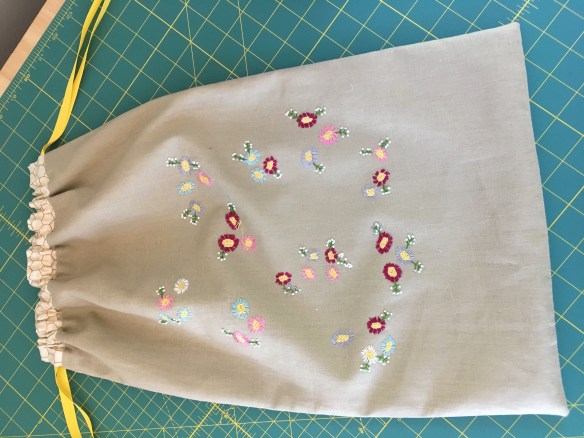
When I over-knitted this summer at Medomak Fiber Arts Retreat, I decided that I needed to take some time to rest my left arm. I decided that I would make a project bag, following (loosely) the project in my Making Magazine. Initially I thought I would make it exactly according to the pattern … until I had to figure out how to “trace” the pattern for the embroidery onto a piece of linen fabric. That was way too much to expect from me.
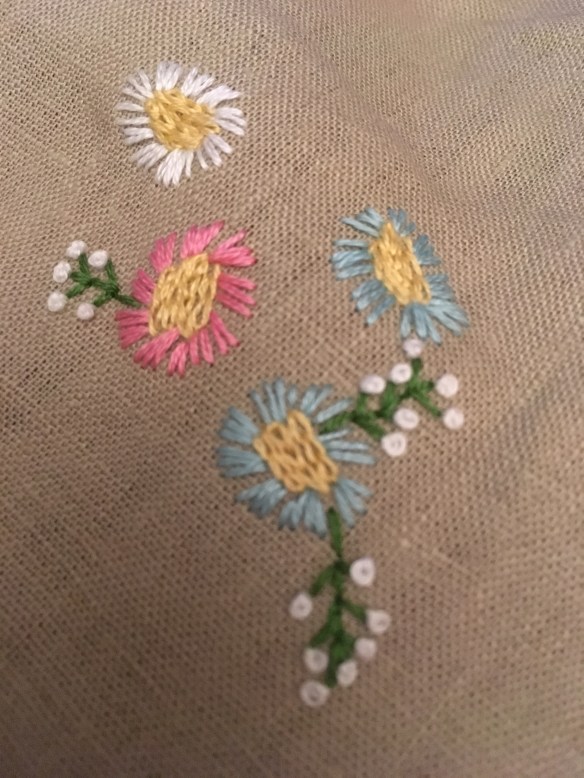
I decided to “wing it” with the pattern. No tracing. I went to my LYS (where I work) and bought some linen fabric, some embroidery floss and needles, too. I worked the stitches to make flowers on the linen. It wasn’t knitting but it was making something with my hands.
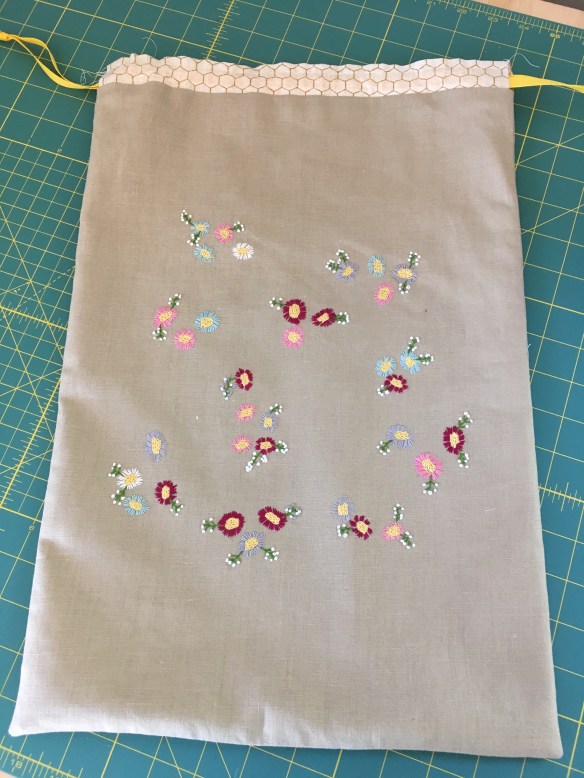
Once I was satisfied with the look of the embroidered flowers, I put the bag together.


Lucky for me, I have a pretty decent stash of fabric, too. I went (obviously) for some bee fabrics for the lining and the little bit that makes the space for the draw string. I chose a very light color for the lining because I hate a “black hole” in my purse or my knitting bag. I needed this to be super simple this first time. Next time, I’ll probably put a pocket in the lining. I love pockets!
I only had a bright yellow grosgrain ribbon for the drawstring. I have since found a ribbon (again, at my LYS) that is the same color as the lines on the fabric on top of my bag. I like it much better. I also made a small change to this part of the bag. I made it a little bit wider and stitched 1/4 inch along the top to make a more finished edge.
Ta-da! I’m very pleased and will proudly carry this project bag … filled with knitting … for a bunch of years!
Gone (not) knitting!
