
This weekend was Thanksgiving and I decided to cast on a new and very simple project. Something I can make to sell. Well, they’re already off to their new home and I got them started AND finished over the course of the weekend. And I didn’t sell them. My daughter wanted them and I was more than happy to oblige!
Several people have asked me for my pattern. It’s an antique pattern with a lot of little changes.
Fingerless Mitts in a Weekend
220 yards (100g) Worsted Weight wool yarn. For my sample I used Ella Rae Classic Wool in colorway #164; a heathery light purple.
Set of 4 US 4 double pointed needles
1 stitch marker
Lengths of scrap yarn or yarn holders to hold thumb stitches
Cuff: to make a women’s mitt cast on 44 stitches and K2, P2 for 3 inches. You can certainly make the cuff longer but remember you may need more yarn. On the last row (it can be an extra row after 3 inches, don’t sweat it. Just remember what you did so you can do the same on the second mitt) *k1, k1fb, p2, (k2, P2) ten times, repeat from * one more time. Two stitches increased. 46 stitches total.
Knit six rounds plain. (No increases or decreases.)
Begin Thumb Gusset increases:
K1fb, k1, K1fb, PM (place marker) knit to the beginning of the round.
Knit 1 round plain
K1fb, k3, K1fb, SM (slip marker) knit to the beginning of round.
Knit 1 round plain
Continue in this manner, increasing in the first stitch and the stitch before the marker, slip the marker and then knit to the end of the round; knit two rounds plain until there are 15 thumb stitches. (The stitches between the beginning of round and the marker are the thumb gusset, extra stitches to accommodate your thumb.) You need to remember to knit two rounds after the last increase round.
Now thread a needle with some scrap yarn about a foot long. Slip the 15 thumb stitches from the DPN to scrap of yarn (or a stitch holder. I like using a scrap of yarn because I can keep trying on the mitts.) You have 15 thumb stitches on holder and 46 stitches on the Dpns.
Cast on three stitches, connect again for knotting around the hand stitches. Knit all stitches in the round until the hand is as long as you want it to be. I like my hands (mostly) covered so I knit until the hand is about at the first joint of my pinkie finger.
Begin ribbing: k2tog, K1, (P2, K2) to the last two sts, P2. 48 sts total.
Continue on pattern as set (Knit 2, Purl 2 around) for five rounds. Bind off in pattern.
Thumb: slip 15 thumb stitches onto dpns. cast on 5 stitches at the «crotch » of the thumb (where you cast on three stitches.)
Knit 3 rounds plain
K2, P2 around for five rounds. Bind off in pattern.
Make the second mitt just the same.
Weave in ends. Block gently. Or just wear them!
Mind you, I haven’t had these mitts test knit or tech edited. I’m happy to take your suggestions and edits should you find « issues » when you’re knitting.
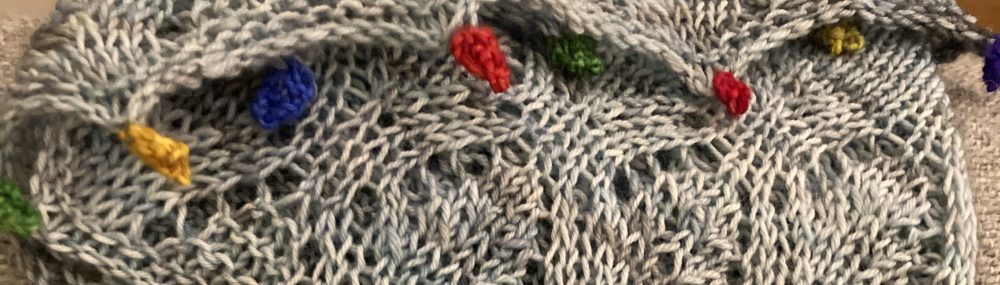
These are the mitts that I taught last session at the adult education program here. I also taught my students to embroider on the fabric knitted. There are lots of pictures out there of embroidery on knitting. I also used this pattern for these mitts with self-patterning yarn. Be fearless! Have fun!

Gone knitting.
Follow me on Instagram @QueenBeeKnits
I’m also on Facebook: Queen Bee Knits by LindaWarner
I’m lindar on Ravelry
