Finished!

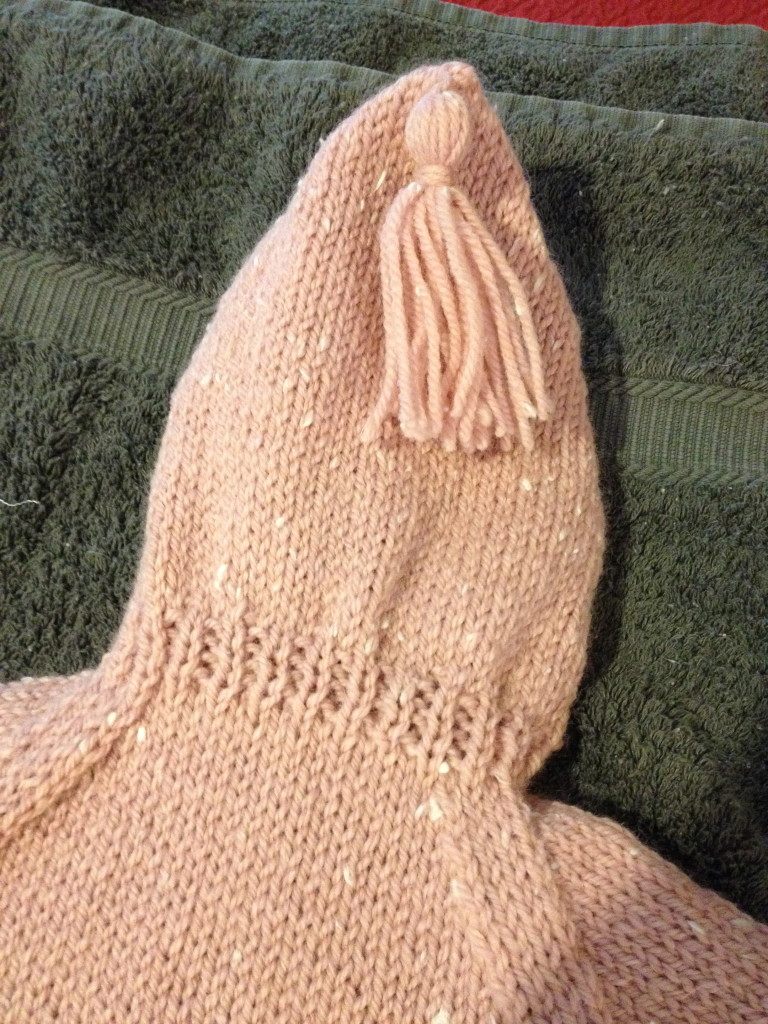
Woo! Hoo! Yay me!!! My very first Covid-19 Pandemic FO! Socks for my neighbor’s big birthday.

I find it difficult to buy gifts for friends. I want to get them something they will love. I put a lot of pressure on myself to find the perfect, most wonderful gift. So, often I am stuck with no good ideas. This time, I decided to give my neighbor a ball of yarn and a promise that I would make her socks.

She traced her foot and brought the yarn back to me a few days ago. Today I delivered the finished pair to her and she loves them. Yay!!!

The yarn is EYC Fair Isle (aran weight) and I used the most wonderful sock pattern, Yankee Knitter’s Classic Socks for the Family (#29). I love this pattern because it provides the best-fitting socks for baby through adult man and you can tailor the socks to the yarn you’re using. In this case, the yarn is self-patterning so I wanted a very simple sock so the pattern shows. (If I’d used cables or patterns they’d have been lost in the pattern of the yarn.)

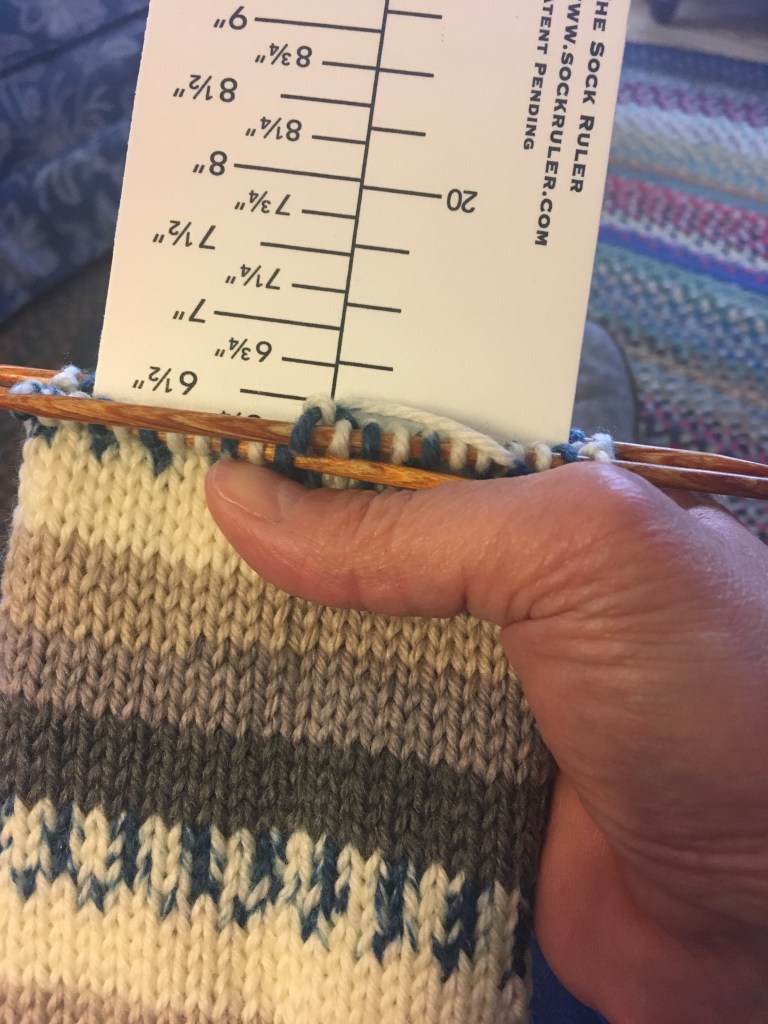
Every pair of socks that I make, I use my “most favoritest” sock knitting tool, the Sock Ruler. I was given my adult sock ruler by my sister-in-love. I wasn’t sure I’d use it because I have knitted so many socks. I didn’t think I needed it. Well, was I wrong! I use it to measure the length of the leg and the the BEST part is when you’re knitting the foot – and the sock ruler fits down into the heel so you can measure how far you’ve knitted the foot without the fiddly heel/gusset interference! You know, the part where you try to lay the sock flat with three needles and measure from the outside at the end of the heel to the needles? Well, the sock ruler takes all that fiddly stuff out of the equation! You can find the Sock Ruler at Yardgoods Center in Waterville, Maine or online. I wish I had come up with the idea but I don’t make any money if you buy them.

Gone knitting!

To learn more about my knitting projects, find me on Facebook (QueenBeeKnits by LindaWarner), Instagram (@queenbeeknits) and Ravelry (lindar).

Fingerless Mitts in a Weekend – a free pattern

This weekend was Thanksgiving and I decided to cast on a new and very simple project. Something I can make to sell. Well, they’re already off to their new home and I got them started AND finished over the course of the weekend. And I didn’t sell them. My daughter wanted them and I was more than happy to oblige!

Several people have asked me for my pattern. It’s an antique pattern with a lot of little changes.

Fingerless Mitts in a Weekend

220 yards (100g) Worsted Weight wool yarn. For my sample I used Ella Rae Classic Wool in colorway #164; a heathery light purple.

Set of 4 US 4 double pointed needles

1 stitch marker

Lengths of scrap yarn or yarn holders to hold thumb stitches

Cuff: to make a women’s mitt cast on 44 stitches and K2, P2 for 3 inches. You can certainly make the cuff longer but remember you may need more yarn. On the last row (it can be an extra row after 3 inches, don’t sweat it. Just remember what you did so you can do the same on the second mitt) *k1, k1fb, p2, (k2, P2) ten times, repeat from * one more time. Two stitches increased. 46 stitches total.

Knit six rounds plain. (No increases or decreases.)

Begin Thumb Gusset increases:

K1fb, k1, K1fb, PM (place marker) knit to the beginning of the round.

Knit 1 round plain

K1fb, k3, K1fb, SM (slip marker) knit to the beginning of round.

Knit 1 round plain

Continue in this manner, increasing in the first stitch and the stitch before the marker, slip the marker and then knit to the end of the round; knit two rounds plain until there are 15 thumb stitches. (The stitches between the beginning of round and the marker are the thumb gusset, extra stitches to accommodate your thumb.) You need to remember to knit two rounds after the last increase round.

Now thread a needle with some scrap yarn about a foot long. Slip the 15 thumb stitches from the DPN to scrap of yarn (or a stitch holder. I like using a scrap of yarn because I can keep trying on the mitts.) You have 15 thumb stitches on holder and 46 stitches on the Dpns.

Cast on three stitches, connect again for knotting around the hand stitches. Knit all stitches in the round until the hand is as long as you want it to be. I like my hands (mostly) covered so I knit until the hand is about at the first joint of my pinkie finger.

Begin ribbing: k2tog, K1, (P2, K2) to the last two sts, P2. 48 sts total.

Continue on pattern as set (Knit 2, Purl 2 around) for five rounds. Bind off in pattern.

Thumb: slip 15 thumb stitches onto dpns. cast on 5 stitches at the «crotch » of the thumb (where you cast on three stitches.)

Knit 3 rounds plain

K2, P2 around for five rounds. Bind off in pattern.

Make the second mitt just the same.

Weave in ends. Block gently. Or just wear them!

Mind you, I haven’t had these mitts test knit or tech edited. I’m happy to take your suggestions and edits should you find « issues » when you’re knitting.

These are the mitts that I taught last session at the adult education program here. I also taught my students to embroider on the fabric knitted. There are lots of pictures out there of embroidery on knitting. I also used this pattern for these mitts with self-patterning yarn. Be fearless! Have fun!

Gone knitting.

Follow me on Instagram @QueenBeeKnits

I’m also on Facebook: Queen Bee Knits by LindaWarner

I’m lindar on Ravelry

Starting the New Year off with FOs!

IMG_2283

First finished object is the Ruche Beret by Susan B. Anderson. I love this hat and hope that the new owner will wear it through some challenges and into a lifetime of good health. I knit this for a friend from college who has a friend going through chemo treatments. I knit this in this pretty beige-y taupe-y color and it’s a dk-weight yarn, Plymouth Baby Alpaca DK. I love knitting with this yarn! It’s so soft and will feel so good on a “naked” head. The best thing about this hat is the simplicity of the design. I just love it.

IMG_2257

Next up, the 1898 Hat. This is a free pattern on Ravelry and calls for a worsted weight yarn and US 7 needles. I started knitting with the needle as in the pattern but it was too small. So, I changed to a US 8 and the hat is lovely! I knit with the customer’s Cascade Yarns Eco Duo. Another super soft yarn and it will be so warm. The construction of the hat is a little bit different – the “cuff” is knitted in garter stitch with slipped stitches that is folded in half and grafted into a “headband”. Stitches are picked up around the cuff and the hat is completed in a more traditional manner. The customer was so happy that she’s asked me to knit another one out of Brown Sheep Lamb’s Pride. Stay tuned!

IMG_2273

Last but not least, a baby blanket for my sister-in-love. They have an employee who is having a baby this month and she asked me to knit a blanket. I love stripes, so this was my suggestion. Knitted in Plymouth Encore (navy, white and bright green) to make life easier for the new mom (it’s washable and dry-able!) This is a simple knit – almost boring, actually – two rows of each color, carrying the yarn up the side. The green is an i-cord edge. I love the way the green pops! It’s blocking on my guest bed (sans sheets after Christmas) and it will be sent very soon.

Speaking of Christmas … I haven’t shown you all of the Christmas knits that were finished and given.

IMG_2149

An eyeglass case in Berroco Comfort DK (red and green, obviously!) The pattern is Sweet Sunglasses Case by Ambah O’brien. This was a fun little something to knit for my co-worker who is super sweet. I will make more of these. The Comfort yarn is very soft and won’t scratch glasses … it could be lined but I stink at sewing.

IMG_2129

These are really a better and brighter blue with a bit of sparkle and were sent to my adorable mentee. I met this darling girl when she was ten years old and I was her mentor at school for a couple of years before she moved about 2 hours away. She had a rough transition and I adored her so I traveled to meet her for lunch at her new school every week. Zip ahead and she’s now a beautiful teenager and I still adore her.

Pattern is Holywood Mitts and was a free pattern at our store. I knit these in Holywood by Cascade Yarns. It’s just enough sparkle. And I loved the button that I found to serve as a ring!

IMG_2048

Wow! This is a terrible photograph! These are alpaca fingerless mitts knitted in Cascade Yarn’s Eco Alpaca in black. The pattern is Maize by Tin Can Knits. I love, love, love Tin Can Knits designs! I made the mitts a bit longer than the pattern called for because when I am driving I want to have the fabric of fingerless mitts between my hands and the freezing cold steering wheel. Most fingerless mitts are a bit too short. I hope my son-in-love loves them. I figure that they’re classic enough that they’ll go with any coat in New York City. Right?

IMG_2047

Another questionable photograph but these are the felted slippers that I made for my step-daughter. (I don’t love that “title” and will need to think of an alternate term for my husband’s wonderful daughters.) Anyway, I made these for her for Christmas at her request. Her favorite color is blue so I chose two shades of blue Cascade 220 Heathers. The pattern is Fiber Trends Felted Clogs by Bev Galeskas. I’ve made several pairs of these for different people and they are fun to knit, interesting construction, and they’re very cozy, too.

IMG_1790

I made several of these hats! This is another Tin Can Knits pattern called Barley. I made a trial Barley for my husband and he loved it so I made one for all the boys in the family for Christmas. This one is Plymouth Yarn’s Homestead in Brown Heather colorway. The other three, for the NYC boys were knitted in Berroco Ultra Wool in black. All city people like black. I like black, too. I love the Ultra Wool! it’s a wonderful super wash wool and I am looking forward to seeing how it holds up to the washing machine!

IMG_0390

Two more! For my other step-daughter, a cowl made with Universal’s Bamboo Bloom in shades of pink and Wisdom Yarn’s Poems. I love the Hanassaku Cowl pattern, too! It’s fairly simple pattern is easy (-ish) to follow. I say “fairly” and “-ish” because it always seems to me that when I let myself believe that something is easy, I always make mistakes. I started this cowl twice because I assumed that I knew what I was doing and I also pretended that I could count! Needless to say, I couldn’t do either! It was better on the second try! I started my cowl with the Poems and ended with it, too. Mine is not nearly as wide as the pattern suggested. I used one skein of each and knit until it was gone. I love it and I hope she does, too.

IMG_2077

I used a Top This! Hat “kit” to make this little crocheted lamb lovie for my dental hygienist. Well, not for her, exactly, for her new baby. I am going to visit her next week and will deliver it then. The pattern is a free pattern that I found at the shop (Yardgoods Center, my LYS). I started to knit the pattern and didn’t like the way that the fabric felt. I decided to try to crochet it instead and really had fun making my fourth (or fifth) crocheted project! I hope the baby will love it. It’s really just a great big granny square – and I love making granny squares!

I finished a pair of socks for my handsome hubby, too. I used a ball of Regia (their worsted weight sock yarn) and he’s happy as a clam. He was “nagging” me about a new pair of socks for him and I knit them at work or at knitting group so that he had no clue I was making him socks. I do love a surprise when I can keep them! I haven’t taken a photograph of them … they’re already in the laundry.

So, that was a long post full of finished objects. It feels good to see that I have gotten a lot of knitting done and gifted. I love to make gifts! More details are in my Ravelry project page. I’m “lindar” on Ravelry!

Gone knitting!

Something’s Fishy

IMG_5626 I’ve been wanting to work on so many projects that you might think I had an attention disorder. Right now on the needles I have a Girasol afghan. I’m nearly finished and the edge lace pattern is a bit boring (but it’ll be worth it!) I also have the cabled poncho for my niece (and another one for her sister) to finish by Christmas. I’ll get it done. (Them done!) And then there is a half-done pair of socks, my daughter’s Christmas cowl and the headband that I promised last winter and, of course, the lobster hat that was supposed to be last year’s partial birthday gift. I think I need a few projects finished before starting anything new.

And thus I’ve started a new project. A fish hat. I’m sure you’ve seen it on Ravelry or Facebook or somewhere. It is a Knitty pattern that has made me laugh several times. Fish Hat (Dead or Alive?) can be found as a free pattern on Ravelry or Knitty.

IMG_5625So, when I saw my friend Harry’s bald little head the other day and knowing winter is coming I decided to make a run to the yarn shop and buy some new yarn … My stash is all in storage, remember? I chose good old Plymouth Encore Worsted because it’s soft and washable. And when you’re knitting for children, especially boys, washable is best. My colors are “different” for me but I fell in love with the teal-y blue and had to have it. And I love charcoal gray. The coral and tweedy green were the last add-ins because I needed a bright and something to unite all the colors. I’m knitting with my trusty and well-loved Knitters Pride Dreamz interchangeable needles (US 7). Harry is hairless this winter because he is being treated for Leukemia. He has been such a good sport – he always seems to have a smile on his face despite what many would say are really rough days. Handsome Harry, I hope your fish hat makes you smile!

The hat is knitting up pretty quickly and I only have one more to knit. The second one will be for a student that I worked with at school down in Florida. He was and will always be one of my favorite students. This little guy was hit by a car at the beach when he was two. He suffered a spinal injury and is “handicapped” … unable to walk and in a wheelchair. But he’s such an “able” kid with an incredible spirit and he is smart and sassy. I hope that the fact that I made him a crazy hat will make him smile. And he will have bragging rights at school … I can hear him telling the other kids, “What!? Mrs. Rockwell made it for me!”

It makes me smile to do something for these sweet boys. Gone knitting!


Pouches Rock!

My second Wonderful Wallaby is off the needles. This one for my sister-in-law to give to a friend who is expecting a new baby in April. She requested it in pink … and since I was at the Black Sheep (teaching), I ran right back to the yarn room to see what was available in a baby-friendly pink that’s not too pink. (Because as much as I love pink for little girls, I also know that they get a lot … a LOT … of pink gifts.) And voila! I loved this one …

Ta-daaa! My yarn choice!

Ta-daaa! My yarn choice! Plymouth Yarn “Encore Tweed”

Knitting for babies and children really requires washable yarn. I sometimes break this rule … especially when I’m knitting for people who I know well. But when I am knitting for people I don’t know, I assume that they’ll want garments that are easy to care for. Thus, acrylic or blends are essential. The yarn I chose is Encore Tweed by Plymouth Yarn. It’s a worsted weight blend of 75% acrylic, 22% wool and 3% rayon. Stretchy, soft, washable … and a great price point at $7.50 a ball (I needed three. Color W464, Lot 67839.)

I decided to make the smallest size possible which is a 2T because if the baby is born in April, she will be 8 months old in December and with rolled up sleeves, this size will likely fit well with a little room for growth. I always put my children in sweaters that grew a little bit with them. Because I was knitting a gift, I did knit a swatch for gauge. If it was for me I might not have done that but I wanted it to be sized accurately. And away I went.

Bottom's UP!

Bottom’s UP!

This sweater is constructed from the bottom up and knit in the round. (Hear this, NO seams!) The instructions are very clear and easy to follow. Two needle sizes needed. Sleeves can be knit one- or two-at-a-time which is my preference so that they are sure to be the same size. I’m sorry that I didn’t take a photograph of my sleeves in process. On this particular pattern, I like using scraps of yarn to hold the few stitches for the underarms both on the body of the sweater and the sleeves. (Makes the “pits” very flexible.)

Here’s a great tip! If you start with the sleeves, you can consider them your swatch. For those who don’t like to swatch, you can start your project right off and if your gauge is off you have a lot fewer stitches to pull out.

Splitting up for the neckline

Splitting the stitches for the neckline … and then on to the collar and hood!

The sleeves are attached very simply by stitching them onto your needles along with the sweater body. Decreases all around for the shoulders and we’re getting closer and closer to a finished garment.

At the neckline, the stitches split and you knit back and forth for the neckline and hood (if you choose to add one … and I love children’s hats with hoods!) Again, very simple. The only “glitch” that I can see in the pattern is that there is a repeat of a few knitted stitches on the edge of the hood, which I am too much of a perfectionist to accept. So, I chose to knit all of the edge stitches on one side and purl all edge stitches on the other side. That way, I get a “perfect” edge. You’ll see what I mean when you knit this cutie!

At the end of the hood, you’ll graft all the stitches together with a Kitchener stitch and ta-daa!!! I added a tassel to the hood because I really liked the hassle that I added to the first WW that I knitted for my niece. All you have to do is graft the underarm stitches and all the seaming is done. Don’t you love that!? I sure do! Use a long piece of your seaming yarn to tighten up the “holes” at each side of the underarm. This is a trick you can use in lots of patterns.

IMG_0021

Just a few underarm stitches to graft … that’s it for seaming!

Underarm "holes" are easily tightened up!

Underarm “holes” are easily tightened up!

So, there you have it once again. The Wonderful Wallaby. I love this pattern so much that I am knitting one for myself in oatmeal-colored wool. You can be sure you’ll be seeing it when it’s on the needles!

Wonderful Wallaby in pink!

Wonderful Wallaby in pink!

Queen Bee Knits label is placed on the inside of the bottom … don't want it rubbing baby's neck!

Queen Bee Knits label is placed on the inside of the bottom … don’t want it rubbing baby’s neck!

Tassel … my addition

Tassel … my addition

Gone knitting.

UFOs and Abracadabra, Y’all!

They’re finished!

I sent off the Baby Life Ring socks and the hat that I designed to match with it’s little dreadlocks on top and the Grandmother-to-be loves them. Makes me so happy to please people with yarn-y wonderful-ness! And I have to be perfectly honest, the little hat is pretty stinkin’ cute!

An original Queen Bee Knits design – “Baby Dreads”

While visiting my college roommate here in Atlanta, I’ve finished knitting and embellishing the “This Little Piggy” hat that I designed for another friend’s granddaughter. I’ve knitted up a pair of thumbless mittens to match. The pattern is called Stay Put Baby Mitts by Jillian Neary. It’s on Ravelry … of course! The pattern is really simple to knit up and since it’s knit in a worsted-weight yarn (at least that’s what I used), they knit up quickly. The little single-crochet “string” tie at the wrist keeps the mitts on the baby’s hands. The string attaching them together keeps them from falling off and getting lost. They’re not embroidered yet (they need to have cloven hooves) but they will be finished and sent out as soon as I am back in my southern atelier!

“This Little Piggy” hat – an original Queen Bee Knits design

The hat pattern will be joining my other originals on Ravelry when I get it test knitted. I am really pleased with the adorable piggy ears and it’s little curly tail. I giggle when I look at it because the pig’s face seems so quizzical … like it doesn’t know what to do – go to market or stay home!

Next up, my Boxy Cardigan. Pattern and yarn by Seacolors Yarn. The process Seacolors uses is very unique. It’s hand-dyed with sea water, thus it’s name! The cardigan pattern is very simple and square. What makes it unique is color-blocking and I’ve purchased (after a long, long, long time wandering their booth at the Maine Fiber Frolic) some great colors that I’m very excited to see come together in this sweater! I’m already dreaming of buttons … they also will have to have been made in Maine! I started knitting with the US size 7 needles as the pattern suggests but have frogged that bit knitted up because it didn’t make the gauge. I’m starting again with my US size 8 needles and we’ll see how it goes! I’m knitting the large size.

I’ve also had a request to knit up another top down baby sweater in the fabulous “Grateful Threads” colorway from Coveted Yarn. I am really excited about knitting with this yarn again!

My tunic is still coming along. Knitting a ribbed stitch on US size 1 needles is slow going and very tedious so I have to break up that work with other projects.

Dropps Tunic (Dropps 111-21)

Detail of the “gathering” effect

The construction of the tunic (it’s a Dropps design) is quite simple and the switch from the US size 6 needles in stockinette stitch to the 1×1 ribbing on US size 1 needles creates a bit of a gathered effect which is very pleasing. The back is nearly complete!

I am so grateful for the friends and family who have encouraged me to follow my passion around knitting and I’m certain that the future holds all great things for my business as it grows right along with me!

Gone knitting (in Atlanta), Y’all!

Finished Objects

I’ve been wrapping up a few UFOs again and thought you might like to see some photos of them and hear what I thought about the yarn and patterns, etc.

Prima Dogma by Queen Bee Knits first order is ready to go out. I’ve finished two sweaters for Jan’s fur family (they live out in the San Francisco area). Jan has two Japanese Chins and these sweaters are for her little girl.

First, my original design, “Señorita Lolita”

"Senorita Lolita" - custom knit for Jan

I originally bought some wool fingering weight yarn in a peachy pink. Jan had asked for a pink color for this sweater but left the shade to my discretion. I started knitting and decided I really didn’t like the yarn and ordered some Koigu KPPM in their solids color way. I love the way this sweater turned out. It’s pretty and feminine and the ruffle is just right. I also knitted the flower in various “scraps” of fingering yarn in KPPM and wools that I have in my stash. The first flower I knitted was way too dull but this one – I especially like the way the green leaf turned out – I think is just perfect!

"Boyfriend" a PrimaDogma by Queen Bee Knits design

Lola was kind enough to model twice – she is not the dog who loves to wear clothing – and this is the “Boyfriend” sweater knit for Jan’s Japanese Chin. I love the colors of this sweater. I knit it with Cascade Yarns Baby Alpaca Chunky and it was a pleasure to knit. The yarn is so soft and will be so warm on those Northern California wintery days! This pattern is a seriously altered version of the sweater in “Dress Your Dog” by Sys Fredens. It’s designed to be bulky and loose like a boyfriend’s sweater would be. I think it looks adorable on Lola and can’t wait to see Jan’s photos.

Fingerless Mittens - I'll be knitting until the cows come home!

Three pairs of fingerless mittens that I’ve knit for my SIL, Annie, who will be gifting them to some lucky ladies! The grey pair on the left is knit with pure alpaca DK weight yarn from Maine. I bought it at an alpaca farm in Washington, Maine. It’s so soft and will be warm … but alpaca is well-known to also be very light weight. This one pair took approximately 8 hours to complete but I love the way they turned out. Needless to say, however, I had to find another pattern that didn’t take quite so long if I am going to get the rest of the 15 pairs finished and delivered before Christmas (or sometime next year!) The two pairs on the right are simpler construction and knitted in a DK weight wool from Maine, too. This is a hand-dyed wool from French Hill Farm in Solon, ME that I bought at a farmer’s market. I loved the rich ocean colors that go from purple to turquoise to limey green and then to yellow. I also love this pattern – it’s simple and lets the yarn be the focus.

And last but not least, the most recent threesome. More fingerless mittens. (I haven’t even woven in the ends of the left-most pair yet).

On the left, grey wool fingerless mittens that are about as simple as they come but I really like this pattern and will be making more of these. They knit up quickly in worsted weight wool and I will be embroidering a snowflake on the back of the hand to give it a little bit of character. The two green pairs are knitted in a more “Aran” cabled pattern – and I love, love, love cables. It must be my Irish heritage that comes out through my fingertips when I get sticks and string together. The yarn is a 50-50 alpaca/wool blend and it’s lovely yarn. Also worsted weight, this pattern knitted up in about 3 hours per glove … not too bad. I seem unable to knit up a glove in much less than that and 6 hours each pair isn’t an awful lot of time to spend. Wish I knitted a bit faster but I don’t.

I’ve discovered a great knitting in the round tip, though for knitters. If you criss-cross the first and last stitches (pass the last stitch to the left needle to knit first and pass the first stitch to the right needle to knit last – here’s a youtube video that shows you how to do this a bit better than my explanation. Love it! And she’s absolutely right, the little divot at the beginning (I always just started knitting) is gone! Woo! Hoo!

Gone knitting!