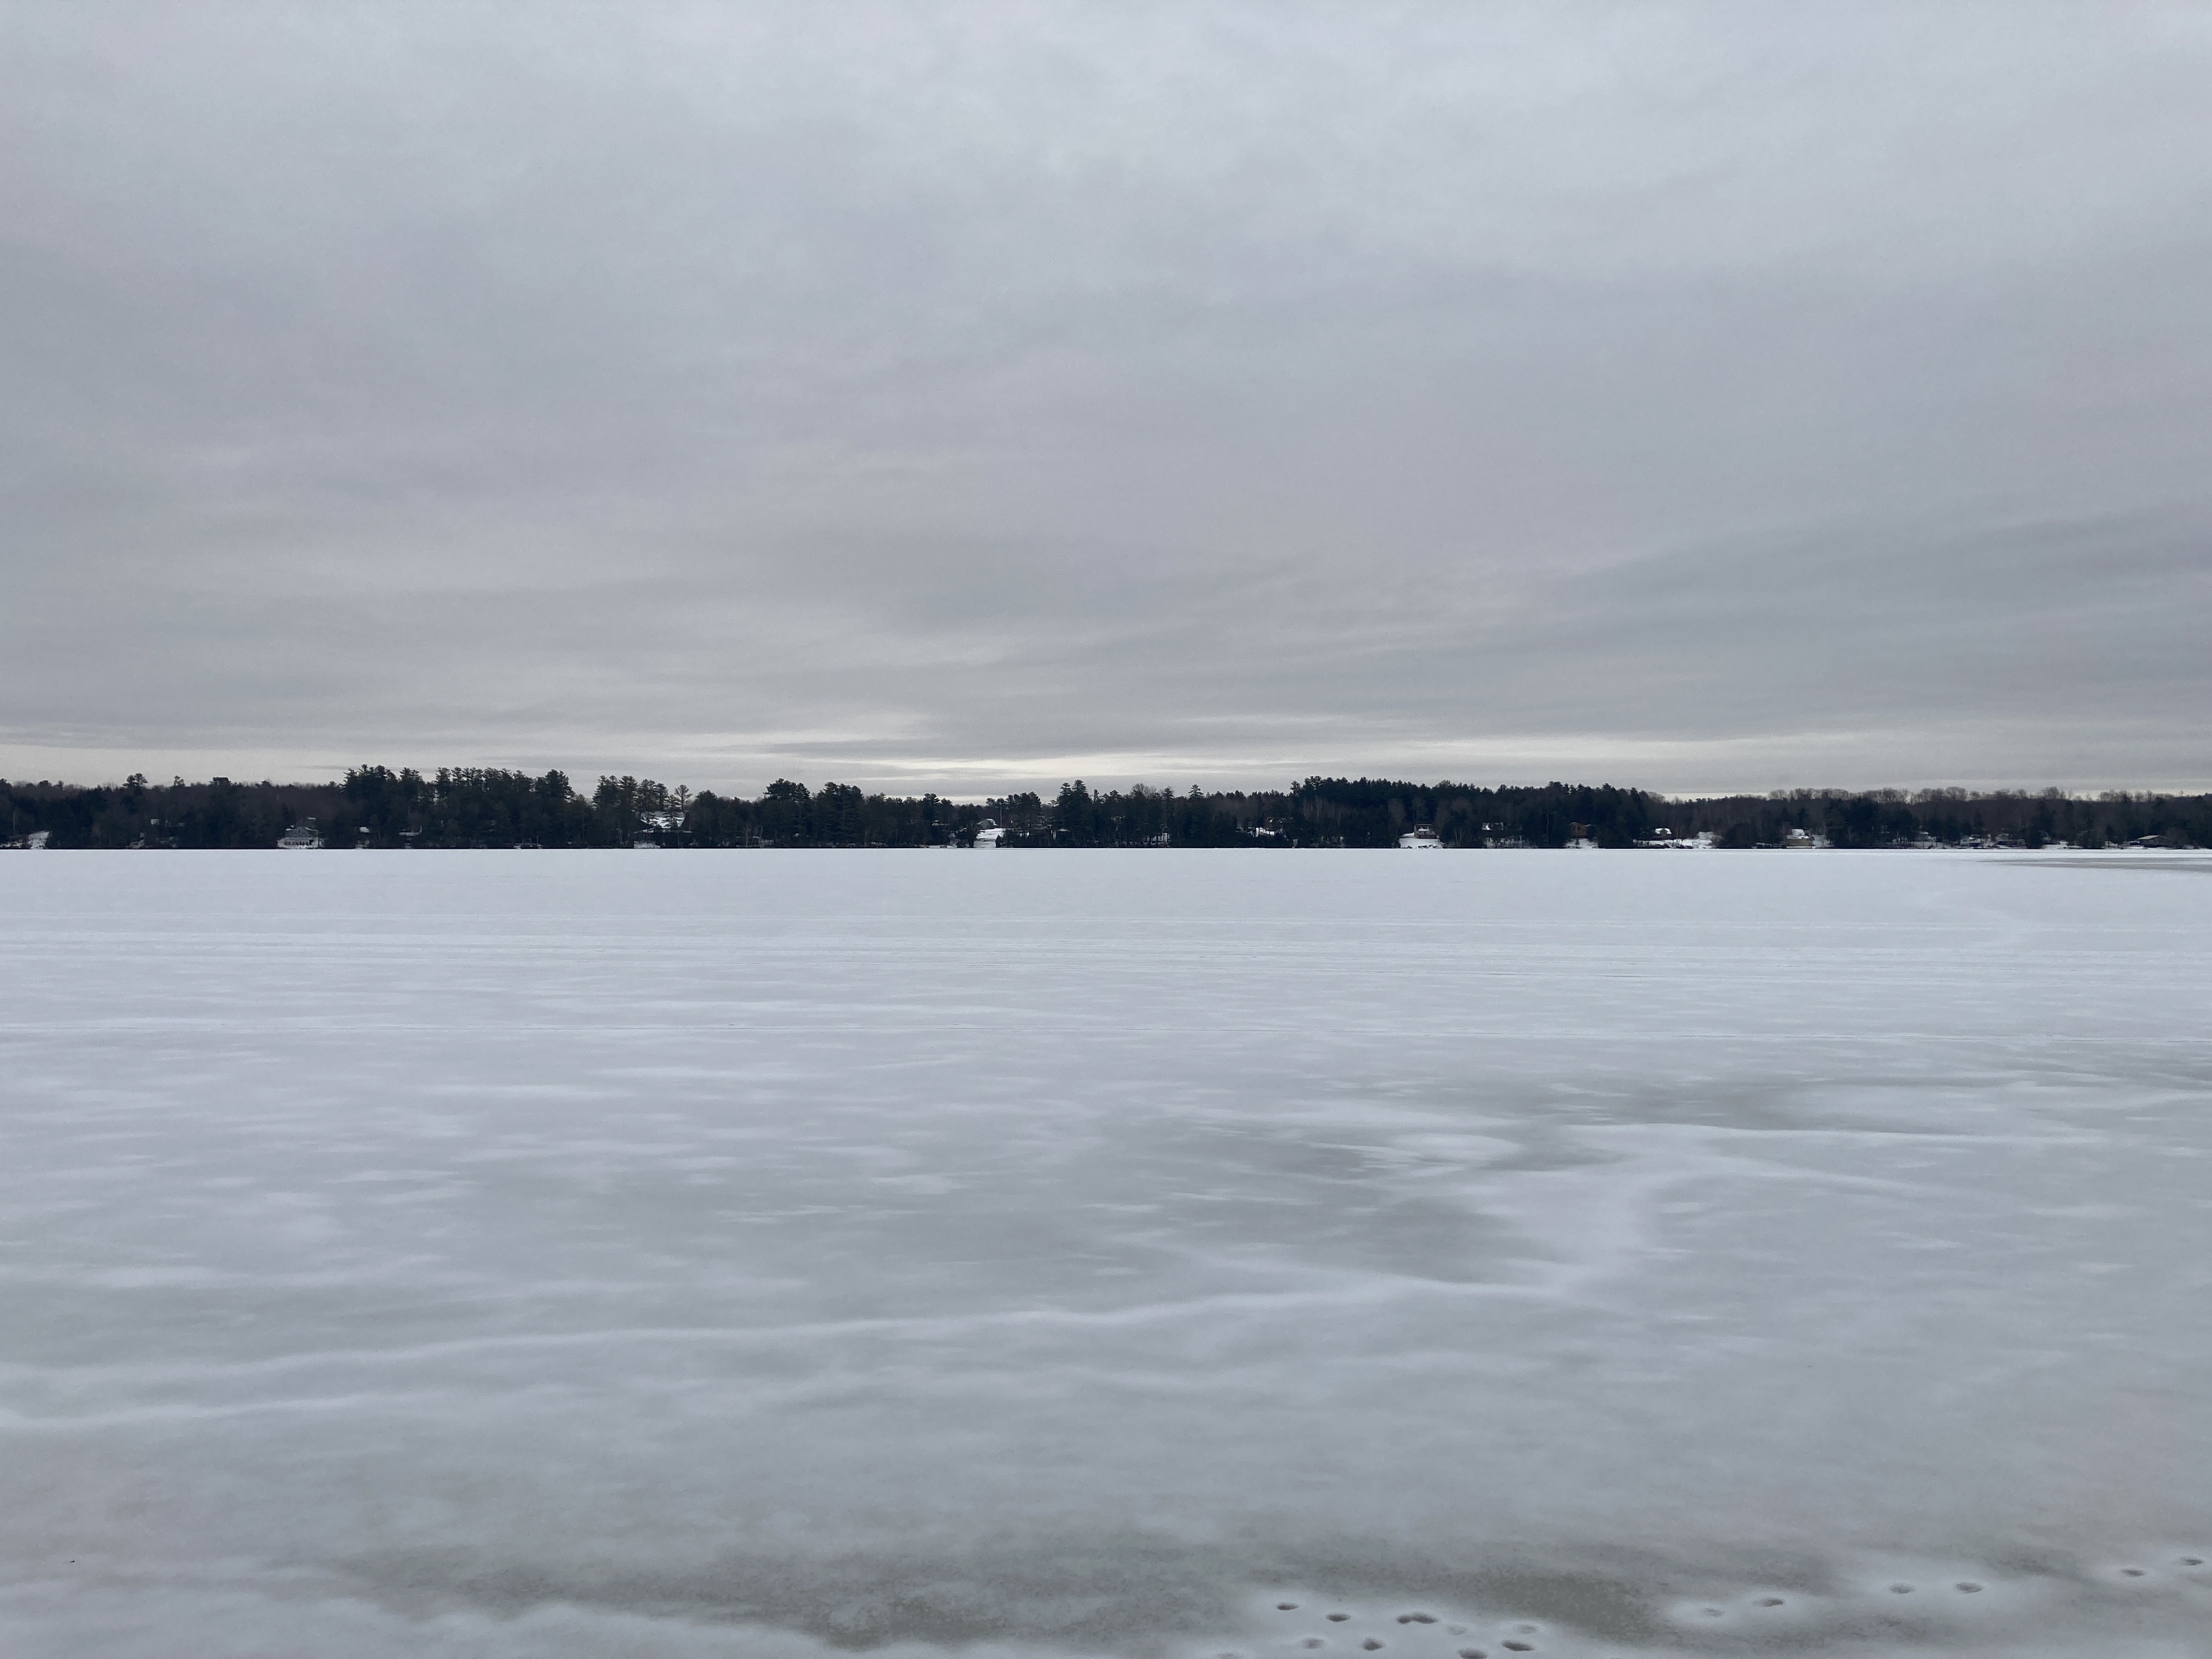
We are having some snow again today and we had some ice on Thursday. It’s winter in Maine and I have to say that I am a happy girl. I love the winter and I love the snow. I feel like the media has been really good at scaring the pants off of us and now we are told to stay home even at times when the driving isn’t bad. I headed out to work on Thursday after we got a quarter inch of ice and I had no trouble getting out of our driveway or getting to the store … and as my car slipped by the back door (ha! ha!) I decided that I’d park out front where nobody would have such a good opportunity to slip down the hill and into my car. I’m so grateful for my cleat-thingys that keep me upright on ice.
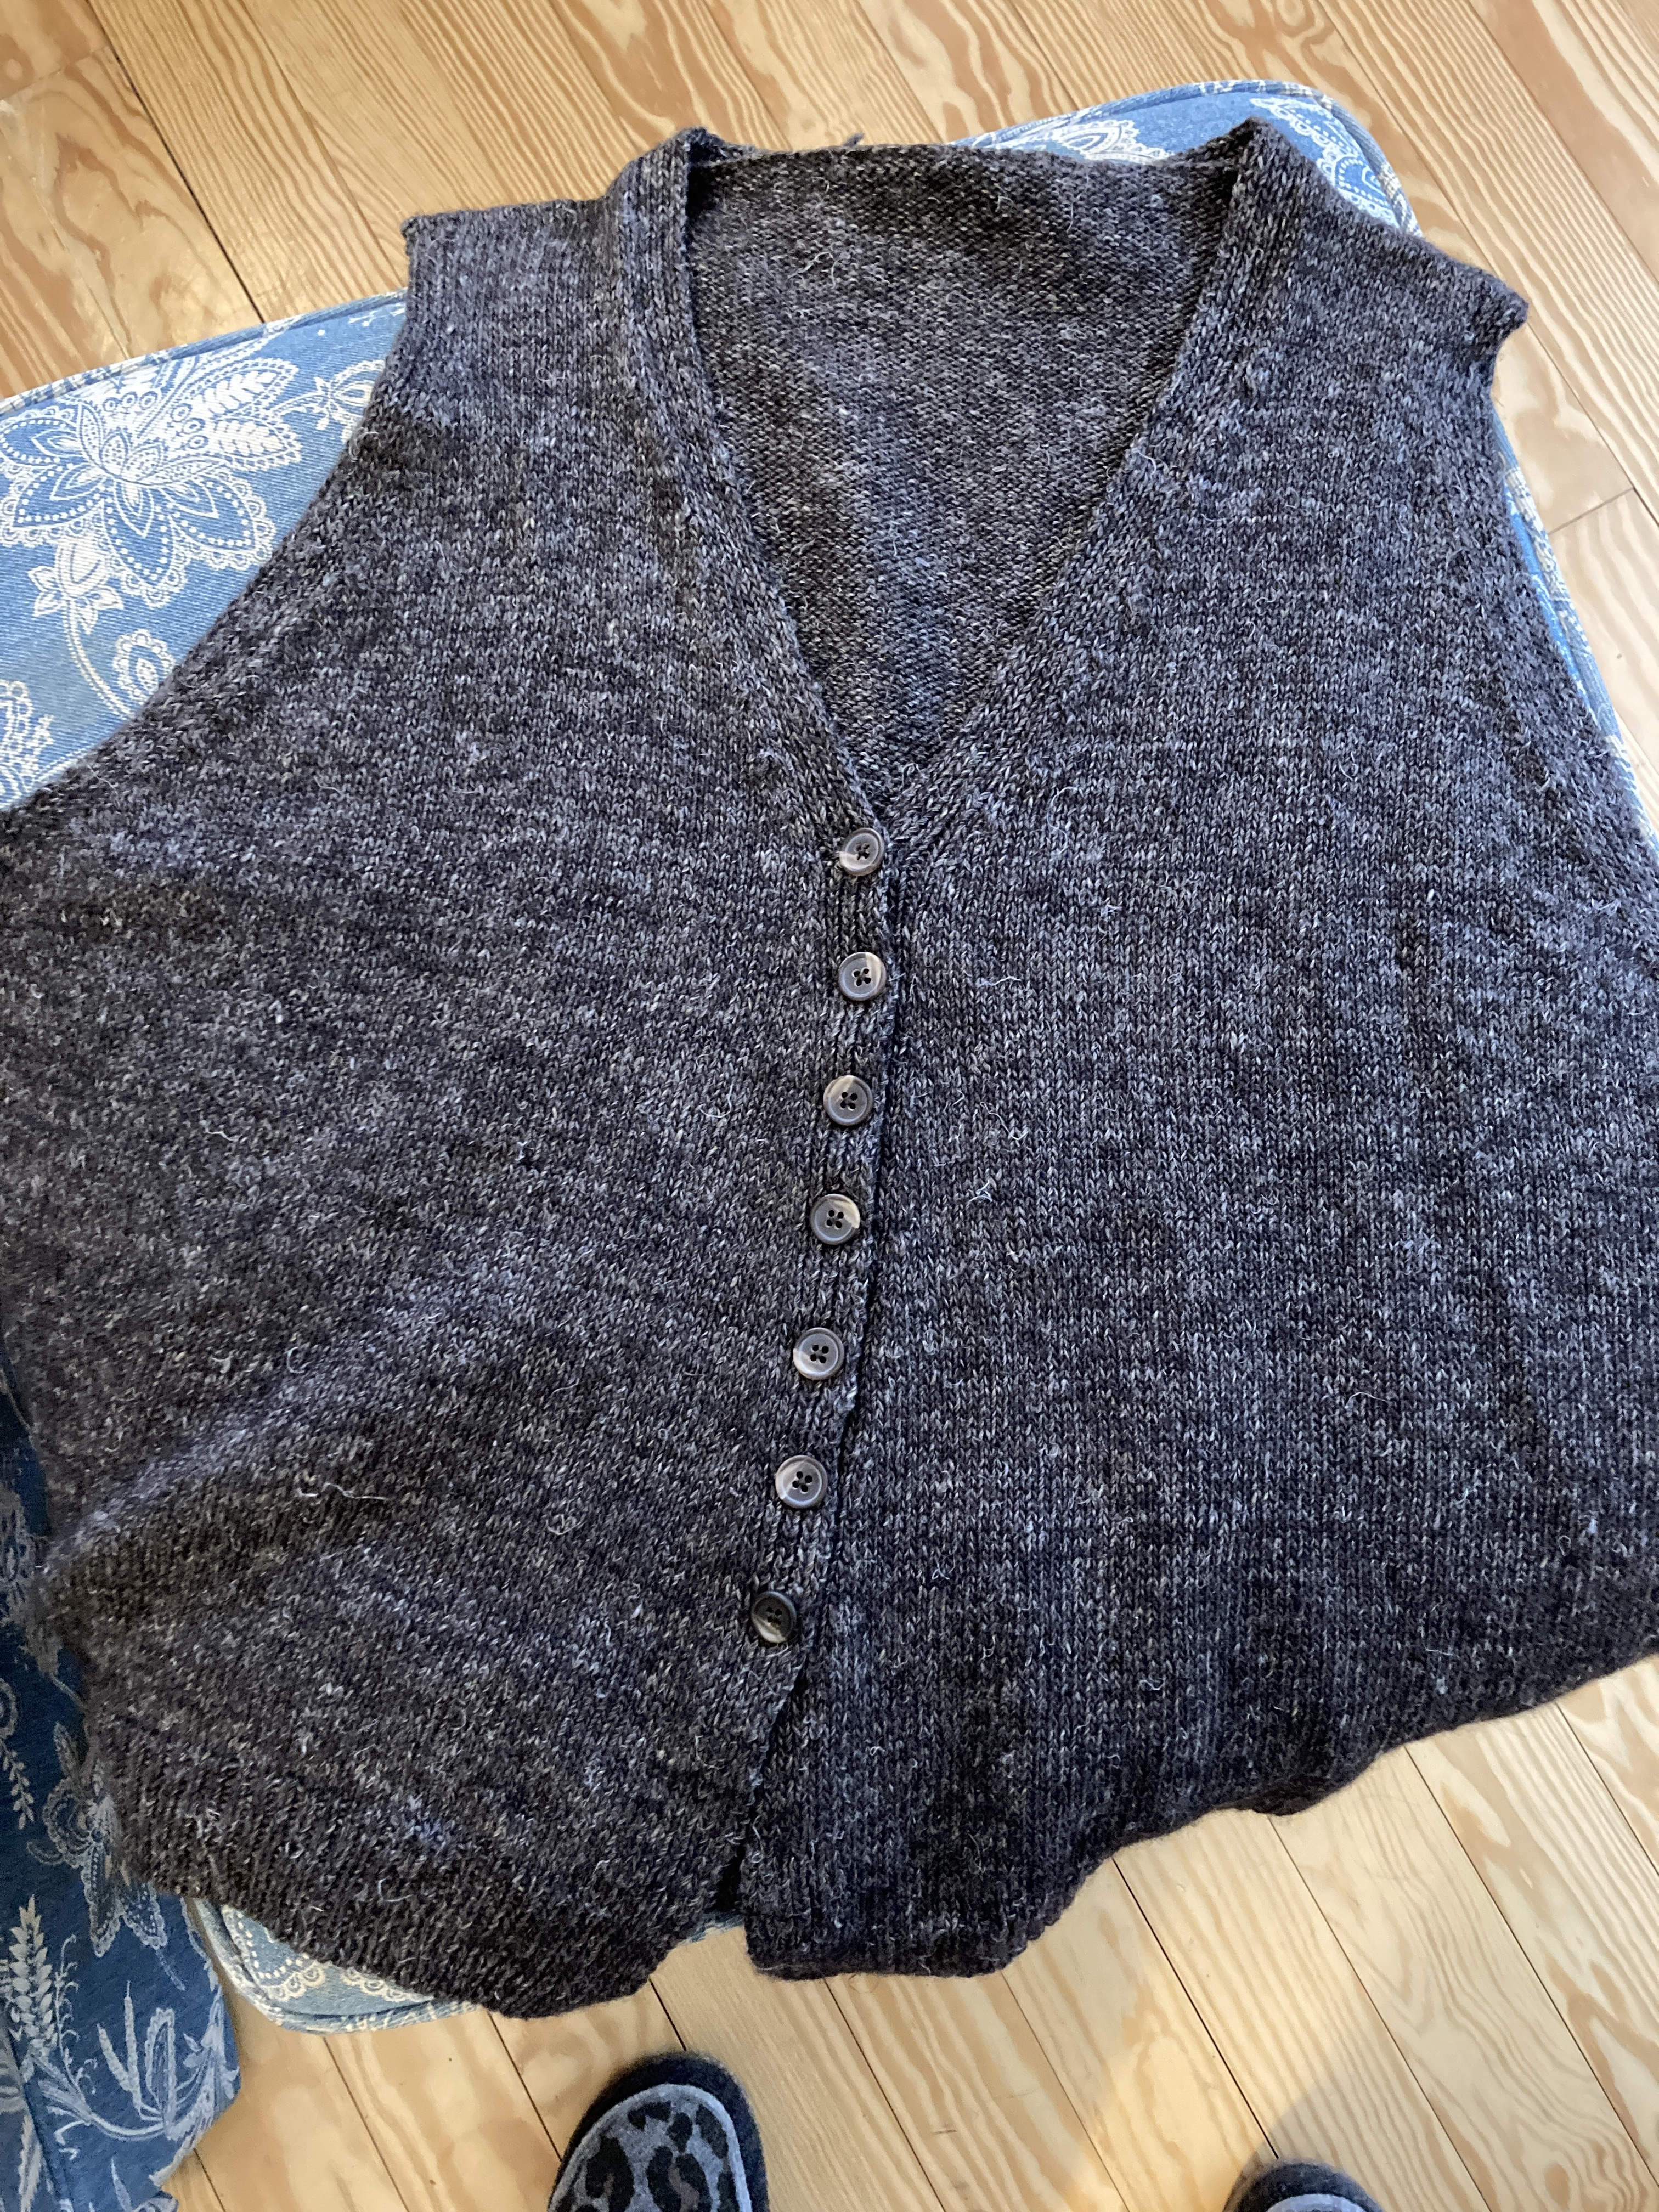
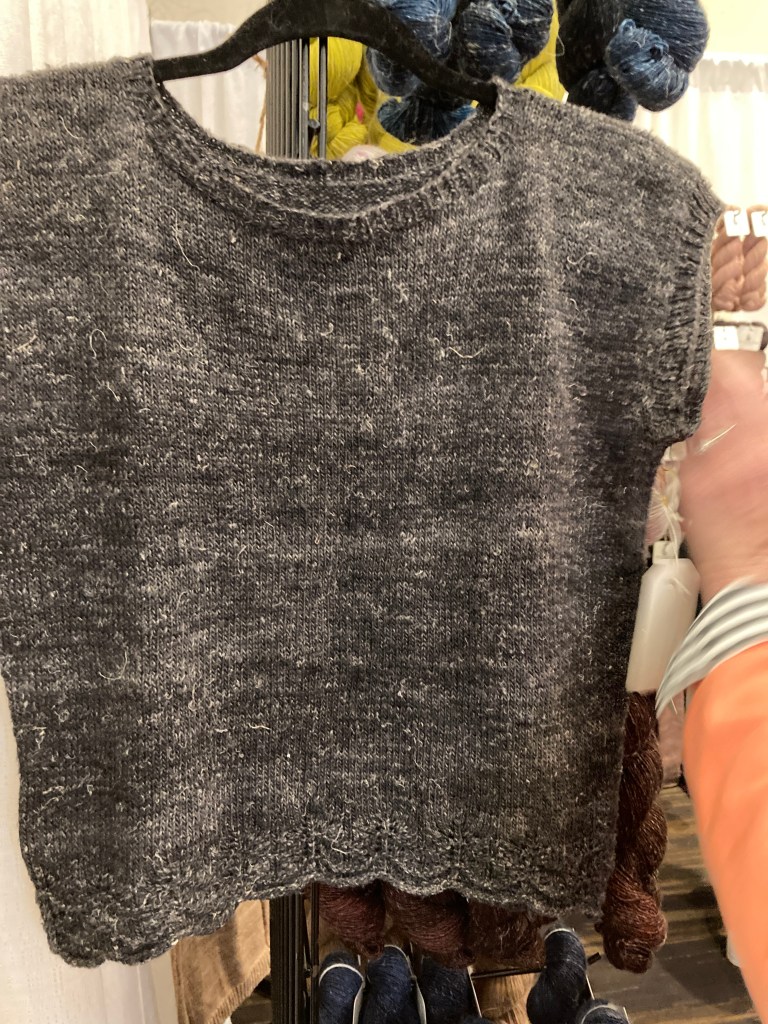
I’ve just finished sewing the perfect buttons on my Nancy’s Vest. It is finished. I wore it to work today buttonless and I love the way it fits. I also love the weight of the yarn and it’s soft and just enough gray and brown all at the same time.
So, now I have two vests … and there are going to be more of them in my future.
I pulled my sleeve out of my Women’s Favorite Genser again. In its first iteration, the sleeve decreases were too far apart and the sleeve would have been too long and the stitch count off for the colorwork before the cuff ribbing. On the second iteration, I realized that the increases were too close together which made the sleeve too narrow too soon. Now on my third try, I’m decreasing “in the middle” of the other two and I think it’s looking good. Cross your fingers.
I’m working on my Cooked Lobstah socks and my Double Thick Hat. They’re both easy patterns that I can nearly knit with my eyes closed. I may have mentioned that I hate myself in hats. The only ones that I wear are saggy baggy hats that fall down over my eyes. I only wear them if I have to go out with wet hair in the winter or if I am spending time outside like when I clean off my car or help shovel. But that’s the long way of saying that even though I am making this hat for me, I may decide that I hate it. AND I hope I don’t hate it but it’s more than possible. BUT I love the yarn! I’m knitting with Juniper Moon Farm’s Herriot Fine. I had two hanks of it in my stash, they were a gift from our KFI salesman at the store. He always sent something for “the girls”. (ha! ha!) Herriot Fine is absolutely gorgeous to work with. It’s soft and comes in lots of pretty colors. I have a blue and a creamy oatmeal color. Not thrilling colors but if I love the hat, I can worry about different colors later.
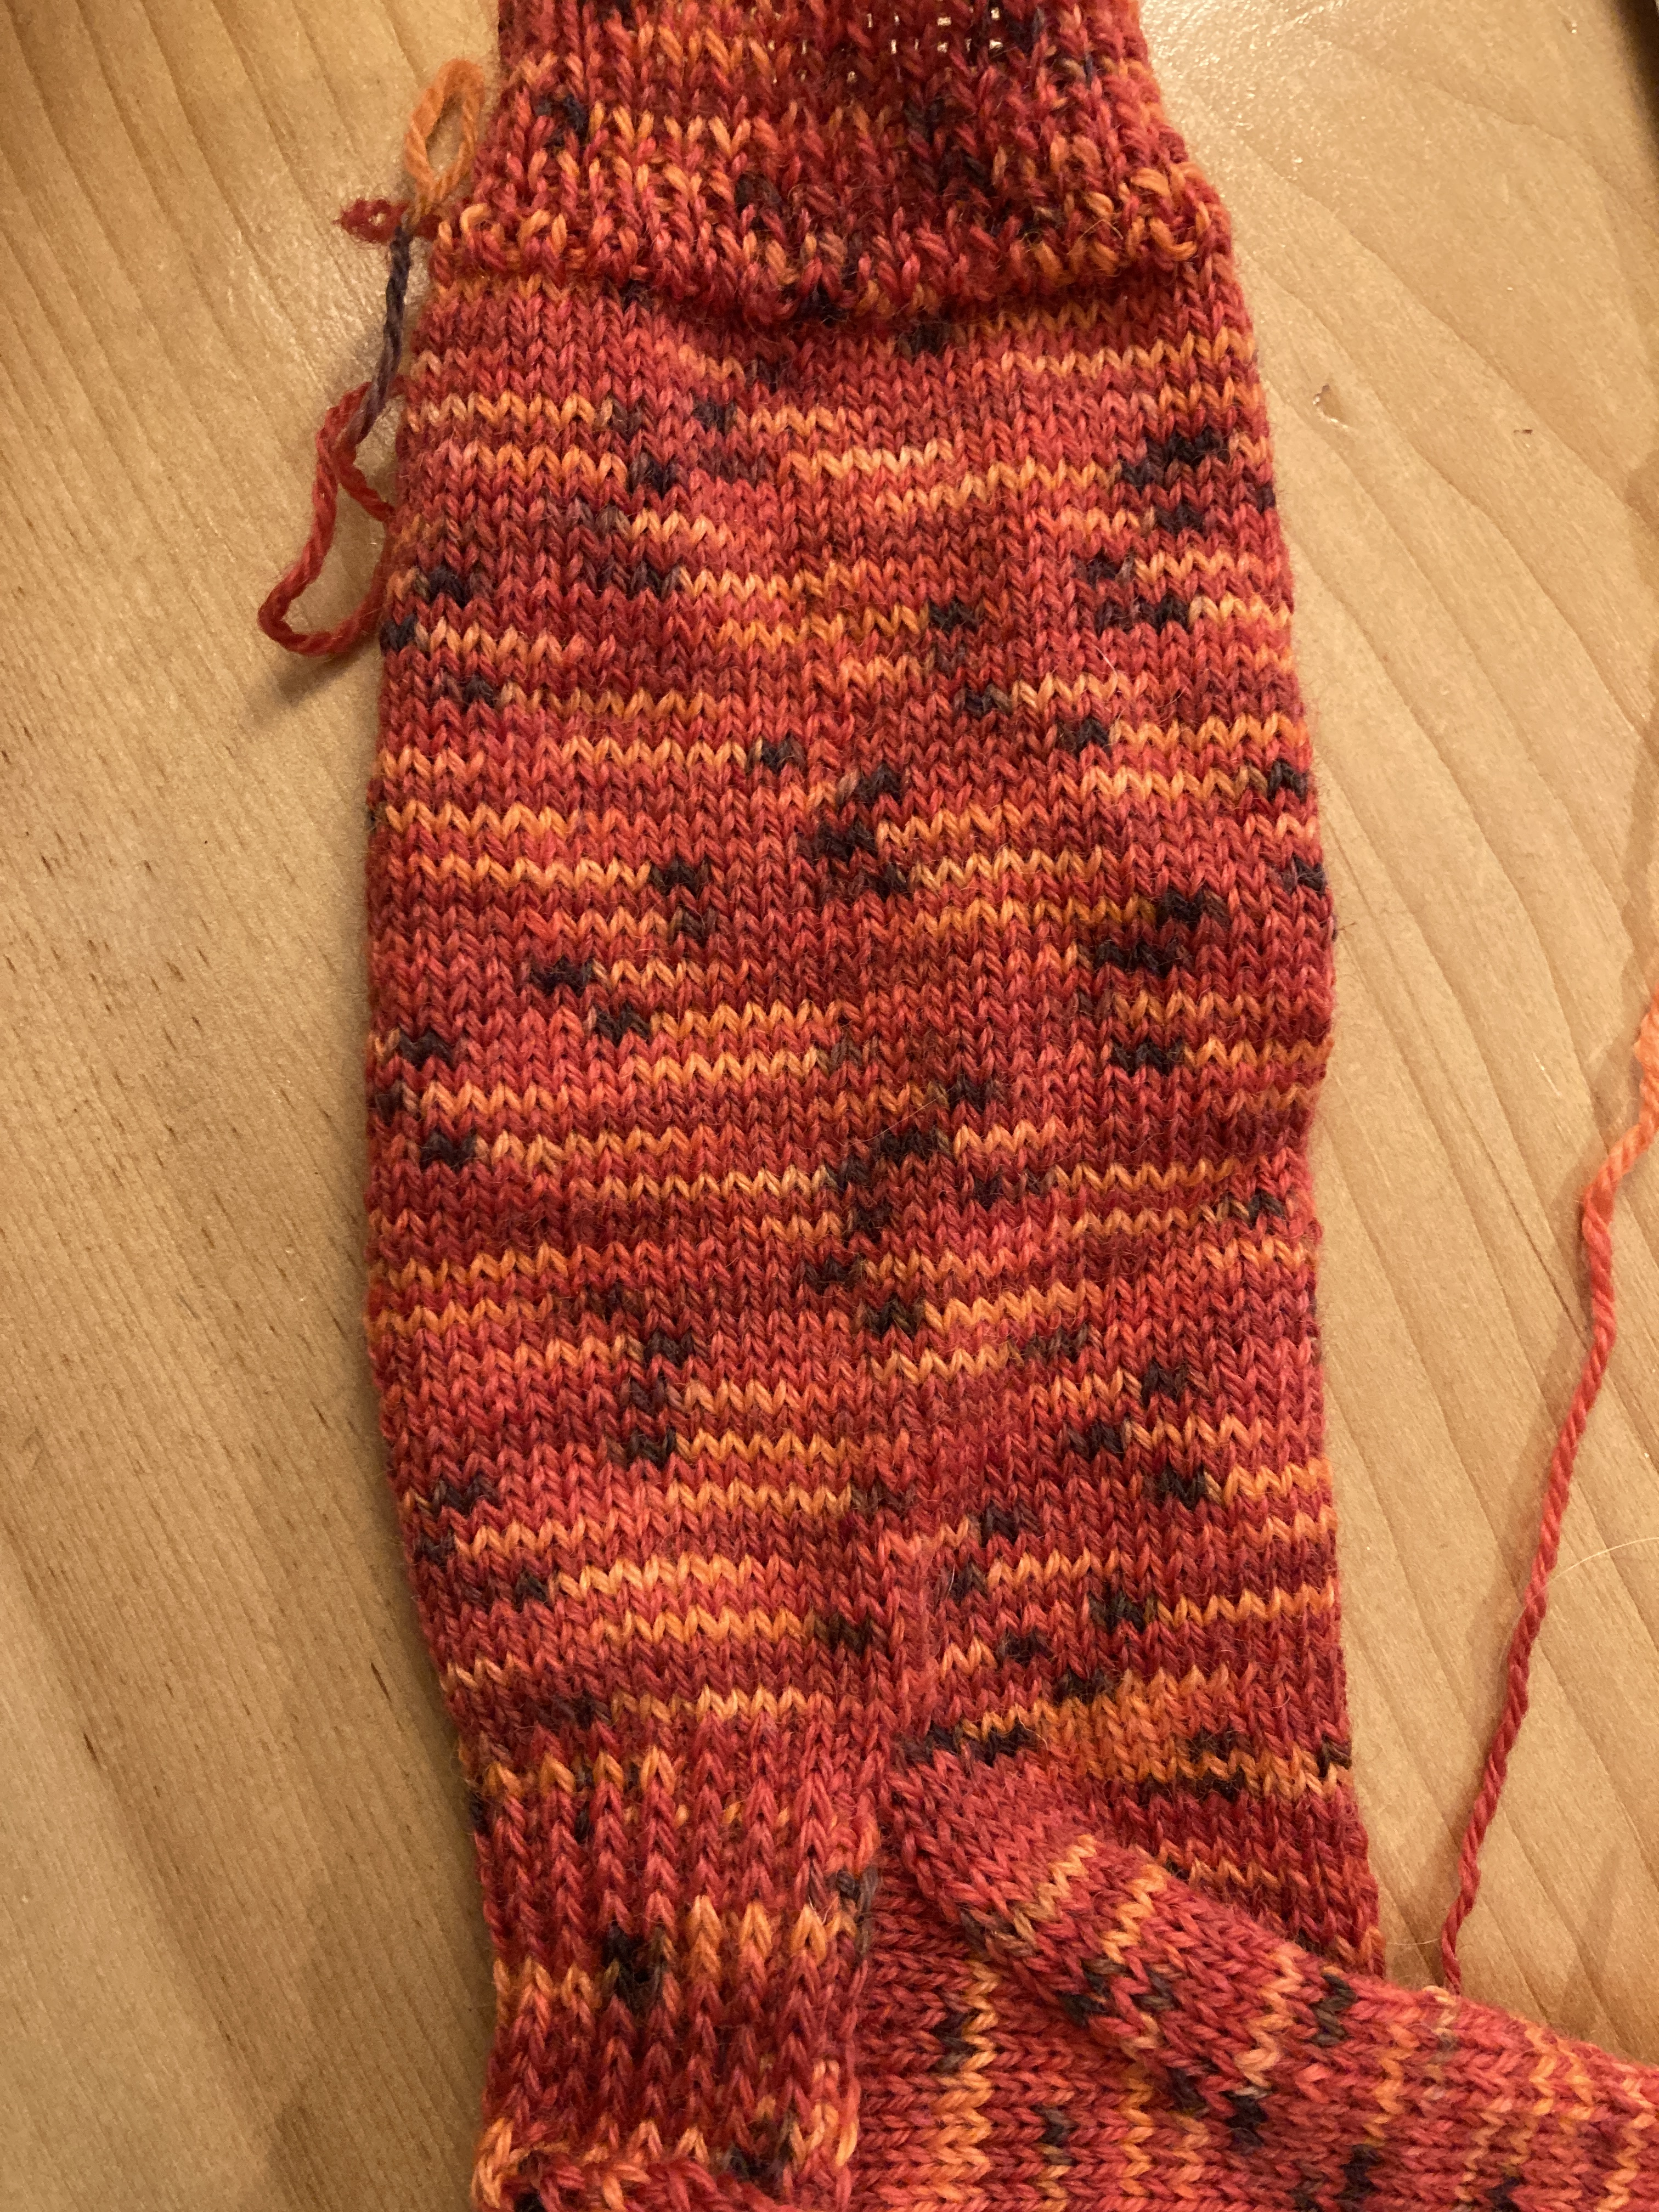
And the socks are just my “run-of-the-mill” socks using Yankee Knitter’s pattern #29. I love the pattern and have knit so many socks over the years that I practically know the pattern by heart. This crazy colorway that I bought at the Maine Fiber Frolic years (and years) ago. These socks will be a gift, as with the blue striped pair that I just finished.
I have a brand new knitter in my afternoon knitting class and today’s storm kept almost everyone home. It gave me an opportunity to help H. remember how to cast on and how to purl so she can try to make her first pair of mittens. She picked up purling really quickly and I feel pretty good sending her home to practice and I told her that if it doesn’t go well, it’s all good. Consider it an opportunity to practice! It’s a ribbed cuff and it can be frogged and re-knit and I told her that I’m re-knitting a sleeve for the third time.
Knitting offers us the opportunity to get used to making mistakes. I used to get frustrated and annoyed by making mistakes but now I can take them in stride and begin again. Forgiving yourself (and others) is a skill that is learned over time and knitting has helped me be more accepting of myself and my flaws. It’s also taught me to be more flexible and forgiving with others. I’m grateful for my sticks and string for having added so much joy to my life but I am also grateful for the lessons that it’s taught me. Life is good.
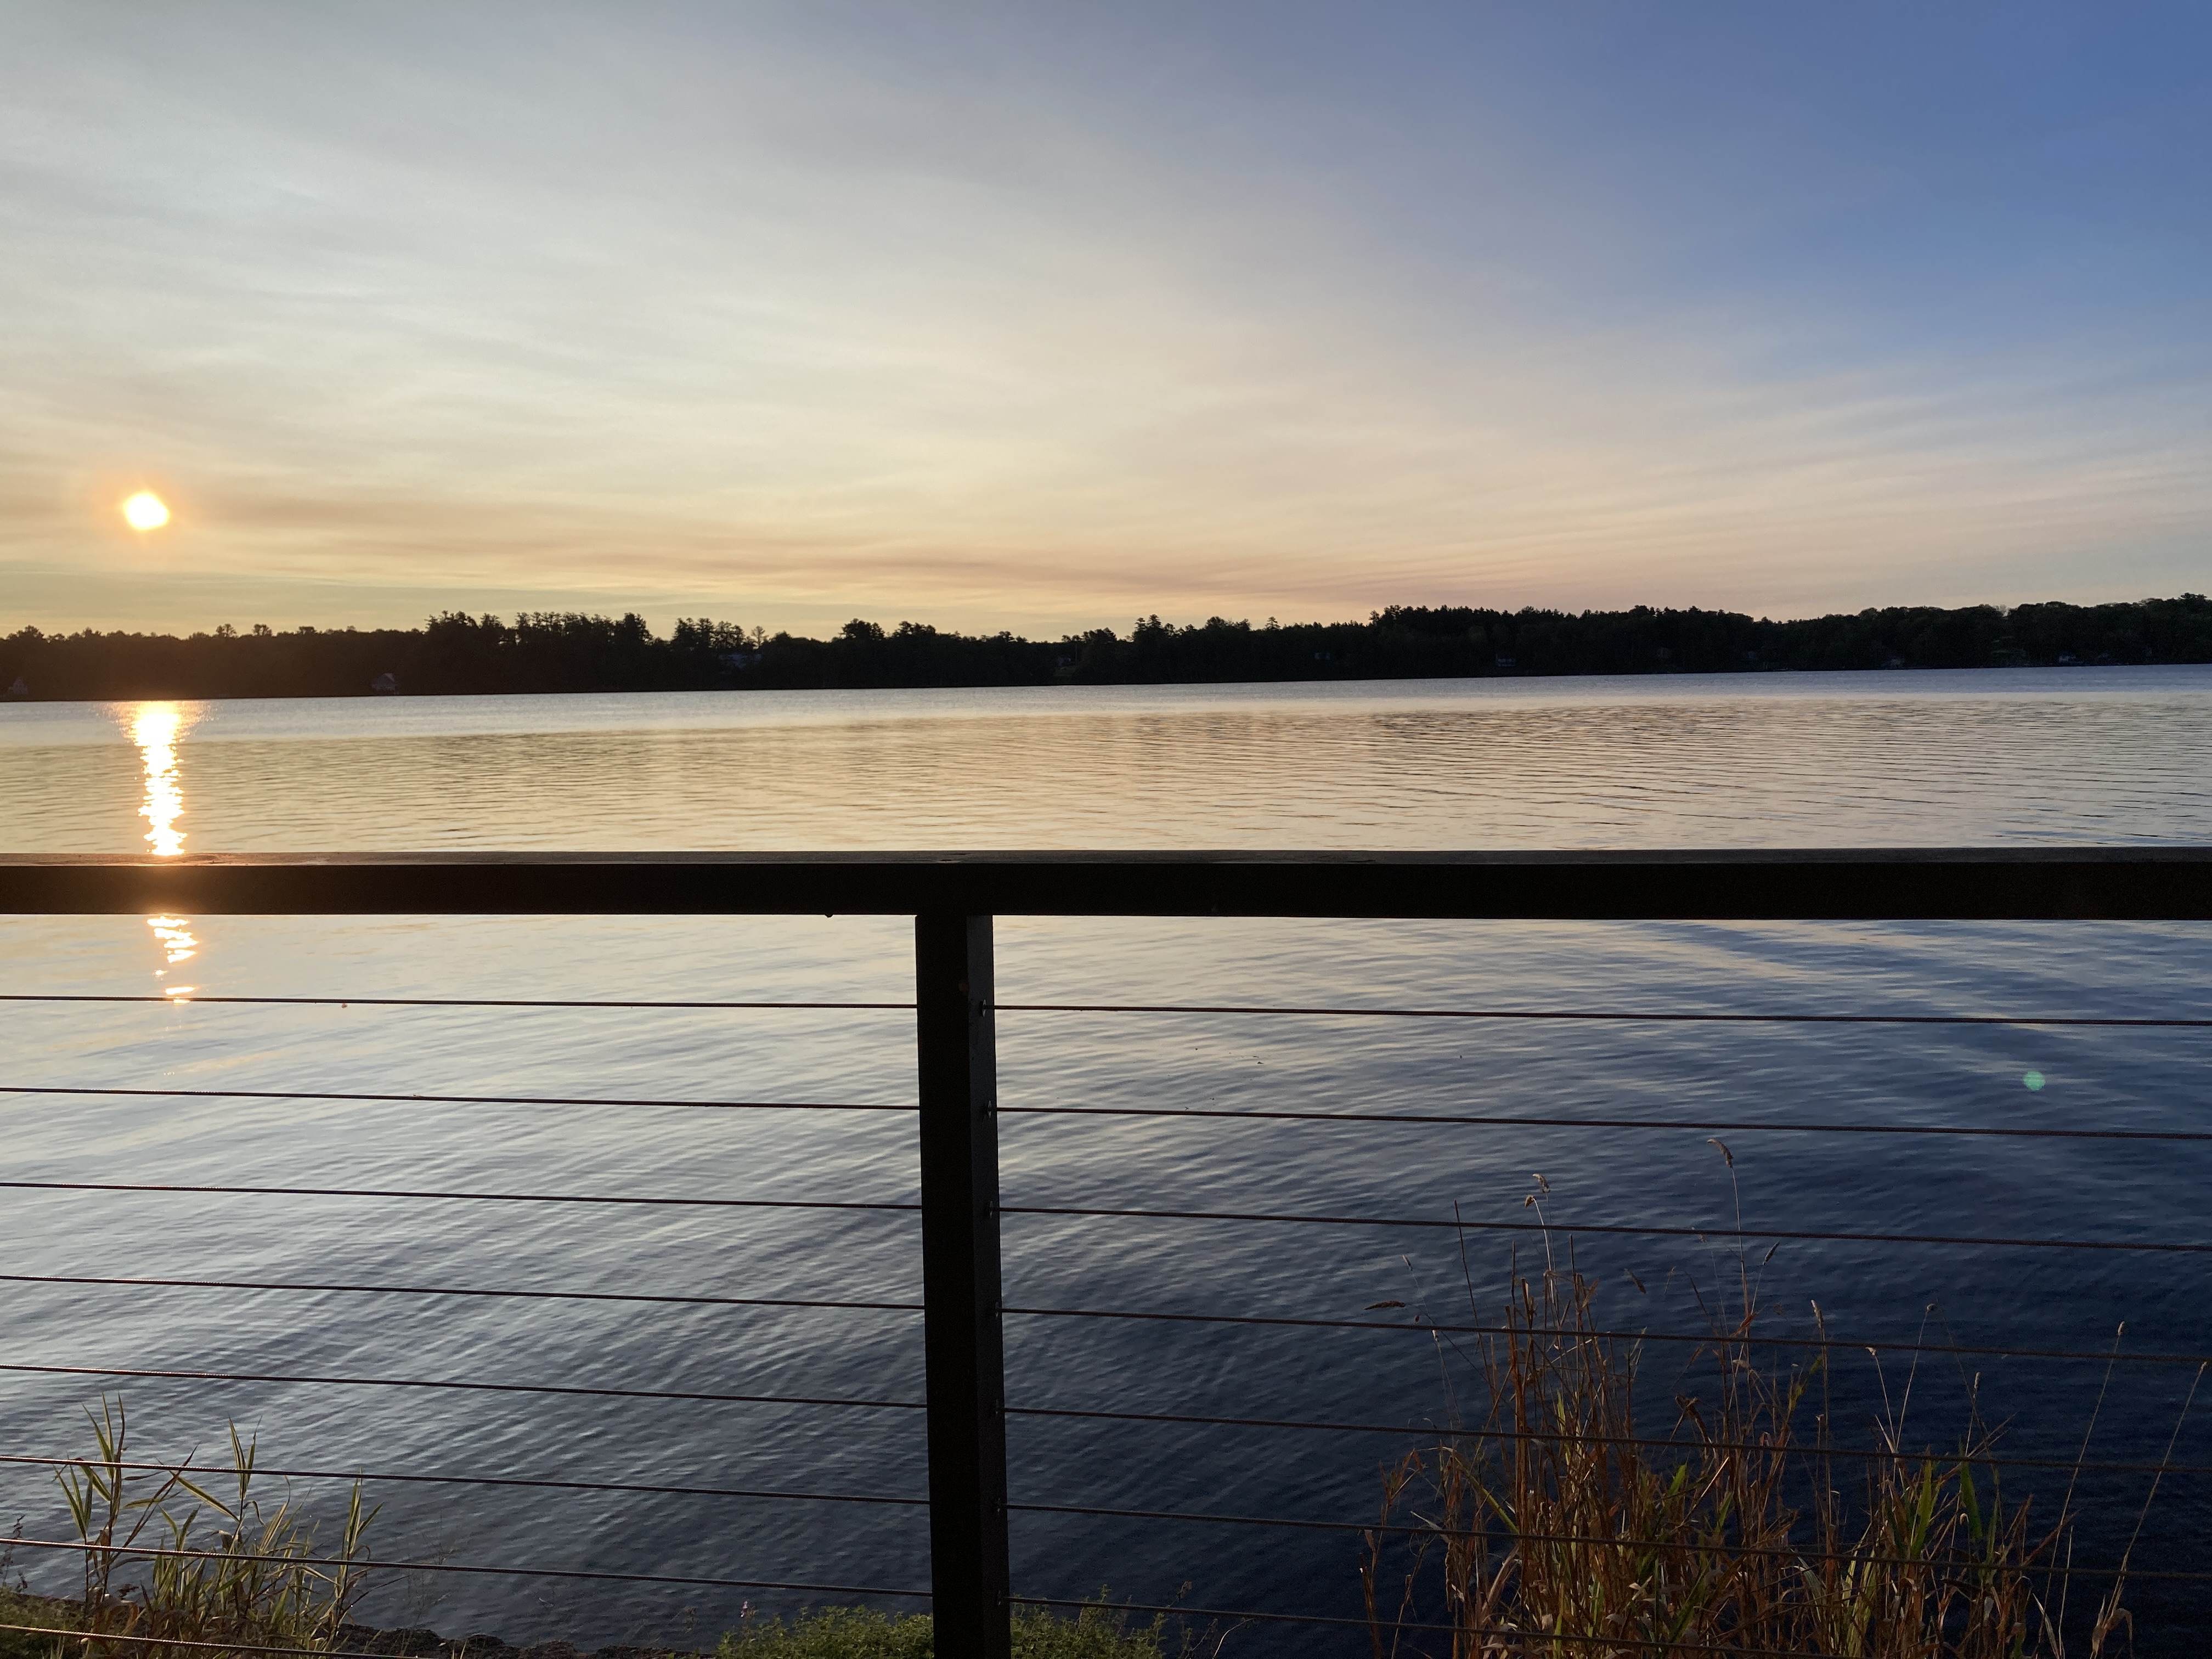
It’s been a beautiful day at the lake and I am grateful for a day to “do nothing”. We had coffee on the porch this morning and those mornings will end soon enough and we’ll be inside again for our coffee. But today we got to be outside and it was so quiet and quite warm as the sun rose higher in the sky.
I spent the day “catching up” after having taken a couple of days to visit with my family in Marblehead. I drove down yesterday, spent the day with my brothers and sisters-in-love, niece and her husband, great-nephew and nephew. We had an incredible dinner of chicken parmesan cooked by my Marblehead sister-in-love, Annie. I’ve never had a bad meal in that house! It was delicious. The next morning we visited again and then I headed home in the early afternoon. We all hope to get together for a longer time when the Louisiana family is here in December. Maybe they’ll even get up to Maine!
I brought my Nordic pullover with me and didn’t knit a stitch. I am plugging away at the body of the sweater and all that garter stitch when I don’t have family to visit with and my great-nephew to play with. He’s a happy boy and cute as a button. I am determined to getting it finished before the really cold weather settles in.
I’ve been working on a pair of pumpkin hats for my daughter’s friends’ two sons. I made lots of these hats several years back and thought that they might be a fun surprise. I’m making two large hats and hope that they’ll fit the boys. I have made a few minor modifications which may change the sizing just a wee bit. Instead of holding the yarn double for the band of the hat, I am knitting with a single strand and on the increase round, I increased with a M1 increase to have the correct number of stitches for the pumpkin part.
The first hat, the one that is pictured here, is a bit “tight” around so I hope this one will fit the baby. But children’s heads don’t grow too quickly so the second one that I’m making I’m changing up just a bit. I’m still making the large hat but this time, I knitted the last round of green with a double strand and increased per the instructions. The band of the hat is a bit more stretchy so I hope this one will fit the big brother. I’ve gotten an inch or so into the pumpkin part of the second hat so I hope that I can get it finished by the end of next week. I have an extraordinarily busy next few days and I’m unlikely to get a lot of knitting done.
The pattern for the pumpkin hats is called Patrick’s Pumpkin and it’s a Fiber Trends pattern that I have had for decades. Yes, decades. I made them for my children when they were young. I always used Brown Sheep’s Cotton Fleece yarn in the past but I didn’t have any on hand and decided to make these hats with Plymouth Encore yarn. The colors are pretty perfect and I had the yarn on hand because … we knitters, when we get an idea, we want to knit it right now!
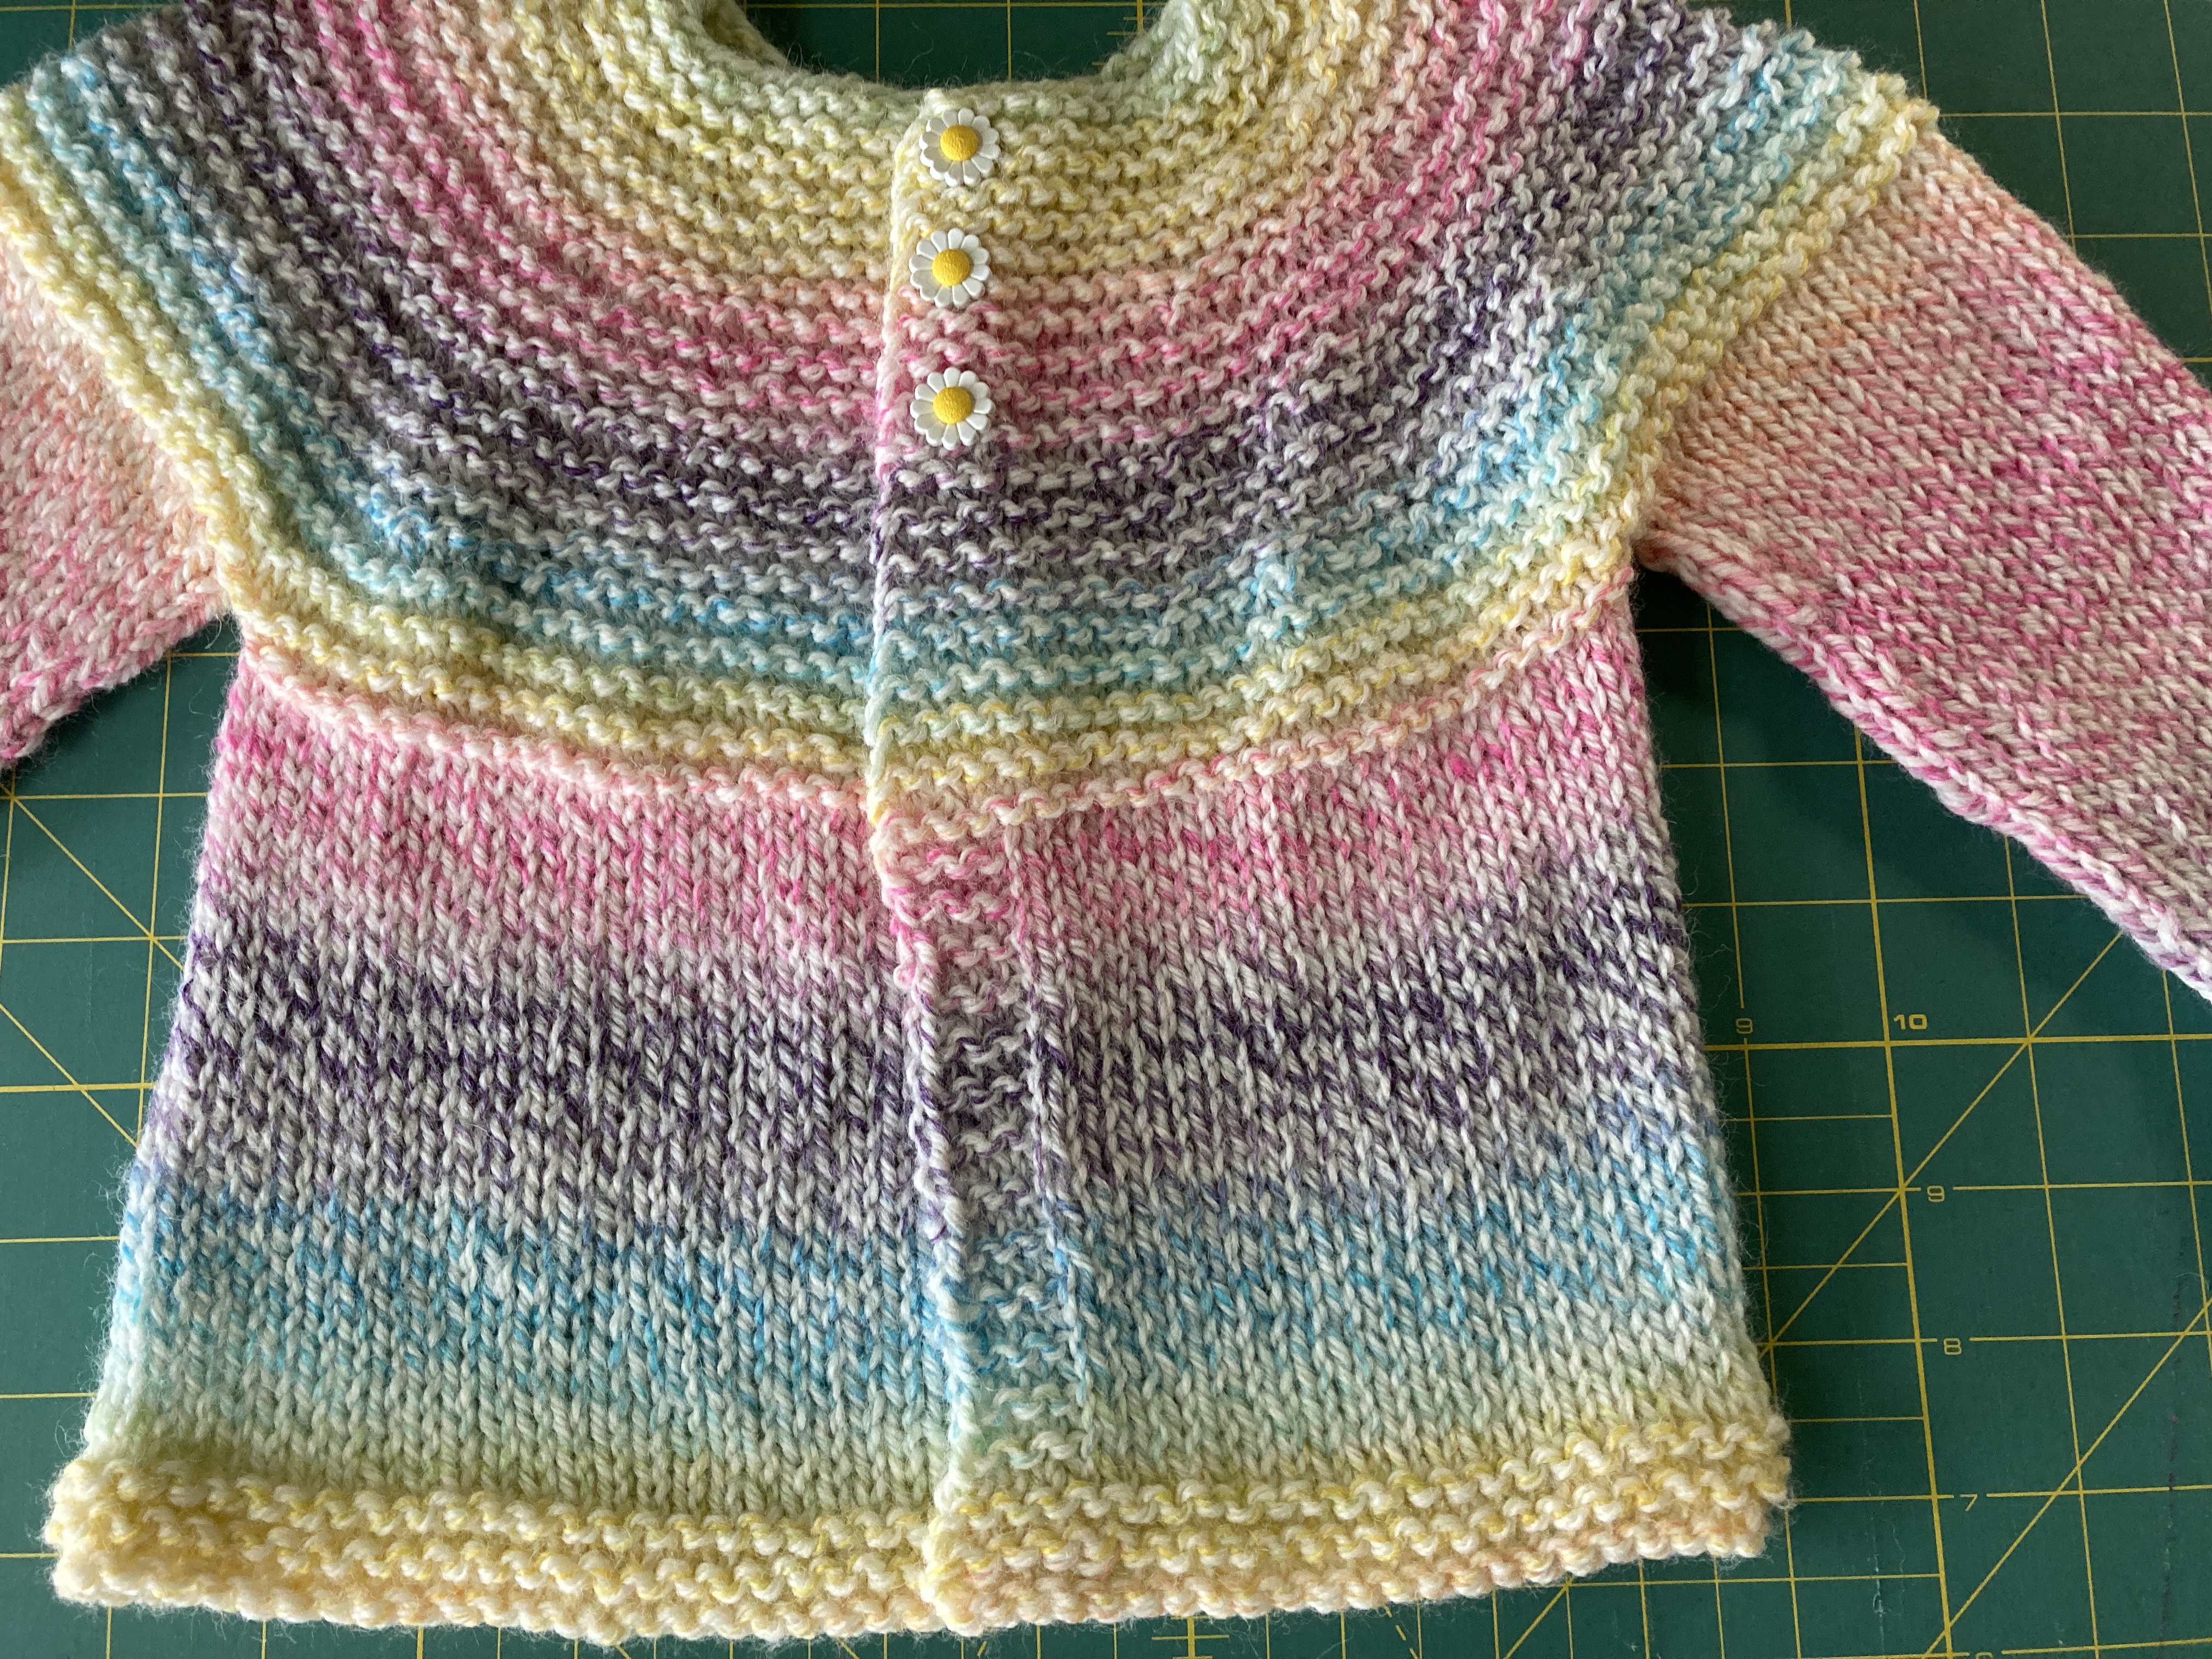
I found some daisy buttons for the yoked baby cardigan that I made with donated Plymouth Encore and it’s really cute! I have also washed and blocked the sweater and the hat. They’re ready for new homes. I have several items that I think I will be putting up for sale in the near future so that I can make some room in my studio for some new yarn. Ha! Ha! Like I need new yarn. I hope someone will want to have some mittens, hats and scarves that are knitted by me to give or to keep. What doesn’t sell will be donated to a good cause.
I’ll write more later about selling hand knits. For now I’ll sign off. Gone knitting.
We arrived Le Centre Sheraton Montreal on Thursday afternoon after an easy drive from Belgrade (Maine). GPS took us all the way to Canada and nearly to Montreal on back roads and it was a beautiful day for a drive.
The hotel has been undergoing some renovations and as such, Glenda, my knitting adventure companion, upgraded us to the Club level of the hotel where we would be able to have breakfast in the mornings included in our room rate. There was also an option to have hors d’oeuvres in the evenings but we only made that once. We were busy! The hotel was nice, the rooms were above average and we were able to park the car in the hotel parking so I didn’t worry about it at all.
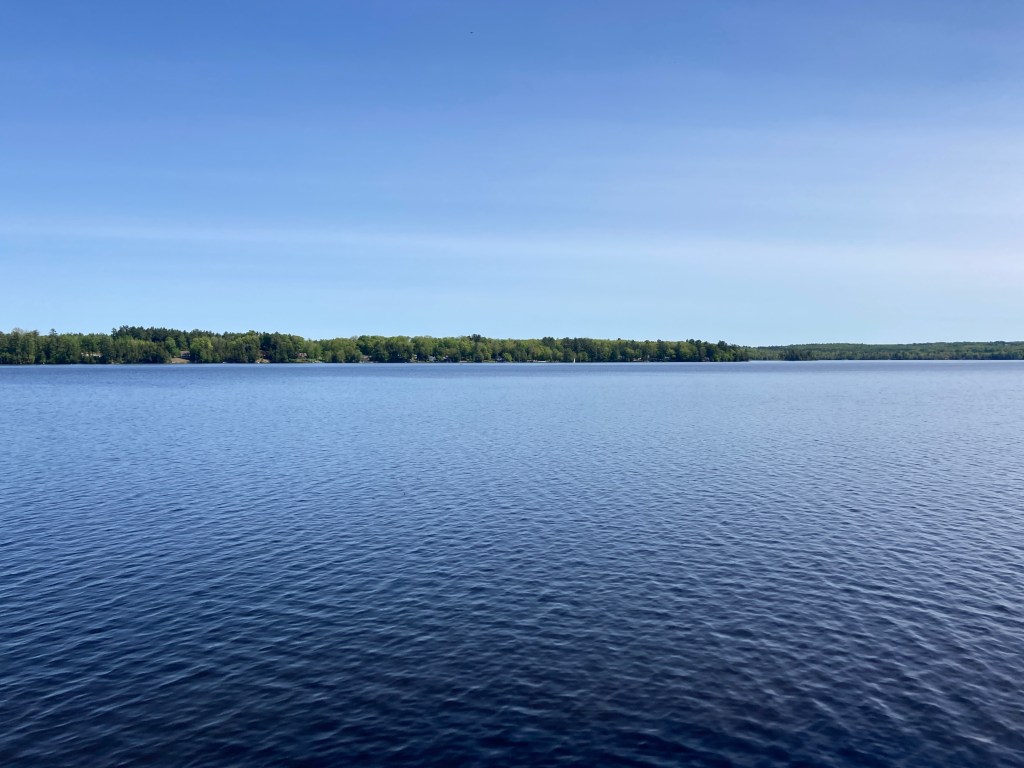
After we checked in we checked out the Club level and had some hors d’oeuvres before our first adventure. The photo above was the view from the 37th floor of Montreal.
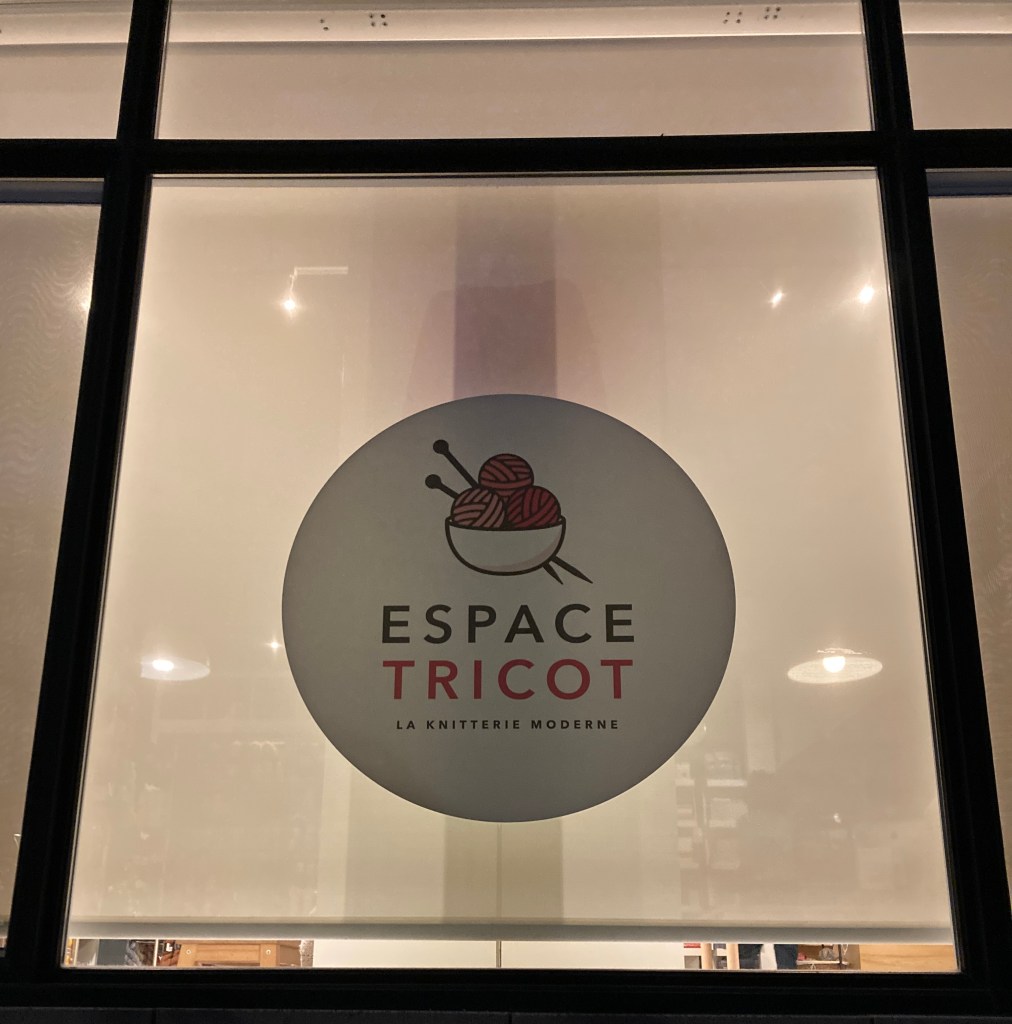
Thursday evening’s excursion was to “knit night” at Espace Tricot. Espace Tricot is one of those iconic yarn shops that you dream about visiting. My friend Michele from The Medomak Fiber Arts Retreat lives in Montreal and her LYS is Espace Tricot. So … when in Montreal … we headed out of the downtown area on the metro requesting a “soiree illimitee” ticket.
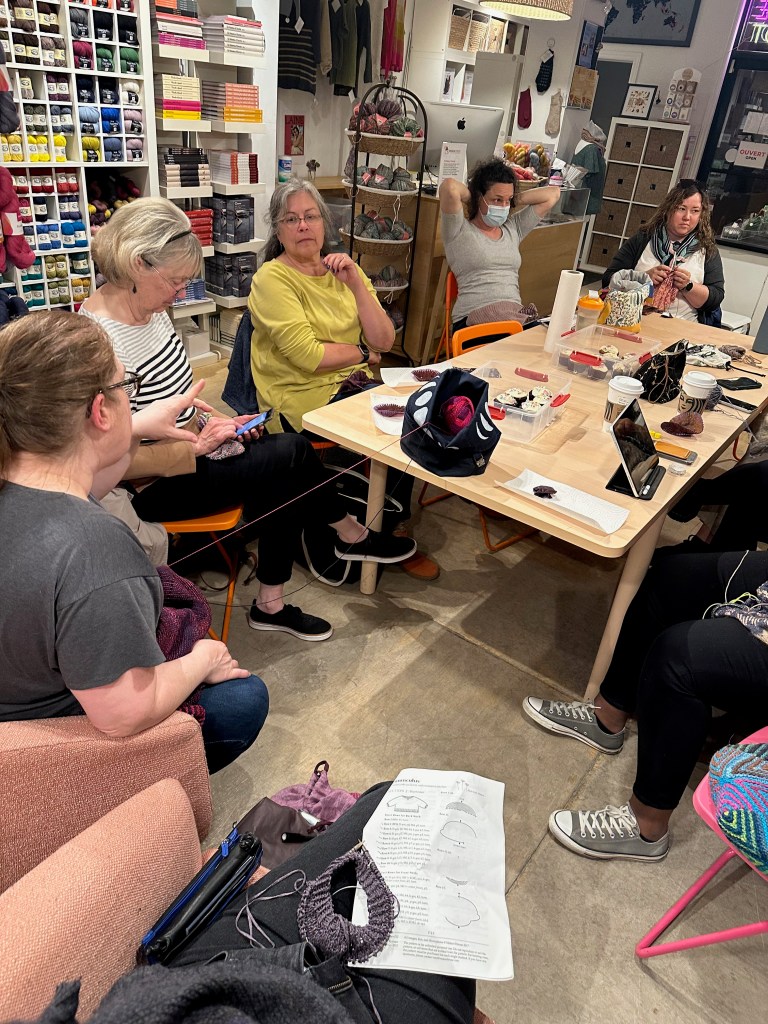
Espace Trico is on the second floor of the building and is an attractive, light-filled, well organized space full of delicious yarns. They have their own brand of yarns in addition to many other brands that we don’t normally see down here in the States. There were five women there, a smaller-than-normal group, and the four of us. It was Cindy’s birthday so Michele brought vegan cupcakes. I am looking forward to getting her recipe. They were delicious! (Happy Birthday, Cindy!)
On Friday morning we had classes. Mine was Slip it, Float it, Tuck it with Bristol Ivy. It was a wonderful class and Bristol is a generous, organized teacher. We made a “wonky” swatch of practice stitch patterns but I learned a lot. Slipped stitches do so many different things and make so many different stitch patterns.
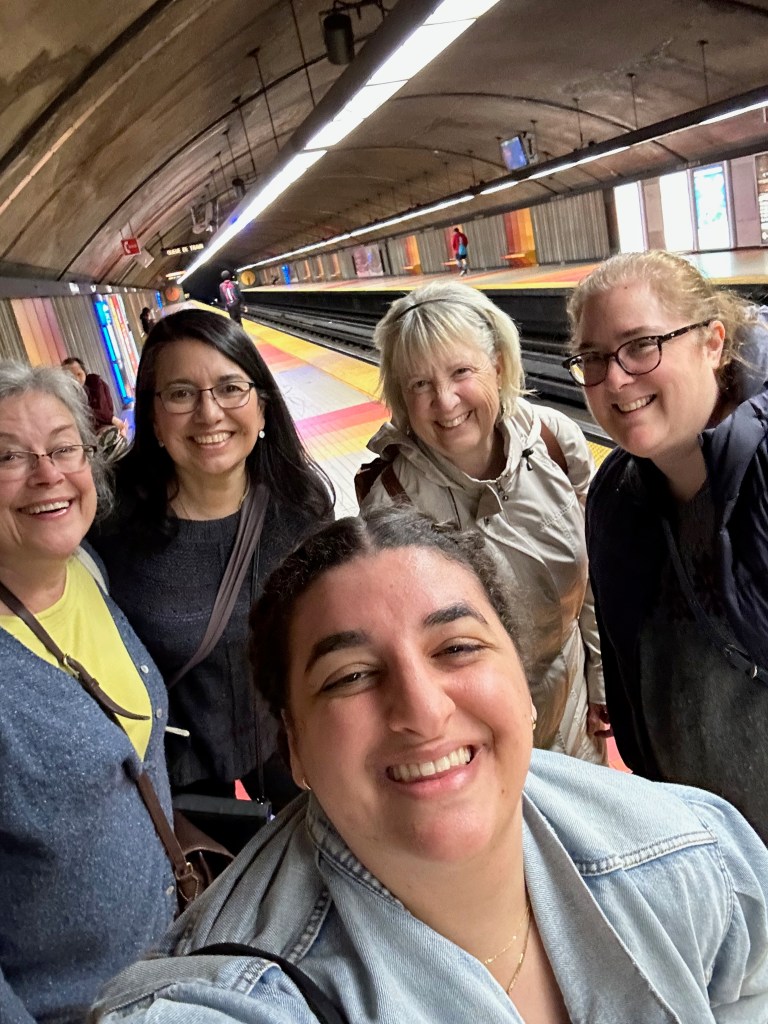
Since our official tour guide had to work on Friday, we headed off on our own, Glenda, Cindy and me, to find two local attractions that we heard were not to be missed. So back to the metro we went and headed to a kosher Jewish bakery called Boulangerie Cheskie.
le metro
Oh my goodness, if there was a world in which I could have one of each, this is the world! Yummm!!! The bakery was filled with locals who were preparing for the sabbath. Older kids with their younger siblings in strollers, families, and us. We met a lovely older woman who’d lived in the neighborhood for decades. She was warm and happy to chat with me in line. I brought home some rugelach, babka and some potato knishes.
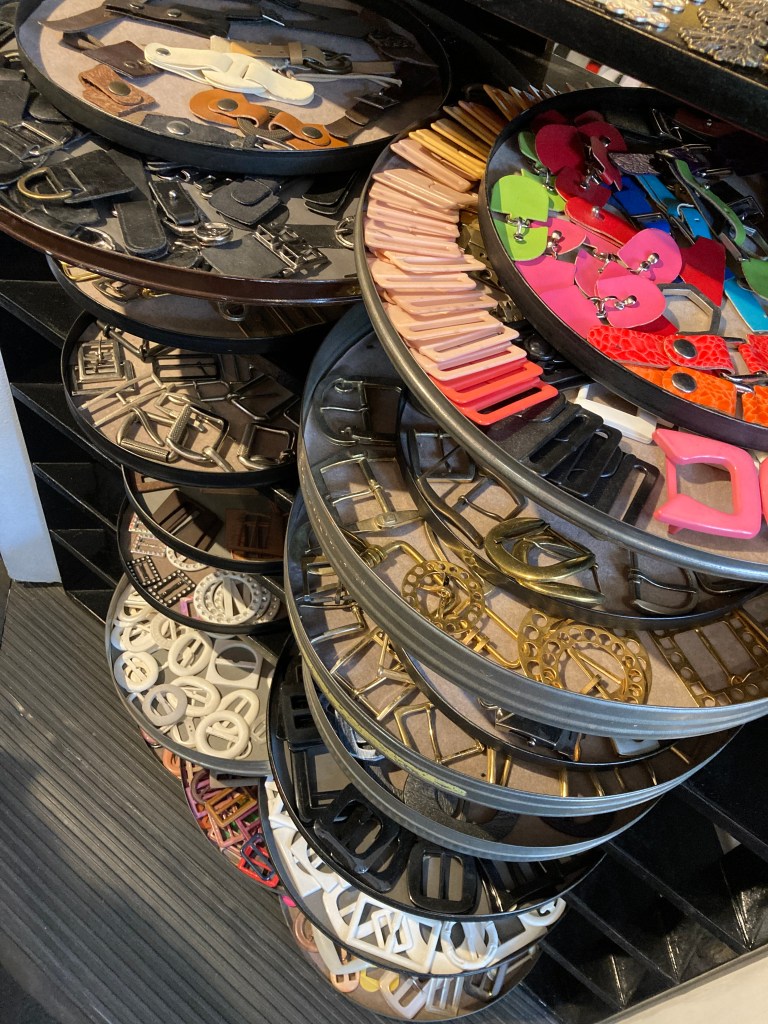
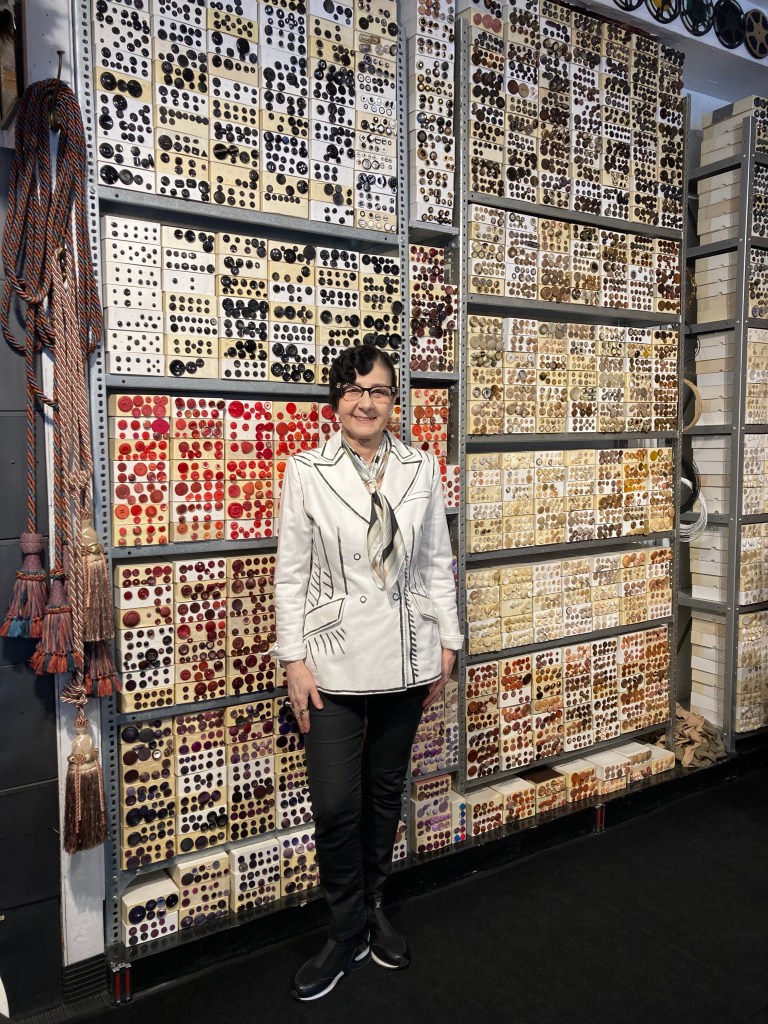
Then off to the “button shop”, Rix Rax, aka the candy store. I’m not even sure that there are words for this place beyond WOW! I’ve never seen so many buttons in one place before. A rainbow of buttons of every size. And the proprietress knew where we needed to look for anything we asked for. It was incredible. I got little orange buttons for the sweater I’m going to make for Sylvie and I got some little navy buttons to replace the ones that I put on my Elton cardigan. I also bought some gorgeous orange glossy shell buttons … guess I’m going to have to knit myself a sweater for them. They’re so special!
We also visited a little yarn shop in the same neighborhood. None of us can pass a yarn shop without going in.
La Maison Tricotee was a sweet little yarn shop with some beautiful yarns. They had the Knitting for Olive yarns that I’d never seen before and never touched. It’s lovely for knitting and particularly nice for knitting for little people. I was saving my money for Saturday so I didn’t buy anything there but I could have.
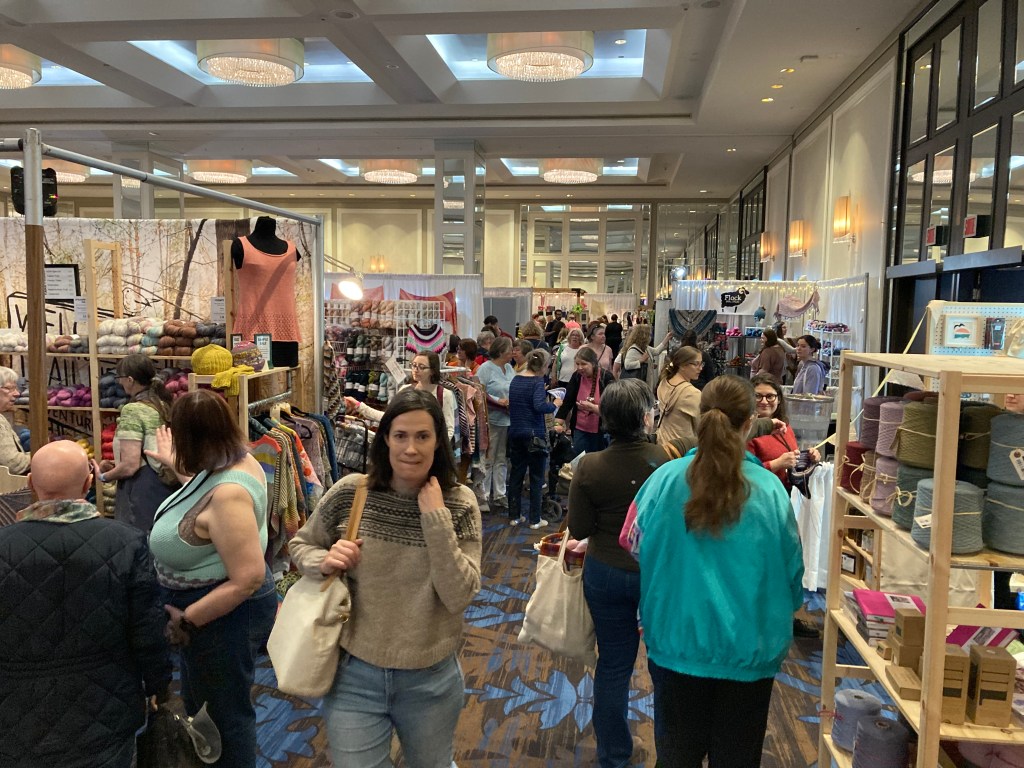
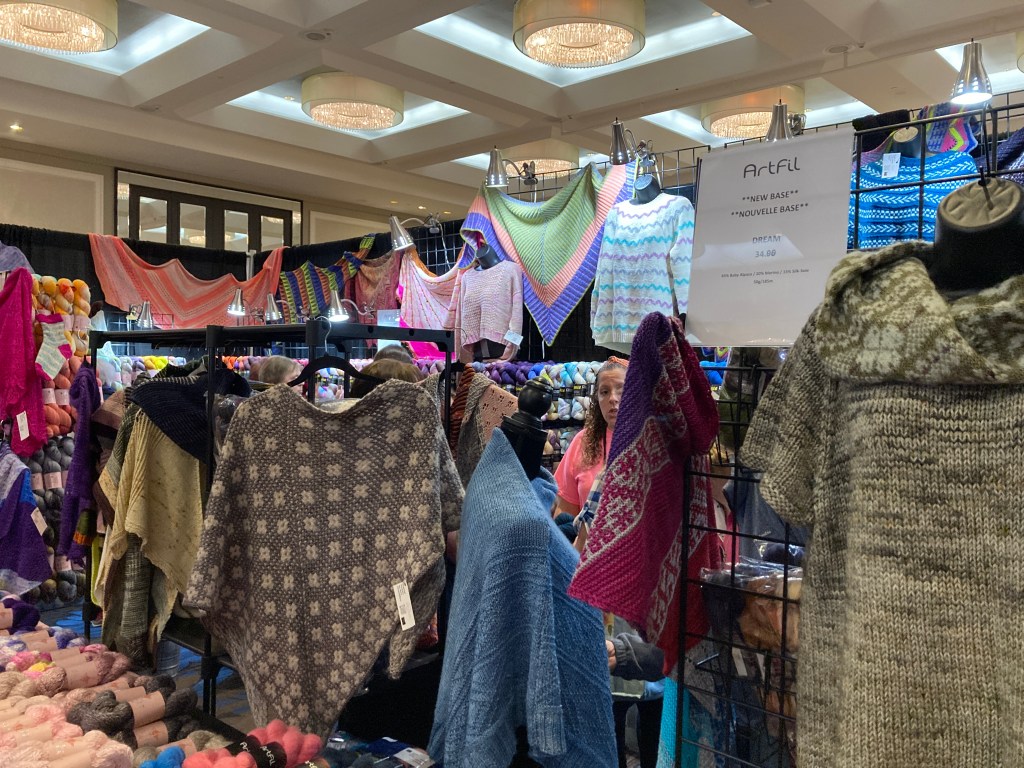
Saturday we went to the Knit City marketplace.
We had previewed the different vendors and shops and had a “plan” but after walking into the market place, we bought our first yarn at almost the first booth we saw and it was not part of our plan! I bought a 100g hank of peach and two mini-hanks of the same black tweed fingering weight yarn to make a cowl. We both loved the colorwork cowl sample that was shown to us. It was really pretty. I’ll be making the First Snowfall Neck-warmer by Runningyarn.
I also bought a hank of yarn at Mailles a Part which is owned by one of Michele’s friends, Catherine, who we met at knit night. I’m not sure what this yarn will want to be yet, but I was thinking a one-skein shawl. I loved the color! I also bought a beautiful enamel row counter. It has pins on the back of it so you can pin it to your project bag. (Glenda has already noticed that the numbers don’t “lock” so we are. both a bit concerned about how it will really work. I haven’t tried it yet.)
Last, I bought some fingering weight yarn in a gray/pink wool, Nurtured Fine from Julie Asselin. Julie herself rang me out. I loved the sample that they had in the shop in this yarn. It was called Poet by Sari Nodlund. It’s amazing to think that I can make a sweater (although it is a tee and without sleeves) in two cones of yarn. I am looking forward to working with this yarn. And it seems like I’ve got my knitting plans all charted out, doesn’t it? We had a blast at the marketplace and the plan was to to not return because we’d bought our fill.
We both took a Saturday afternoon class with Stephanie Purl McPhee … and she was amazing. Funny and light but also providing lots of tips and tricks as we talk-walked through the process of knitting a garment from visiting a yarn store and choosing yarns to blocking. I had heard that the class was a lecture (a 3-hour lecture) and was prepared to be entertained more than informed. Boy was I wrong. Stephanie’s lecture was totally note-taking-worthy. I only wish I’d taken pictures of her. (And Bristol, too!)
After breakfast on Sunday we went back to the marketplace “to get Glenda’s book signed” and … OOPS!
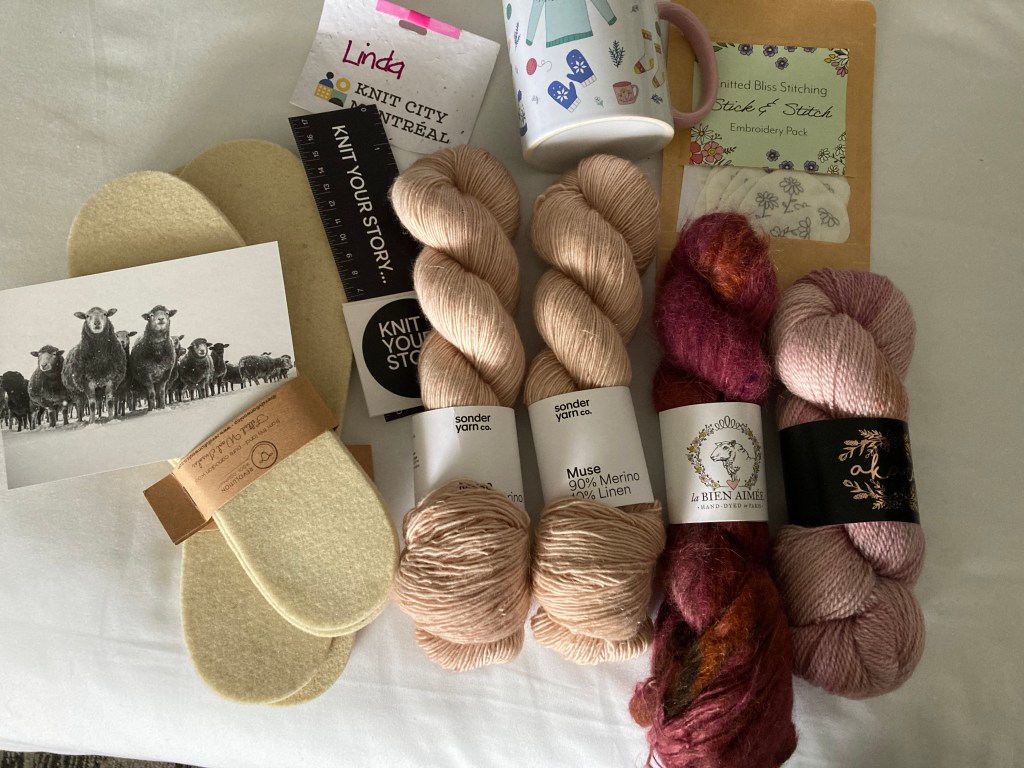
I got into a little bit more “trouble” (but it’s good trouble!) Wool insoles from Revolution Wool Company for our shoes for obvious reasons. His will be a birthday gift next week. A mug with pink insides and handle and lots of cute knitted garments adorn the outside. It was too cute to pass up. I also bought from the same vendor some stick on/wash off embroidery patterns intended for knitwear. This water soluble fabric stabilizer isn’t foreign to me but I thought this was a good way to try it for the first time. Knitted Bliss Stitching had a really sweet pair of mittens, Framework Mittens, that I’ll knit and then embroider on to give this a try – and she uses embroidery floss! I have that.
On Saturday after we were at the market I learned about special yarn colorways that were made for KCM. I “had” to buy one of each. One was a mohair blend from La Bien Aimee and the other an untreated BFL wool by Akara. I’m not sure what they’ll be yet but I was thinking a shawl with stripes of each yarn. Time will tell. I also bought two skeins of Sonder Yarn Co’s Muse yarn. This will be used to knit a tank top called Staple Linen Top by Joji Locatelli. It’s a relatively simple pattern and the pale peach yarn will be a favorite, I’m sure.
Highlights and Lowlights:
For me the least fun was the knit night on Friday evening. The room was packed to the rafters with people, ten to a table and there wasn’t room to move around and visit with our other friends. Seats were assigned so Glenda and I were away from the friends we really wanted to visit but we met a nice woman (between us) named Kim from RI. There were games and raffle prizes but to me, the music was too loud, I couldn’t hear the emcees well at times and, frankly, I think I’d have rather just visited and knitted with my friends from all around the US and Canada. BUT the high part of the low part was that there were so many younger people there. We were the oldest women at our table of ten. That was thrilling.
The best part of this weekend was the people. All of the vendors, organizers and unofficial city hosts in Montreal (those in the restaurants, the metro, the hotel staff, volunteers, etc.) were so friendly and helpful. And the best of the best was getting to spend time with old friends and meeting new friends. Again, we felt warmly welcomed at knit night at Espace Tricot and everywhere else we went. This “shiksa” was welcomed at a kosher Jewish patisserie by an 80+ year old local … how much better than that does it get? Montreal really showed us what a treasure sits on their little island. (I learned that Montreal is an island!)
We took a GPS-chosen route home yesterday and had some good laughs. We touched two countries and three states in our return trip – crossed into the US in Vermont, New Hampshire and then Maine on what we are calling the avoidance route – we avoided all two-lane roads after Canada’s Route 10 – and yet, we arrived at Glenda’s house in 5 hours. And it was a beautiful day for a drive.
Thank you, Montreal, Knit City Canada and to Glenda for going with me. We will be back next year especially since we are bilingual. (Je pense que non!) Ha! Ha! Ha!
The adorable baby sweater is finished except for the buttons.
The pattern used a yarn over (YO) to make a small button hole and it’s a bit odd … thus, it’s going to be a challenge to find an adorable girly-not-too-girly button (times seven). I’ve tried several that I thought would work and they don’t.
Again. The pattern calls for a 3/4 inch button … they seem a little bit to big. And anything other than a smooth circular or near-circular button gets caught in the button hole. Grrrrr!
I am sure that I’ll win at this battle. I can always make my own buttons but I’d like to find something sweet for my niece-to-be.
I chose to use a Knit Picks yarn, Comfy Sport, which was wonderful to work with. I love the way it feels and the colors are great. Price point is very reasonable at and it’s washable. I think that knitted gifts for babies have got to be washable. You can check out the colors that I used on my Ravelry projects page.
This pattern was free on Ravelry and it’s a very simple knit. A beginner could certainly make it … especially if one made it in a single color. Stripes are not difficult but carry the yarn as you go because there would be a ton of ends to weave in if you don’t. With my three colors there were enough ends and I carried the yarn as much as I possibly could. I made the 3 – 6 month size. It required one ball of each color and there isn’t much yarn left. Once it’s blocked and buttons are sewn on, I’ll post another picture. I just need those buttons.
Classes on Friday were Embellishments and Heel! Learn Toe UP Socks with Mutt-Luks!
Embellishments Swatch
You can see we did several different embellishments. I, personally, love love love the little dreadlocks! Anyway, you’ll see that there are several rows of garter stitch (just to warm up our fingers!) and then the first embellishment was the “dreadlocks”. Next, bobbles. These are nice perky bobbles with no droop or hole underneath. I love the idea of using these as buttons. Next we did a few rows of cables … without a cable needle. A great technique because, Annie says, using the cable needles stretches the yarn and sometimes makes for a gap or hole in the fabric. This technique will not! Last, but certainly not least, we did a couple of different bind offs … a picot bind off (on the right) and an i-cord bind off (on the left). The picot bind off could be used as closure for a cardigan sweater, for example, with some lovely bobbles as buttons. The i-cord band could include i-cord loops or frogs. I’ll be playing with a few of these ideas. I’ve played with adding i-cord to a flat garment but never edging a garment with i-cord!
(PS) My swatch is sitting on one of the books that I bought at the classes which Annie has written, Confessions of a Knitting Heretic. The second book I bought was this one:
Cheaper than Therapy is a collection of stories that were gathered by Annie. Since I’m a one book at a time kind of girl, I’ve not really dug into either one yet. But I am looking forward to them both!
The second half of our technique classes on Friday was a toe-up sock with a different (and better) toe and a different heel … an after thought heel of sorts, made with short rows. We didn’t really make a sock but we started (duh!) with making the toe and then knitted several rounds of the “sock” before adding some scrap yarn to mark where the heel will go. I still need to go back and finish the “sock” and I’ll show you pictures at a later date … or I’ll add them to this posting.
Day 2- Entrelac Lace
Saturday we did entrelac. Lots of entrelac. Mind-boggling entrelac!
Entrelac Swatch
We started out with our work flat, working back and forth in entrelac. I really like the look of the entrelac (especially in two colors). It’s such a harlequin look. With the idea that entrelac can also be worked in the round, we then joined our work and then made the squares bigger and worked the top ones in lace. It was fascinating to think about taking a somewhat complicated technique and making it more complicated but the lace skirt pattern that Annie used as her example is really lovely and I would love to make something similar!
Day 3- The Universal Mitered Bag/ Modular Knitting
Sunday we made a small Mitered Bag. Using three colors, we learned how to form the interlocking triangles in different sizes and how to construct a bag (to be felted) using the technique. I found this technique really easy to follow and really enjoyed it. Annie even knitted on my bag to show how to do some of the steps … thus, I have a bright orange and a couple of tiny gray “diamonds” (on the left) which she gave me permission to pull out – but who in their right mind would pull out Annie Modesitt’s knitting? I think it makes my bag all the more special!
My Mitered Bag
This is the bag before felting. Notice the really cool “edge” at the top where the purple and cream yarn are twisted.
Two Rounds of Twisted Edging - Looks like Herringbone!
I originally had gone around again (because this round was done by Annie. Yay!) but it was too wide and I went back, after making sure I could actually DO the technique, and tore it out and bound off. I do think I’ll buy some good wool for felting and make the next size bag because it was really lovely and a good size.
Annie also gave us some tips for felting (and told us about her online classes that she offers … I would encourage anyone wanting to learn more about our craft to check out her classes … click here to be magically transported to her site! She’s a wonderful and thorough teacher and I learned a lot!)
So, add in a potluck lunch that lasted into the next day, some great knitting women in the Orlando Knit or Knot group – which, by the way, is the local Knitting Guild Association group – and a lot of laughs, and you get the general gist of the weekend.
I had a blast – and I’m still recovering from the mind-bending concentration. I took some notes and will share some of them with you “down the road”. But for now …
Woo! Hoo! I’m wrapping up some (long overdue?) projects … it feels really good to get them off the needles and into use. Socks from hell. These are the ones that I tried (and won’t try again – at least for awhile) to do two socks on one needle. It was a struggle to get the hang of knitting two socks on one needle but I’m always open to a new knitting challenge. This one was OK until I came to turning the heel. I asked Betty (my Maine knitting teacher) who couldn’t explain her method to me and did it for me. I’m sure there are others – perhaps one person who is in my new knitting group – who like to have their socks exactly the same and that’s what this method is best known for. Perhaps, after a while, I’ll decide to give it another shot. For now, I am glad that these socks are off the needles and I may just have to put them on my feet today.
Mac Bag Blue. I have had this yarn hanging around in my stash (yes, I have a pretty amazing stash … what’s the big deal?) since my eldest daughter (now 27 1/2) was around two. My son got quite a giggle about this this morning on the phone and pointed out that the yarn has been traveling around with me for more than two decades. Well, yeah, and so?! 🙂 Anyway, this project grew out of needing a properly-fitting bag for my new Mac. I used a seed stitch for the main body of the bag and then used a more stretchable 2×2 rib (in two colors because I ran out of blue) for the pouch on front that holds the cord. I think it came out well. The black leather button seals it all up and adds a pop – different texture and different color family. I am really proud of the end result and now I need somewhere to travel!
Prima Dogma Bulky Turtle(neck) This is the first half of my first Prima Dogma by Queen Bee Knits first order. It’s based loosely on a design that I’ve made before but needed to change quite a bit in order to fit a teeny-weeny dog. Truthfully, I’ve knit this sweater twice and “frogged” it twice before I got it right. Now, I have to type up the pattern and will likely start offering these for sale in my Etsy shop. My client asked me to make it pink with grey stripes … I love the colors that I chose and I hope she will like them, too. The sweater is styled to look like you’re wearing your boyfriend’s sweater … a bit big and bulky but oh so very warm and cozy. Yarn is a bulky baby alpaca – super soft and it will also be super warm! Before I block it, Lola will model and I’ll post photos.
Next on the needles… Prima Dogma for Queen Bee Knits Señorita Lolita sweater in a pretty peachy pink wool. Not sure what the flower will be yet. Stay tuned! Also, a hat for my son. Another custom pattern in specific stripes – black, grey and orange – with cables and earflaps. Also black socks (they’re started but haven’t gotten very far) for my son.
Left to finish … my Noni felted bag. Knitting and felting is done but the lining and handles need to be added so I can tote it around. It’s so pretty … maybe tomorrow? I’m not a super-sewer!
We’re off to get outside in this beautiful cooler-but-warming-up weather! It’s already past noon! How does that happen!
Here's the side view ... can you see the pretty buttons that I worried over? No?
Well, in all the years I’ve been knitting, I think I’ve knitted about two … maybe three … swatches. Yes, I know. Everybody tells you to knit a swatch to determine your gauge PRIOR to starting your garment (whatever it may be!)
I now have a better, first-hand understanding of WHY you should knit a swatch … even if it’s “just a cowl”!
Not exactly upstanding, is it!
And from the front ... the leaning tower of cowl.
I’ve taken three photos … well, I didn’t but my sweet love took time away from polishing his boots in the garage to take it for me.
Photo one above shows a side view. There are two lovely buttons that you can’t see because this cowl is so darned big. Nothing like the sample photo on the pattern. Why, you ask? Because the Queen Bee is a non-swatcher. (I’m almost ashamed to claim the title.) But it’s the truth and I always tell the truth.
It’s rather funny, actually. In my day-to-day life, I am such a rule follower. I don’t cross the street when it says “don’t walk” and I make a full stop (counting to three) at stop signs. I don’t litter. BUT … I don’t swatch!
And now, I will have the pleasure of frogging my lovely Thermis cowl and then making a swatch so that it turns out the right size. I’ll blog about it again, dear reader, when it’s knitted properly!
While I may have hit a creative block, I’m thinking about knitting … and am off to the library to find some books to peruse while my creative block is still in the building. 🙂
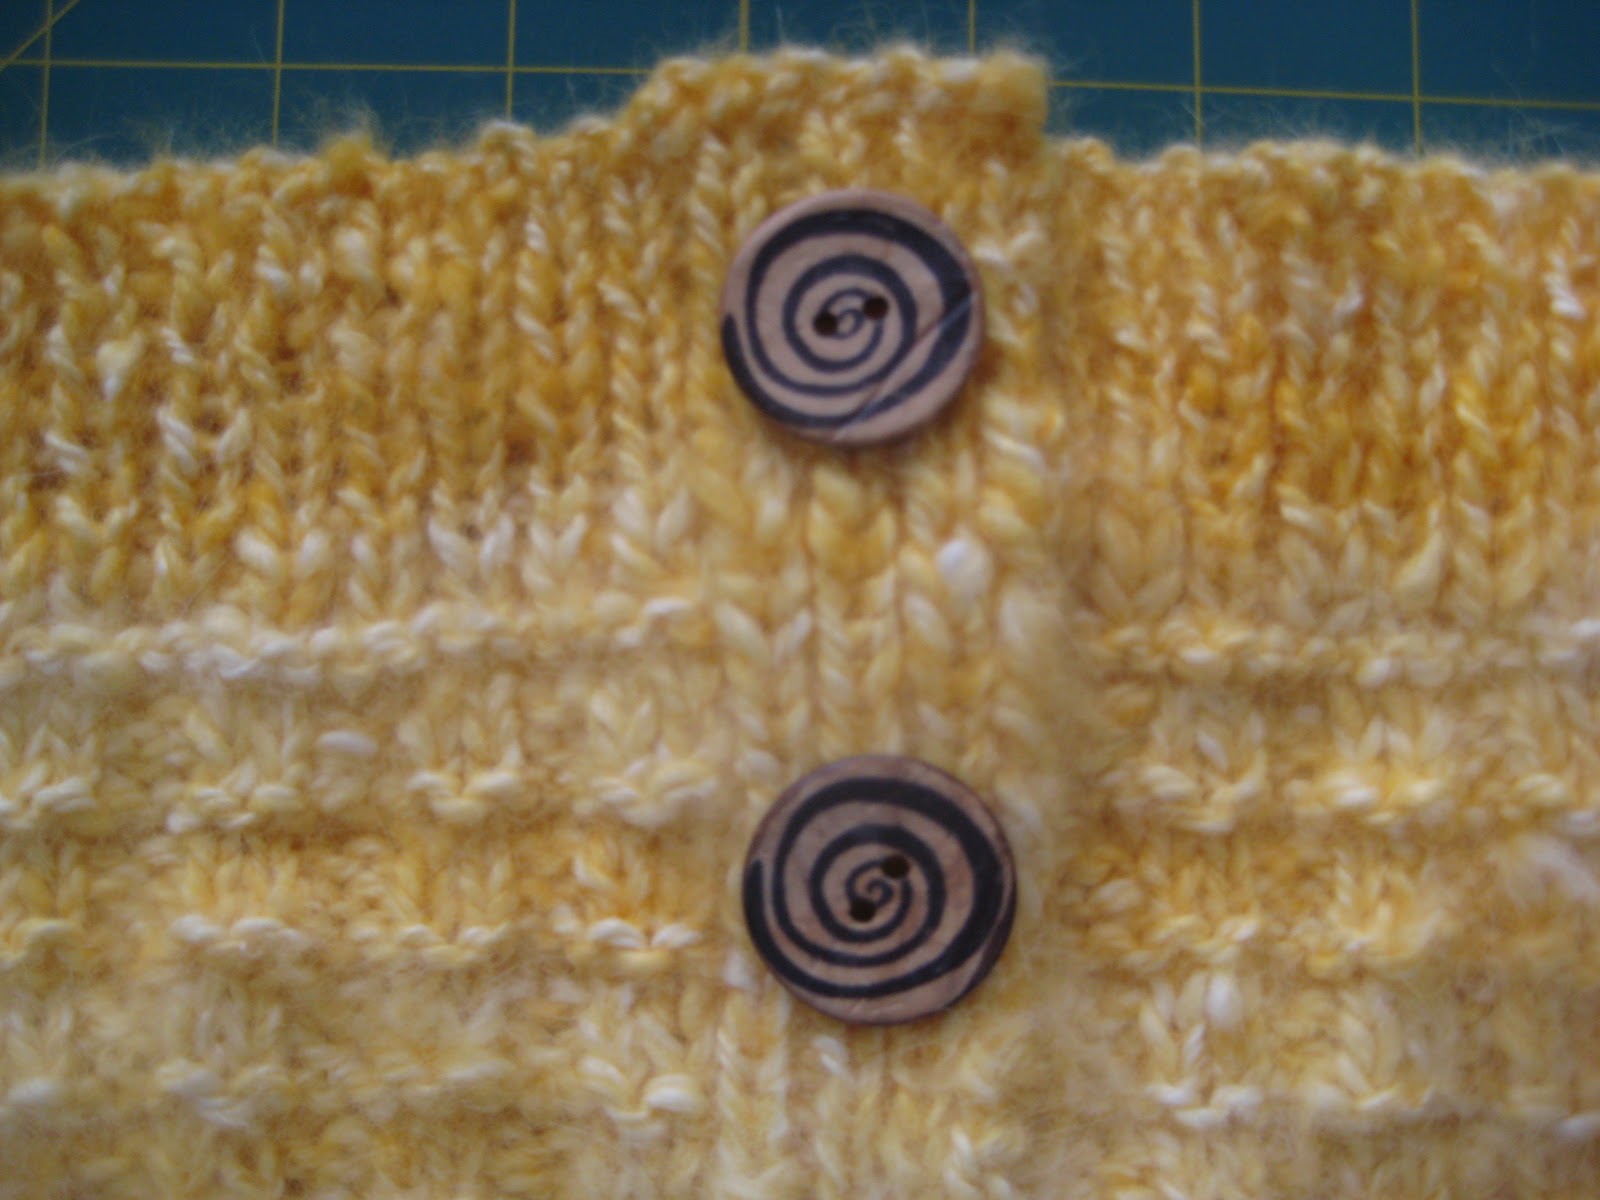
So, I’ve finished the lovely cowl … with my yummy soft Malabrigo angora in a buttery yellow (very bee pleasing) colorway. I went to my local JoAnn Fabrics store the other day – with my cowl – and picked out a few buttons.
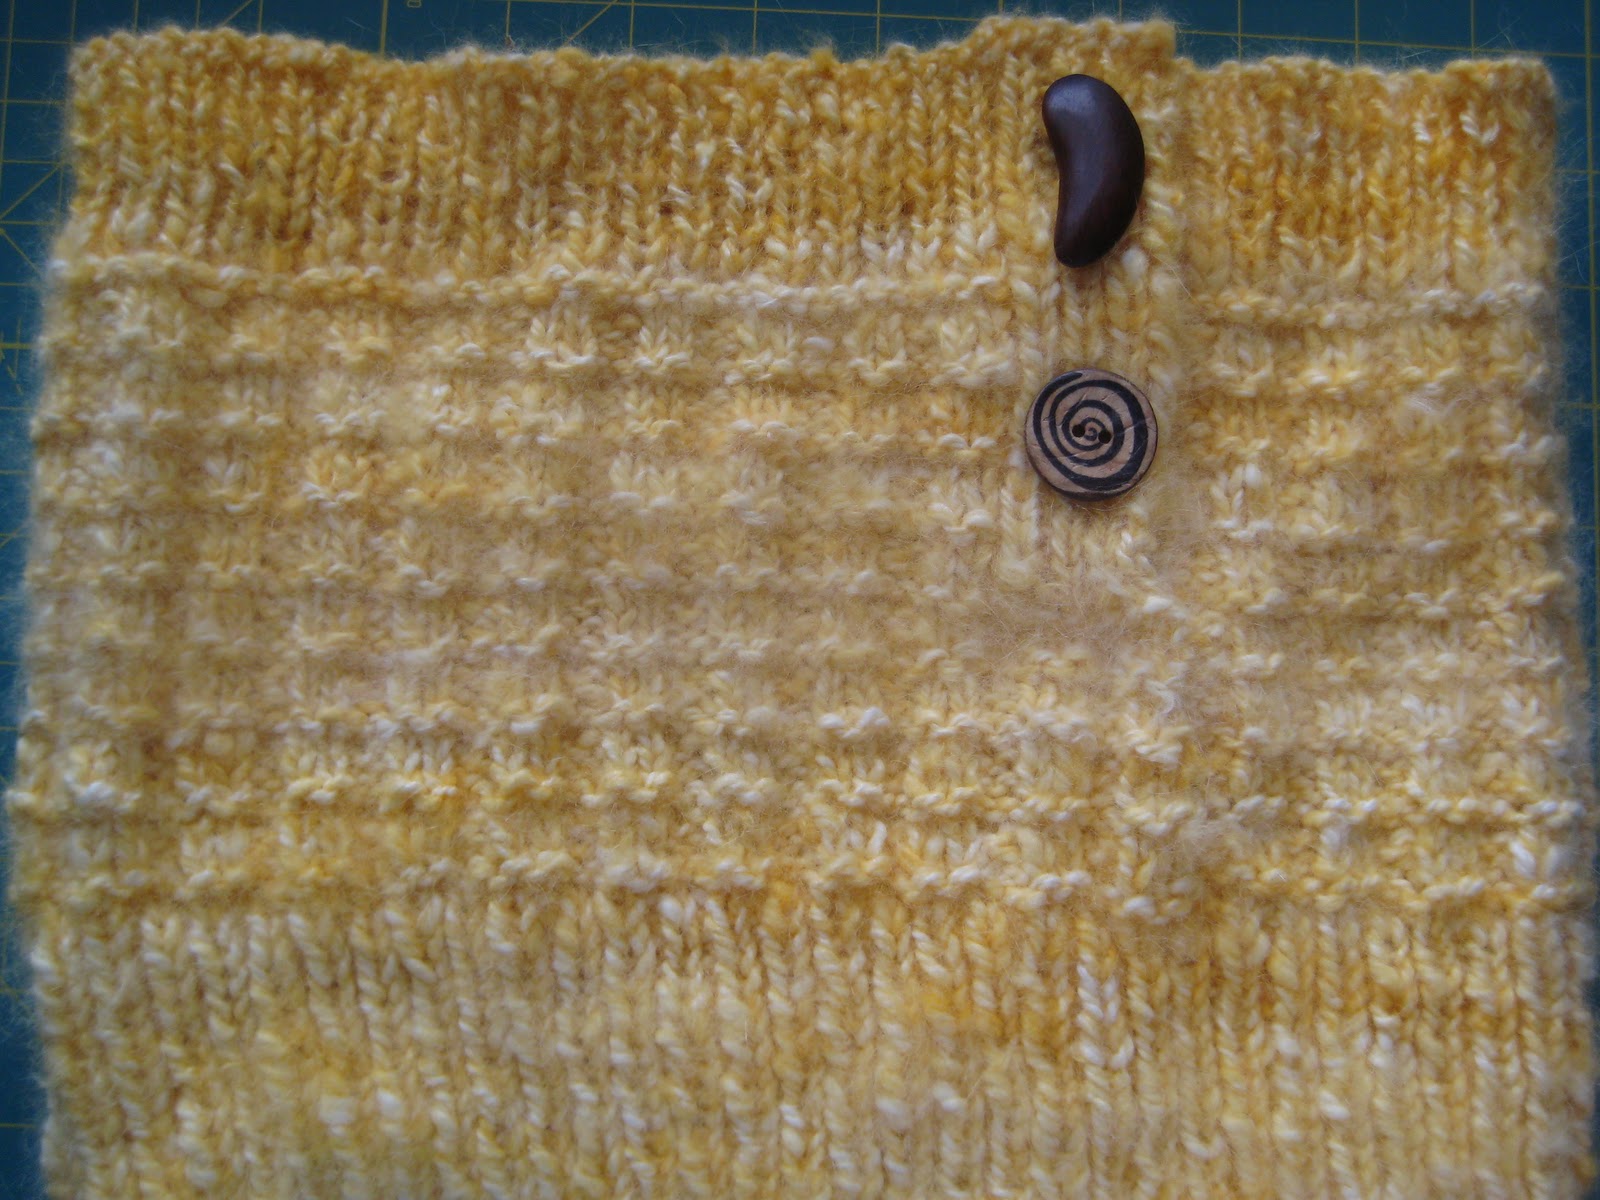
The first two are an organic shape and a dark wood. Smooth and simple, providing a striking contrast to the uniform, almost architectural feel of the cowl itself. I love these buttons and I think they are my favorite (which is why I put them at the top of the “list”.
The second pair are round wood, with a swirl pattern in light and dark. Also a contrast to the linear cowl design. Like the buttons but not sure about matching them with this project.
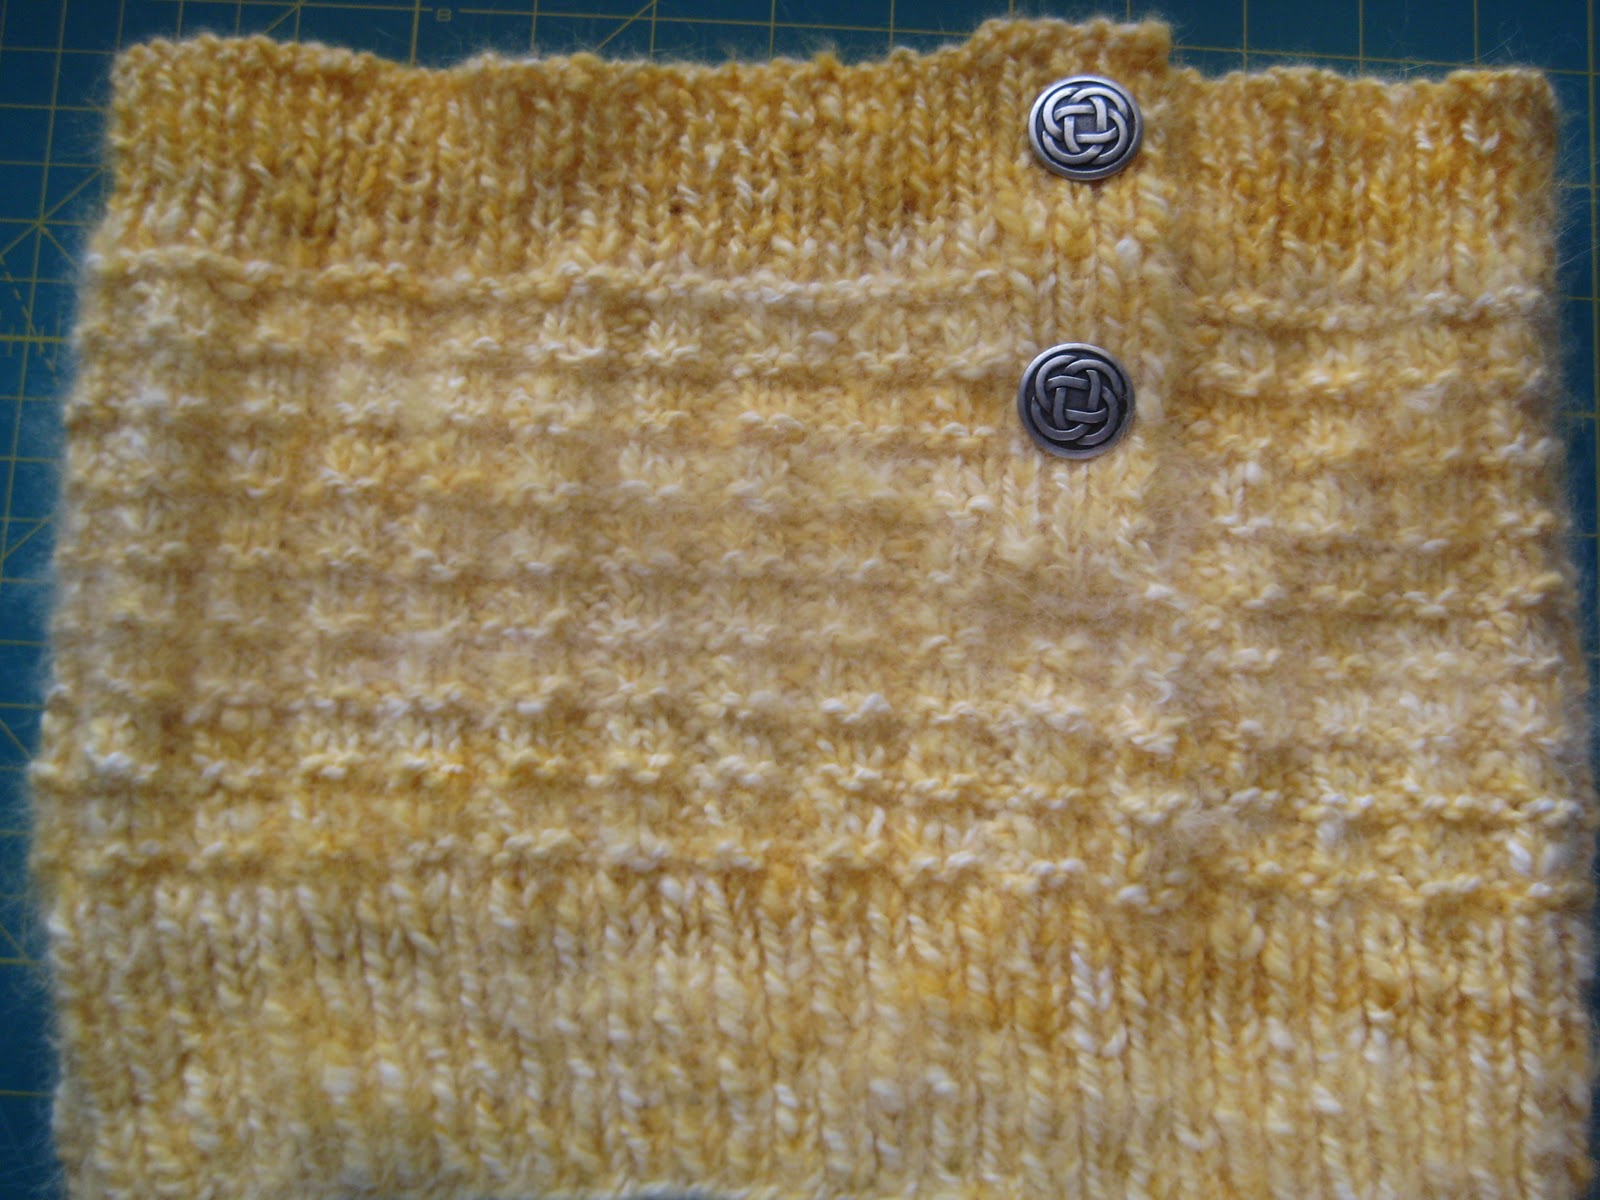
The third pair are Celtic knots in a metal finish. (Did I ever tell you how much I love Celtic knots? Aran knits? LOL!) I like these but they don’t pop like I’d like them to.
The last pair are hippie-dippy-color-popping-pink-with-peace-signs. I have to admit, I didn’t think I’d use these buttons on this project. I thought about my actor daughter when I saw them. She just was in HAIR on Broadway and briefly with the Tour and they just reminded me of her. I think I’ll save them for something for Kate.
And then I go and get creative and the last two ideas are a combination of two buttons together … the most contrasty ones, as a matter of fact. I think I like the next one. It reminds me of an exclamation point! (And I like using exclamation points … have you noticed?
This one leaves me unmoved. Why is it that the one above I like while this one is so close but leaves me totally unexcited? Very strange how that happens with buttons.
So, which buttons would you choose? Did you pick the ones that I picked? When I get them sewn on, I’ll get a photo taken of the finished (and buttoned up) cowl … wrapped around my Florida neck. Yes, I’ll do that for you, dear blog readers! But I won’t have it on for very long … at least not here!