Unknown's avatar

About Queen Bee Knits

Living in Maine, knitting, baking and loving my family. Please be kind!

Keep Calm & Cast On

keepcalm
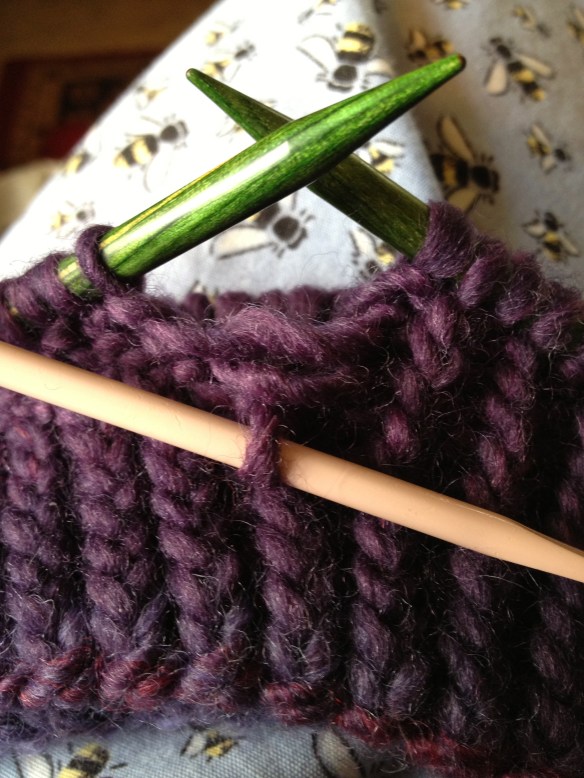
I always knew that the meditative aspects of knitting were good for my soul. It appears that there is scientific proof that the repetitive nature of knitting is a health benefit. There’s an article on facebook today that I think is very interesting and you can read it by clicking HERE!

While I can’t say that knitting has been good “exercise” and there is no proof that I have lost weight or become more physically fit by knitting, I do believe my mind and soul is healthier (and maybe it’s helped my blood pressure, too). I have had some experience over the years with SAD (seasonal affective disorder) and depression. When my son became school aged, I had a really intense bout with depression and really thought that I was going to die. Thanks to my friends and family who stepped in to help me with my children when I was immobilized, some wonderful doctors who were willing to listen to me – beyond the physical symptoms, medication and a great therapist who invited me to look at myself, I recovered and resumed being a mom. I’ve had a few little struggles along the way but nothing like the big “wake up call” back then.

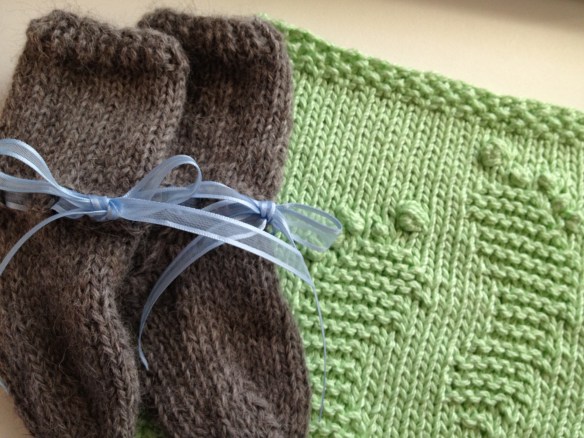
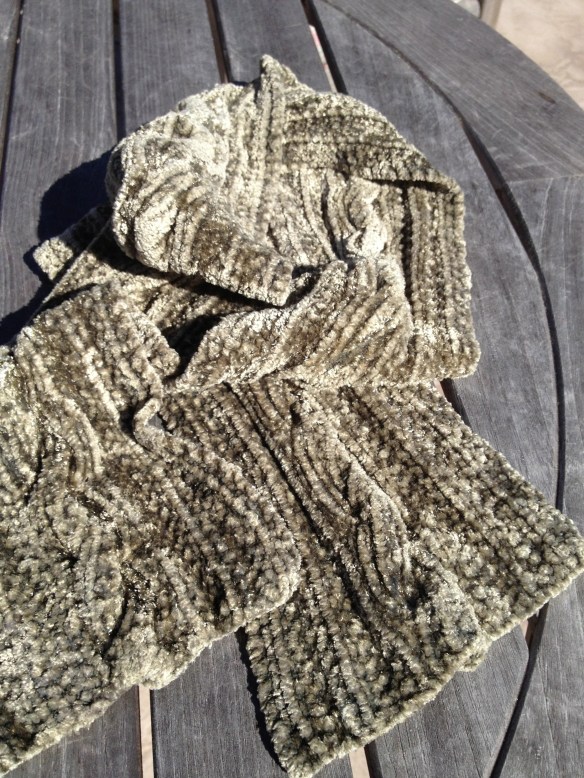
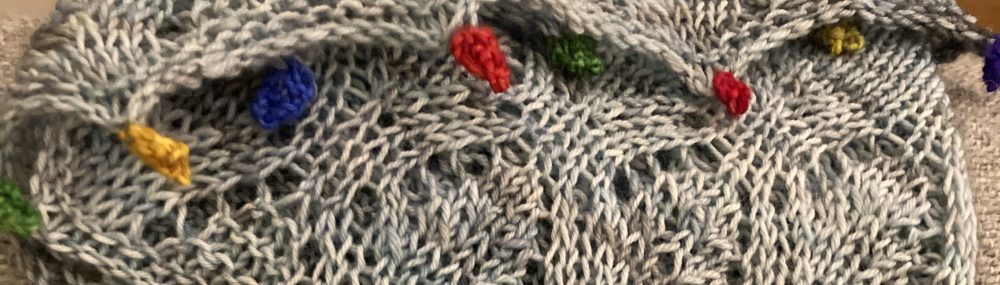
I thought I could attribute my mental health to therapy and self-awareness. Now, I think I have to give, at least partial credit, to my knitting needles and yarn. It does feel good to relax deeply and watch the fabric grow with time and attention. It feels good to finish a project and sense the accomplishment of having created something beautiful; often to keep someone I love warm or to give as a gift to someone that I love or admire.

We’ve all seen the pictures on Pinterest and Facebook that say that knitting is cheaper than therapy – and while I’m not certain where I’ve spent more money, I do know that I feel healthier today and, according to science, I can thank my knitting for part of that!

Gone knitting!

I Hate it When This Happens!

I was happily knitting along on my Twisted Rib Hat when all of a sudden I noticed this …

I Hate it When This Happens!

I Hate it When This Happens!

Can you see how I’ve goofed up the pattern?

Simple as it is, I have knitted when I should have purled and purled when I should have knitted. And it’s actually not the top most row that I’ve just finished either! So, in this case, what does one do?

I thought briefly about pulling out my needles and ripping back a couple of rows. But with the twisted rib, and only about ten or maybe a few more stitches in the mix, I figured it may just be easier to fix it stitch by stitch. So, I un-knitted back to the stitch where I first got off course and dropped the first stitch.

The stitch on the pink crochet hook is the dropped stitch.

The stitch on the pink crochet hook is the dropped stitch.

Now, I have to fix it. Remembering that it’s a twisted rib, each stitch has to be twisted before pulling through the next yarn “bar” with the crochet hook.


Twist the knitted stitch(es) one half twist to the back or to the right before inserting the crochet hook

Twist the knitted stitch(es) one half twist to the back or to the right before inserting the crochet hook

And then you insert the crochet hook and pull the dropped stitch above it through from the back to the front (this is what you do when you’re picking up a dropped stitch, too.)

Pull the next stitch through from the back to the front. (You've inserted the crochet hook in from the front, too)

Pull the next stitch through from the back to the front. (You’ve inserted the crochet hook in from the front, too)

Now you take the new stitch just pulled through off the crochet hook and give it a twist just like the last time. Insert your crochet hook from the front of the stitch and pull through the next dropped stitch. You’re working from the bottom to the top, picking up a stitch for each row that you’ve dropped.

Put the new/fixed stitch back on the left-hand needleThen put the stitch on your left-hand needle (when there are no more to be picked up) and knit it – in this case, you’ll be knitting into the back of the stitch to give it that twist!

Since this is a 1 x 1 rib, the next stitch to be dropped and picked up is a purl stitch. You drop the stitch – you may have to give it a tug to get it to drop down below your mistake – and then I work the purl stitches from the wrong side of the garment. I turn the garment to the wrong side and insert the crochet hook from front to back just like I did on the knit stitch on the right side of the garment and pull through each dropped row of stitches (no twist on this one!). When you’ve picked up all the dropped rows, turn the garment to the right side and place the new stitch on the left-hand needle and purl it.

Next! Repeat this process for each of the “mistakes” …

All Fixed!

All Fixed!

There you have it! I had to fix about ten stitches – I probably looked away for a few seconds … it may be my little dogs’ fault! They can be so distracting! 🙂

Gone knitting!


Burning a hole in my … stash?

Like other knitters, I have a fairly extensive stash. No, not mustache, a yarn stash – that little bit of collected yarns from here and there that you have to buy because it’s so soft or pretty or pretty soft.

I bought this yarn last summer in Maine. I think what made it so appealing was the price … and maybe the color. Yes, I paid $2.49 a ball for it at Marden’s! It’s Main Street by Reynolds (color 6760, lot 8078, 53% wool, 47% acrylic, 50 grams/approx. 98 yards) – 16 sts and 22 rows = 4 inches in Stockinette stitch on US #8 needles.

IMG_1040


Yesterday, I was going through one of my stash bins and found this yarn (I have only two balls) and I was thinking about what I could make with it. It’s wool and acrylic. Soft. And it occurred to me that it would make a great hat. I’m envisioning a rolled brim cap that could be rolled down so that it would be slouchy. And then I was reminded of the Steven West post about pompoms that I saw on Facebook (I love making pompoms) and so I think it needs to have a pom pom at the top. Maybe even a crazy multi-colored pompom. That decision has not yet been made!

I measured my own (oversized) head and cast on 80 stitches that, with a ribbed hat, should accommodate larger and smaller heads. And I decided to make it a (sort of) twisted 1×1 rib (knit 1, purl 1) by knitting into the back of the knitted stitches. I love it when there is that little bit of twist in the knitted stitches. It’s just a little bit different and very pretty.

IMG_1037

See? Aren’t those lines of twisted knit stitches so pretty?! I can get so excited about the simplest little things! I think this is going to be one fun hat! Wait until you see the way the colors subtly shift from purple to nearly red! You can already see a couple of very subtle variations on purple. I’ll keep this pattern going for 9 inches or so. More pictures will be forthcoming at the hat “grows”!

Gone knitting!

EEEEeeeee! (Yes, I’m excited!)

On New Year’s Day I got a phone call from my first-born. In a somewhat hurried but muffled voice, she said she was in a fancy restaurant and probably shouldn’t be on the phone but “Spencer just proposed” and she didn’t want me to “hear” about it on Facebook (because her friends can’t keep a secret). Wow! My “baby” is engaged. That means I’m going to have a kid who’s married! Thank God, she wants to be engaged for awhile so I can get used to the idea.

On the other hand, she’s so totally happy, I’m so excited for her.

IMG_1041In 1980 when I got married, I wore my mother’s wedding dress. Somewhere I have a formal photo of mom wearing the dress in 1957 and another of me wearing it in 1980 – but having moved a few times, I’m not sure where they are … and for obvious reasons, hanging one in my house now is out of the question. Anyway …

Kate is interested in wearing the dress when she gets married and I thought it was a good time to open the box and see how the dress had fared since 1980. With several moves and a couple of “floods” in homes along the way, who knew what condition I’d find it in.

But it’s still perfect.

IMG_1032


The veil is, too!

IMG_1033


I’d even forgotten that it’s ivory colored and that the Alencon lace is so beautiful. When I wore the dress in October I wanted to have long sleeves and a long veil. The lady who altered the dress did a beautiful job of matching the lace for the sleeves and the veil to the lace that was already on the bodice of the dress (from nearly 25 years before!) And looking at the dress, I am amazed and awed that I had such a tiny waistline! Ah, what three babies and some stress and age will do to the waist!

The extra bonus to this whole adventure was finding this on the box …

IMG_1034


In my mother’s handwriting, a piece of family history that so touched my heart. I wish she was here to share this happy event with us. My mother so loved her grandchildren and would be so proud and happy to see them today as the wonderful young adults that they’ve become. I am hoping that Kate will decide to wear the dress, will change it to make it feel like it’s really a reflection of her style and personality and that we can add another date to the box.

I’ll be carrying this precious box full of family history up to New York City when we go to meet Spencer’s family, to oooh! and ahhh! over Kate’s ring and to see her star in Rock of Ages on Broadway. Several proud mom moments all wrapped into one weekend. Lots of emotional moments to cherish and an opportunity to have all three of my children in one place even if only for a couple of days.

Exciting, terrifying, amazing …

Gone knitting!

Twin Baby Socks

One of each is a real blessing. I’ve decided to knit something for the babies and started with my favorite baby wash cloths … baby feet. I found some wonderful cotton yarn in Maine last summer. Ta! Da!

Lov this green!

Lov this green!

IMG_0929

And this salmon is fabulous!

To go with the wash cloths, I decided to make a couple pairs of booties but the pattern annoyed me (not sure if it was the pattern or me but it simply wasn’t working for me) so I went with the basic sock in baby size. I love the gray Cascade Eco Alpaca (100% baby alpaca) yarn. It’s a little bit “splitty” but so soft and will be so warm on those baby toes!

I wanted to have a little bit of “color” for the socks so I used an eyelet row to embellish the plain socks and allow me to add a bit of ribbon for the color (I went traditional this time but the new mom can change out ribbons if she wants). The eyelet row was simply a purl row, a row with a few yarn over, K2togs as evenly spaced as I could get it, and then another purl row. I’m really happy with the way that they turned out.

IMG_1019


IMG_1018


IMG_1022


IMG_1029


IMG_1025


They’re all wrapped and ready to be sent! I can’t wait to see pictures of the little ones wearing these socks!

Gone knitting!


On Being a Mentor

I’m a mentor at my local elementary school. I had been feeling like I was missing being around children. Mine a grown and have full lives of their own; boyfriends, girlfriend, jobs, social lives, homes to clean, dog to walk … all the things that they’re supposed to have as young adults. I did my job as a mother and as a result of having done it well, my kids have moved on and are building lives of their own. It’s a good thing. And I was still feeling like I had something to offer to children. So I signed up as a volunteer with our local school district not really knowing where it would lead.

A little over a year ago, I got a call from the counselor at my local elementary school. She was looking for a mentor for a student – a third grade foster child. While the “warming up” was slow, I know now that she was holding herself back because she’d been disappointed by adults who had been in her life and was hesitant to trust that  would stick with her. We had a great time visiting over lunch at school every week. I often brought a little craft project or a book to read together or a puzzle to solve and was there for her when she decided she wanted to talk. When I met her, her foster family was going to adopt her. This fall, she moved again to a former foster home two and a half hours away from me. Now, I choose to drive down to visit with her every other week – I started out visiting every week but she’s so well adjusted now, I know she’s OK when I’m not there every week. But at first, she was having a rough time.

Last night, her “foster mom” called me and we had a face time session. I love to see her snuggled up at home and smiling because her report card was a good one and she’d been to a fun Super Bowl party. Normalcy is a good thing for children. Especially those who’ve had a rough start.

Last week I got a call from my neighborhood school again. This time, there’s a little third grader who is in crisis. Grandmother takes care of her and her siblings and cousins. We’re going to meet again next week and I’ll help her get up to speed on her math and be there for her so she feels important to somebody. No strings. No manipulation. Just a grown-up who’s there for her. This one is adorable, too. And so needy.

I’m so lucky to be able to work with these two little girls. They help me as much as I help them. They give me purpose and allow me to give something back to the community that I live in. And they give me joy – a lot of good laughs despite their difficult circumstances and hugs. There’s nothing like the full-heart feeling that you get when you make a difference in the life of a child. And there are so many children today who need a solid adult presence in their lives.

All you have to have is an hour a week and a phone to call your local school … you won’t be sorry. I’m proof!

Ta-Da!

My Vintage Velvet scarf is finished! And felted. And blocked (well, dry.)

Vintage Velvet

Vintage Velvet

I first saw this pattern a decade or so ago and I fell in love with it way back then. I loved the way the yarn felt and I loved the way it looked. Truly like vintage velvet. Mine is no exception.

The pattern, from Scarf Style by Pam Allen, is pretty much perfect. The directions are clear and well written. The reversible cable pattern is simple to follow (even I learned it by heart) and the Meunch yarn, “Touch Me” is delightful to knit with. It feels so good in your hands while you’re knitting, it’s hard to believe that yarn could be so soft. I was fortunate to find the yarn, after all these years, on sale at 50% off so the scarf isn’t worth a small fortune. But even at full price, this scarf is so beautiful, it’s totally worth it! You do need 5 skeins (and I think I used six to use up all that I bought – I was shopping without the pattern) and at $16 or more per skein, this is not a “cheap” project. We all know, however, that it’s not about the price. Right?

Cable Close-Up

Cable Close-Up

The scarf has a beautiful reversible cable right down the middle and when it’s felted at the end – Yes! Felted! I washed mine with a load of towels in hot water and then put it into the dryer for about ten minutes as directed – it truly does look like velvet.

I only have one complaint about the yarn and that is that my dye lot seemed to have a lot of  knots and that meant that I had a lot of stops and starts … and a lot of ends to weave in at the end which is not my favorite part of knitting. But I loved watching the scarf unfold and am so pleased by the end result. It was worth waiting for!

Gone Knitting!

Casting On!

I’m casting on another new project. I probably shouldn’t be doing it, but I am. So there! 🙂

I saw a wonderful cowl pattern on the internet and just HAD to know what it was. Wouldn’t you know it was a Purl Soho/Purl Bee pattern (I’ve never seen a project that I didn’t like from that site!) called the Fluted Cowl (FREE pattern! Click here.)

It calls for 300 yards of a bulky weight wool. So, into my (beautifully organized) stash I went to see if I had what I needed and, sure enough, there it was. Sitting there looking back at me. Begging me to take it out of the bin and knit with it after all these years. Well, not really, but it sounds good doesn’t it?

Years and years ago I bought Some Jo Sharp Silkroad Ultra in a colorway called “Seafoam”. Five skeins of it. Why five? Because there were only five left and I really liked the color and the hand of the yarn. It was also at least 50% off because the shop was closing.

I’ve made an executive decision to use a US #13 needle because I don’t have the size that the pattern asks for. And since it’s a cowl not a sweater, the gauge isn’t as much a strict rule as a guideline. The cowl will be a bit smaller than the one in the pattern but that’s ok.

First cast on effort (yes, first means that I have had more than one!) was using a long tail cast on. I usually use this method and generally it works if I plan for approximately an inch of yarn per stitch. So, since the pattern asks for 196 stitches, I gave it three generous “wing spans” and then some figuring that my wing span is about 5.5 feet (I counted 60 stitches). Wrong. I got 169 stitches on my needles.

So, on round two, I decided to do a more “sure thing” cast on and used the knitted cast on. If you’ve never done it, it’s really simple.

Start with a slip knot on your left hand needle. Knit into the stitch (just like normal knitting) on the left-hand needle knit-wise.

IMG_0946

Insert the right-hand needle knit-wise

Now you can go ahead and wrap the yarn around the back needle and pull it through the “old” stitch. (Good grief, my hands and fingernails look awful! That’s what I get for trying a gel manicure with no intentions to continue to have them done!)

IMG_0949

Wrap the yarn around the needle and pull through to create the new stitch

Pull the stitch through the old stitch and you have one new stitch on your right-hand needle.

IMG_0952

Here’s your new stitch! You’re almost there!

Now, slip the new stitch from the right- to the left-hand needle and tighten the stitch down. Important note: when you’re slipping the stitch to the left-hand needle, twist your right-hand needle a quarter turn clockwise … make sure your two needle points are facing the same direction and then you’ll be passing the stitch the right way. Don’t just pass the stitch from right to left with the needles pointing opposite ways. I know it’s a bit confusing, but if you try it, you’ll see what I mean!

IMG_0953

Now just slip the new stitch back onto the left-hand needle and tighten it up.

Knitted Cast On

Voila! You’ve added one stitch. Now insert your right-hand needle into the new stitch on the left-hand needle knit-wise … and off you go!

You’ve cast on one new stitch. Now just start over again from the first step and repeat for as many stitches as you need for your project.

This way, you’re adding stitches with your working yarn rather than using the tail for your new stitches. This way you won’t get to 169 stitches and have three inches of yarn left for a tail (and nearly 30 stitches short of what is required!)

A new cast on method for you. I now need to go cast on another 190 stitches!

Gone knitting!

Putting it “Out There”

Last year, for the first time, I joined my knitting guild group and entered a couple of items in our Central Florida Fair. I was (super) nervous about putting my work “out there”! But the rewards were great – not only did my work receive recognition, but I felt so good doing it.

This year, I’ve decided to enter a few items again. I can always change my mind but I think it’s healthy to submit my work asking for criticism and showing people the work that I am so proud to do. So, what did I submit?

The rules state that all items have to be completed during the calendar year between fairs. I have chosen the “mini-me” leg warmers that I knitted copying the adult-size ones that I made for my daughter for Christmas. My first efforts at Fair Isle knitting (and I, honestly, forgot to watch the joins which are not joggless so we’ll see how that goes.) I may even re-knit them. Time permitting.

"mini me" infant leg warmers - original Fair Isle pattern

“mini me” infant leg warmers – original Fair Isle pattern

I also entered a little light green seed stitch dog coat that I designed for my little dogs. Last year I submitted my first original dog design for my Prima Dogma line. This is number two. I like the color and the edge which is a simple single crochet in a black & white wool which contrasts really nicely with the light green. It was a quick knit … I really need to write down the pattern and post it! I need to find a way to display it … stuffed dog or something!

The last three items are still on my needles.

My Vintage Velvet scarf with its wonderful reversible cables is one. Second is the little hat that I started knitting yesterday and will finish today, Downton. It’s a free pattern on Ravelry. Check it out! Third is the fingerless mitts that I will finish (I hope) in time to submit that I am knitting along with the Jimmy Beans Wool Downton Abbey KAL “Lady Violet’s Dinner Gauntlets”. Despite the fact that I am not totally in love with the colorway, I like the project. (And it’s my first ever KAL!) Both the scarf and gauntlets can be seen in my previous post, Queen Bee WIP here.

I will report on the final decisions of what I will submit (the deadline is still distant enough to add a project or two if I decide to do so) or that I may decide to withdraw. It’s a woman’s perrogative to change her mind, after all!

Gone knitting!

Organizing my Patterns

IMG_0933

Pattern Storage (and popcorn ceiling)

Organization is something I love. I don’t like disorder much. So, when my atelier is out of order, I am not as grounded and efficient as I could/can be.

Thank goodness for 3-ring binders. I have, over the years, decided that this is the best way for me to organize my printed patterns (whether purchased or printed from sites) in binders. I have a huge box of sheet protectors that I bought at Costco, too. The patterns are slipped into plastic sheet protectors and then snapped into binders. The binders are getting switched around a bit now, since the pattern supply is growing, but I have seven or eight with labels on the spine. Cowls & Scarves, Kids, Sweaters – Adult, Dogs, Dish Cloths, Socks & Slippers, and then I have the old stand-by with miscellaneous patterns, bags & totes, mittens (the latter will be broken up as soon as I get to Costco again.

My magazines (which I never NEVER throw away) are organized by date and title in magazine files. IKEA has the best files for the most reasonable price. I have green ones in my atelier’s closet. They hold all my magazines together so they don’t get mangled or torn. One day I plan to go through them and mark the patterns that I like well enough to knit but it hasn’t happened yet.

Lastly, I have my books. They are on a shelf in my atelier. Reference books for knitting are something that I love having around – even just for an hour, I will sometimes pull them off the shelf and look at the pictures or read a few pages. I  have the Barbara Walker treasuries and the Sally Melville books as well as a few others. Then there are the fun ones like Noni Flowers, Knitting Mochimochi, and a few books about Aran knitting (perhaps my favorite.)

All of the classes that I’ve taken also have a binder (or share a binder if there were few hand-outs). My certifications also have a binder. All with my swatches, labeled and in page protectors.

So, there you are! I’d love to hear about how you organize your patterns and books. I know some people prefer to have their patterns in hanging files and I’m sure there are other ways as well. If you’d like to share your ideas and thoughts, I’d love to hear about what you do.

I didn't even talk about my needles!

I didn’t even talk about my needles!

Gone knitting.