All my Yarn is Packed?

Cascade 220 and Colinette Jitterbug

Cascade 220 and Colinette Jitterbug

When we head north to Maine for vacation in the summer, we’ve always driven. And I’ve been able to take a bunch of yarn (often more yarn than clothes) so that I can pick and choose my knitting projects.

This year, however, I’ve been working and wasn’t able to leave when N. decided it was time for him to go. So, I kissed him and our big brown dog goodbye and off they drove. What I didn’t realize is that I would have to be really choosy about what yarn I bring because I haven’t got a big plastic box to fill … I have one suitcase (which will fly free, thank you Jet Blue!) to fill with clothes, N’s birthday gifts and yarn, needles, patterns and all the notions that I need to do what I do! Yikes!

So, here’s what I am planning …

1) I have four skeins of Cascade 220 in a multi-colored colorway that will be knitted into slippers for N. Part of his Happy Birthday. The pattern will be Fiber Trends Felt Clogs (design by Bev Galeskas).They may get leather soles so that they last longer. To be added when we get home and they’re felted.

2) I have four skeins of Cascade 220 in a turquoise colorway that will be knitted into slippers for me. I’ve been waiting to use the pattern by French Press Knits, French Press Felted Slippers (by Melynda Bernardi). I’ve been coveting this pattern for ages and it’s time to give it a try!

3) The beautiful blue Colinette merino is going to be made into a vest from the book, Swing Swagger and Drape (by Jane Slicer-Smith). A vest because I live in Florida. I can always add sleeves if needed later on. I saw the pattern, Boxes Drape, at the Maine Fiber Frolic and it was love at first sight.

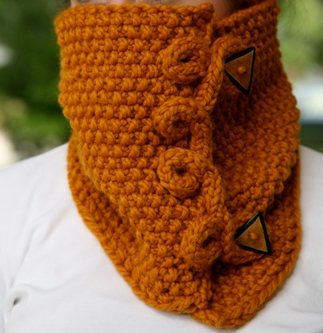
4) I’m taking the Purl Bee cowl to fix and finish.

5) I’m taking my brothers 50th birthday socks to finish.

Fiber Frolic 2012 Yarn ... frogged Boxy Cardigan

Fiber Frolic 2012 Yarn … frogged Boxy Cardigan

6) I’m taking my yarn from the Maine Fiber Frolic … the frogged Boxy Cardigan … hoping to find some inspiration and get it knit up into a wearable piece of Maine to bring back to Florida in the fall.

7) The cotton tank tunic is also going along unless it’s finished before I can leave.

8) Lasts but not least, N took his “boyfriend” sweater up in the truck. It has been closeted away (literally) for at least a year because I can’t bear to look at it. All the work and expensive yarn … and it doesn’t fit. Not even close. Another do-over opportunity.

9) I have to add to this list that I will be teaching myself to crochet this summer too, in addition to the knitting projects that I have on my list. I’ve wanted to learn and am making this promise to myself. I will be able to crochet (at least be a beginner)!

I’m so grateful for the opportunity to spend some time in Maine again this summer. I am also grateful for the opportunity to work for the school that I’ve worked for for the last 50 days. I have loved the experience, the students, the teachers, the administration … it’s been great to be part of the Woodlands family.

Gone knitting!


End of the Year. End of the Job.

It’s been a whirlwind 50 days as an ESE FCAT Tutor. When I applied, who knew what a wonderful experience it would be!? I’ve joined a wonderful family at Woodlands Elementary School and I’m so thrilled to have been able to work with the students, teachers and staff there. Even for only 50 days.

I have been thinking about whether and what to do about end of year gifts for “my kids” and I decided this weekend to make a few more of Rebecca Danger’s “Bunny Nuggets”. One for each of the kids (and one for my two teachers, too.) A little something to remember me by.

Body Parts

Body Parts


It all starts with knitting the body parts. Quick to knit and I used up a bunch of stash yarn in the process as well. The pattern, free on Ravelry, I’ve given you on my blog before. But they’re so cute, I’m providing the link for you again!

Add faces

Add faces


When the body parts are all knitted up, you can assemble them. Assembly is easy. Add a little face and sew on the ears. You also have to make a little pompom for the tail.

I don’t have a pompom maker, if you have one, use it. I use a scrap of cardboard around which I wrap the yarn (about 45 wraps per pompom) and then using my darning needle strung with yarn, I tie a tight knot around one end of the yarn. If you wrap the first half of the knot around twice instead of once, it holds more tightly and won’t loosen when you go to make the second part of the knot. Tight knots are imperative when you’re making pompoms.) Trimming the pompom is messy but I love a well-shaped pompom. I made some of mine cream-colored and some multi-colored. Just for fun! The third grade boys all got the same three-color pompom tail … because I wanted them to remember that they are in this world together. Friends should always remain friends.

Pompom Tails on the Nugget Butts

Pompom Tails on the Nugget Butts


Once the ears, faces and tails have been attached, you can stuff your nuggets. I have used scraps of yarn or quilt batting or cotton balls or fiber fill … whatever I have around the house. Now it’s time to sew up the bottom seam and they’re all done.

Eight little Bunny Nuggets will be packed up and handed off to my eight new family members. Who knew that in 50 days, I’d feel so close to these kids and their teachers. I think being an ESE FCAT tutor was one of the best jobs I could have had. I hope I’ll be able to find something that feeds my heart and soul in the fall!

Bunny Nuggets ... ready for the end of the year!

Bunny Nuggets … ready for the end of the year!

Gone knitting!

Drops Design Tunic 111-21

Bet you didn’t know that 21 was my lucky number!

I’ve done some frogging lately … my brother’s birthday socks for the second time because despite the fact that they were on gauge, they were never, repeat, NEVER, going to fit over his big heels! … and also my Boxy Cardigan made from my wonderful Sea Colors Maine yarn because my Yankee ingenuity bit me in the behind. I will rip back a row from now on so that I don’t have to make a join in the middle of the piece. (Or I’ll make a different join. What was I thinking?)

One project that I have not had to frog is my DROPS design tunic. I bought the yarn, Berroco’s Pure Pima (color 2243/due lot 169, 115 yards, 100% Pima Cotton) online ages ago because it was such a good deal and cotton is a great fiber for Florida living. It was also a really pretty light blue that I loved.

One side is done and ready to be seamed to the second side which is on the needles and I’ve made it to the ribbing at the top. The tunic is mostly stockinette stitch and on rather small needles (US 6 and US 1) and then it’s 1×1 ribbing at the top on the smaller needles.

What changing from the 6 to the 1 needles does is make the Empire waistline gather beautifully. The top should be a somewhat close fit and the bottom will be loose and drapey. I can’t wait to have it done because this is the time that I can wear it!

One word of warning. The DROPS patterns are written differently and can be confusing to follow. I normally would say, “Don’t read ahead” but for these patterns (at least the ones that I have made up) I would recommend reading the pattern first and making sure that you have an idea of how the project goes together. I haven’t bought the DROPS yarn to go with their patters (YET!) but I think their prices are very fair and they’ve been around for awhile, too! I’m guessing their products are good, too.

Gone knitting!

Making the Big Decisions

Last summer I bought the most beautiful yarn at the Maine Fiber Frolic.

Seacolors Yarn

Seacolors Yarn


And I also got a “free” pattern with the sweater. I really liked the idea of the boxy cardigan with this yarn using a random pattern with the three colors. Different sleeves. Not too matchy-matchy.

Over the summer and fall, I got all the pieces knitted and was ready to put them together. The shoulders and sleeves, though, didn’t fit. They were at least two inches off (the sleeves were too small for the space that they were supposed to fit into). Well, what to do?

I mulled it over and decided that I had to re-knit the sleeves. Frog them and re-knit them with more increases so that they’d fit into the space … and then as I prepared to frog the sleeves and re-knit them, I noticed that I had (for some unknown reason) joined two balls of yarn in the middle of the back right about exactly where it would be most noticeable. What was I thinking? So, I decided to frog the back to the join and re-knit that, too. And then when I got that far down and was ready to rejoin the yarn, I noticed that I did it not once, but twice and there was another join just about two inches below the first one.

A second join in the middle of the back ... what was I thinking?

A second join in the middle of the back … what was I thinking?


That did it. I frogged the whole sweater. It went from this …

All the pieces were finished and blocked

All the pieces were finished and blocked …

To this … in just a few minutes!IMG_1420


Oh well, that’s one of the most wonderful things about knitting … you can start anything over if it isn’t pleasing you. This one wasn’t pleasing me at all. But I do love the yarn!

And if anyone is wondering why we may be allergic to wool? Well, check out what was left on my desk after I frogged and re-wound the wool!

Wool dust ... ahhhhh - choo!

Wool dust … ahhhhh – choo!


Gone knitting!

Sweater Design – CYC Certification, Knit Level 2

My Primitive Drawing!

My Primitive Drawing!

The last step in the certification process (or at least the knitting part of the process) is to design and knit a simple sweater with sleeves for a beginning knitter.

Since I’m already “late” in the process, I decided to knit a tiny sweater for a baby niece who is four months old. She’s small and with the yarn I chose out of my stash, it should be a relatively quick knit and I’ve kept it really simple. All a new knitter would need to know to knit this sweater is cast on, join in the round, knit, increase, decrease and bind off.

I decided to start at the bottom of the body of the sweater and make it a rolled edge (no ribbing). And then to make the sleeves short since my yarn is cotton & could be worn in warmer weather or in cooler weather with a long-sleeve t-shirt underneath.

I’ll write the pattern (it’s required for the last step) and will post in on my Ravelry page (have you checked out Ravelry? I’m Lindar) for free when the certification is finalized and I can publish the pattern!

Here’s what I have knit so far …

Sleeve

Sleeve (one of two)
… like you hadn’t already figured that out!)


Body (bottom to top, knit in the round)

Body (bottom to top, knit in the round) with a rolled edge.
Simple enough for a beginning knitter!

The yarn is Araucania (hand dyed in Chile) Tolhuaca Solid in Color 1202. It’s 100% pima cotton, 120 yards per skein. I love the hand on this cotton yarn and it’s denim-y color is something that I thought would match everything my niece wears.

I love rolled necks and bottoms of sweaters but I didn’t want the sleeve to roll (it would feel funny on her little arms and against her little body) so I knit a row, purled a row a couple of times so the sleeves would lay flat against her arms.

Now it’s time to figure out how to get it to all go together. I’ve done one sweater before in this method and I’m trying to use my memory of that to get my pieces to attach to each other!

Gone knitting!


How to Knit i-cord

I-cord is not a difficult thing to knit and it can be used for so many projects.

Recently, I knitted i-cord ears for a Tiny Baby Bunnies pattern and you can see pictures of my projects on my blog, here, or on my Ravelry page, here.

I’ve also used them for embellishing knitted garments like my Senorita Lolita dress and on an original cowl that I knitted and is for sale in my 3 B Street shop.

Senorita Lolita (Copyright 2011 Prima Dogma by Queen Bee Knits

Senorita Lolita (Copyright 2011 Prima Dogma by Queen Bee Knits)


Butterscotch Cowl Copyright 2013 Queen Bee Knits Original

Butterscotch Cowl
Copyright 2013
Queen Bee Knits Original


I-cord is a spiral “tube” of knitting that is constructed by sliding the working piece from one side to the other side of your DPN.

It’s a great handle for knitted (and felted totes), it’s a great embellishment for knitted garments (and can be formed into flowers or stems or just about anything you can imagine!

It’s also very simple to knit!


Here is what you need to know to be successful when knitting i-cord!

Cast on the required number of stitches to be used for the i-cord (in this case, I used 6 stitches.)

Cast on # of Stitches

Cast on # of Stitches

Slide your stitches to the right side of the DPN (do NOT turn your needle!)

Slide stitches from cast on position at the left of the needle to the right side

Slide stitches from cast on position at the left of the needle to the right side

Knit all stitches (to knit the first stitch, you’ll bring the working yarn around the back of your needle and give the first stitch or two or three a good tug to pull the yarn so there won’t be a huge gap but don’t worry too much as the next few rounds will help even it out!)

Note that the stitches will be on the left side of the DPN. Do NOT turn your needle.

Knit all stitches

Knit all stitches (sorry, it’s a little blurry, but you get the idea!)

Slide the stitches to the right side of the needle and knit all stitches again.

Repeat sliding the stitches from the right to left of the DPN and knitting all stitches until i-cord is the right length for your project. It is also helpful to give the “tail” a tug or two to get the i-cord to stretch out & down.

After a few rows, you’ll start to see the tube starting to take form.

After a few rows of knitting (9 here)

After a few rows of knitting (9 here)


Queen Bee Knitting Tip

Queen Bee
Knitting Tip


Knitting Tip – When you’re knitting circularly (in the round) on double-pointed or circular needles, in order to keep your knitting from getting “ladders” where the needles meet, remember to give an extra tug (gently, don’t break your yarn!) on the first and second stitches as you start working on a new needle. This will lessen the chance of ladders happening which are unsightly in your knitted garments. Trust me, I’ve got plenty of experience! 🙂

So, there you go! Practice this a few times and you’ll have a great new trick in your knitting arsenal!

Gone knitting!

Knitting … Bunny Nuggets and Tiny Baby Bunnies

This weekend I actually started and finished a little project!

It’s an award for my 3rd grade mentee who has reached her learning goals for the end of the year (or near end of the year, we still have 21 days left!) I knitted her another tiny brown bunny awhile back and she requested a pink one.

Tiny Baby Bunnies pattern by MochiMochi

Tiny Baby Bunnies pattern by MochiMochi


The first one that I made for her and gave to her a few weeks ago got “lost” on the bus on the way home when she was sharing it with her “friends”. I’ve told her that I’ll knit one more but she is not allowed to share it on the bus. Apparently her friends there can’t be trusted. What a shame that children have to learn that! Anyway, I thought I’d add to the little bunny and make her another and when my knitting friend, Terri, brought some Bunny Nuggets to our knitting group the other week, the choice was easy! The pocket is my addition so the little bunny will have a safe home.

Bunny Nugget with pocket and tiny bunny

Bunny Nugget (by Danger Crafts) with pocket and Tiny Baby Bunny (by MochiMochi)


The patterns are super simple to follow and easy, quick knits.

The Tiny Baby Bunnies pattern by MochiMochi told me that I had to make it in a sock-weight yarn (fortunately I had pink on hand in my stash so I didn’t have to buy more just for this tiny project!). I used US #1 double pointed needles and it came out so cute (both times). Clear instructions and about a ten-minute knit. You do need to know (or learn between now and then) how to knit in the round on DPNs and how to make i-cord. Gotta love those quick-to-knit projects!

The Bunny Nugget pattern, too, is quick and simple. Although, if I’m totally honest, I didn’t make mine in the exact order that is described in the written pattern … and it was only because I was being impulsive and maybe not paying attention! If you follow the instructions, you’ll have no problems at all! 🙂 I made the pocket by picking up eight (8) stitches in the lower belly of the nugget and knitted six or seven rows and then bound off and attached the sides. Easy-peasy! I used some stashed light pink acrylic worsted-weight yarn that I had from an old project. Just about any yarn can be used in this pattern because you can “adjust” it by using needles that are a couple sizes smaller than the yarn requires. I used a US #4 DPN with my worsted weight yarn. For this pattern, knitting in the round on DPNs, picking up stitches (if adding a pocket like mine) are two things you might need to know.

I think it’s a perfect pocket for it’s teeny tiny pink friend!

I hope she’ll love it!

Gone knitting.


Certification Part Deux

C847CIP_CertifiedLogoRGB


I’ve been certified as a knitting instructor for about a  year now … not that it stopped me from teaching knitting before that but it proved to me that I had what it takes to be a knitting instructor.

And now I am working on the second certification level – Certified Knitting Teacher. Which is a bit more complicated, involves more intricate swatches and samples and also involves designing a garment.

I’m torn between knitting a garment for myself or knitting a baby garment for this purpose. One one hand, I have a really great idea for an adult garment, worked out on Thursday with one of my Wild Rows knitting girls. Whether I use it for my certification or not, I will be designing it because I want to wear it! I’m just thinking that it may be less time to make a baby garment and I’ve got an idea for some little pants for a baby. I had a little red corduroy pair when I was a little child and my first daughter wore them when she was little. They were so cute! I’d love to design and knit a pair that looks like them.

One of the swatches that I was required to knit was a mosaic piece. I’ve never knitted anything in this style of colorwork. It’s amazing what you can learn in a relatively short time period – and I have knitted my swatch and we’ll see how it looks when I block it!

It’s exciting to learn new things and Iove the challenge given to me … despite the fact that I’ve been putting this task aside, I am excited to get the process wrapped up and become a certified knitting teacher!

Gone knitting (swatches!)

WIP to Finished!

It always feels so good!

IMG_1192

Lesser Evil Socks (Toe Up, Two at a Time!)

IMG_1202

My own design … baby blanket backed with polar fleece & silk border (sewn by me … and, no, I’m not a great seamstress!)

IMG_1203

And finally my Wonderful Wallaby … heading to my niece on the west coast for next year … or maybe the next year. We’ll see when it fits her!

IMG_1205 IMG_1206 IMG_1207 IMG_1213


Gone knitting!

Writing Your own Pattern – A Scarf

This Princess Scarf article (that I cannot read) has a photograph of a lovely scarf on the Princess of Norway’s neck. It’s a variegated pink yarn that is quite lovely with the background being her black and white outfit. (I tried, I really did, to get the photo inserted here. No luck! That’s why you have to click and go to see the scarf. It’s worth it, I promise, it’s very pretty!)

So, the big question here is, how do you knit a scarf like this?

IMG_0310The first challenge, obviously, is to find a similar yarn. I’d suggest printing the picture and heading out to your local yarn shop. It doesn’t matter what “weight” of yarn you choose because I’m going to tell you how to write your own pattern. But what you do need to know is how to find yarn that will mimic the scarf so that you won’t have a scarf that looks NOTHING like the Princess’!

The “Princess” scarf has a short color change. The pink and pink or pink and cream colors are fairly consistent across the knitted cloth in short lengths and nearly looks like it is “tweedy” or “mottled”. So you’re going to look for yarn that has short color changes. This yarn looks like it’s a lighter weight than a “chunky” or “bulky” yarn and is likely worsted or sport or even sock weight. It’s also a smooth yarn rather than a “thick and thin” or “slubby” or “fun fur” or even of a fiber that has a “haze” like angora or mohair. If you like another color, this is the time to choose color wisely – make sure you love it!

I went online to Jimmy Bean’s Wool and found a couple of different yarns that might work: Madelinetosh Prairie Short Skeins Yarn in Fragrant or Universal Yarns Bamboo Pop Yarn in Pink Joy. The first is a fingering weight and the second is a DK weight. Neither color is exactly like the Princess’, but both would work. Obviously, one will be lighter than the other. Take into consideration how cold it gets where you live! (I live in Florida and it’s not very cold here. Ever!)

needlesOnce you’ve found your beautiful yarn, you need to match it with an appropriate sized needles. The Princess’ scarf is not lacy or open, the stitches are close together. The yarn band or tag will tell you the needle size recommended for your yarn. Sometimes there is a choice (it may say on a size 1-3 or 3-5). Next you need to mix up your yarn and needles by making a swatch. You can read my post about swatching here! And there is a great article on Knitty here. Now you’ll be able to see how your yarn is knitting up and see how many stitches you need to cast on!

Now, it’s time to decide how wide you want your scarf to be. I’m guessing that the Princess’ scarf is about eight inches wide. But you can make yours as wide or narrow as you like (and you can even start, frog and start again if you don’t like it. I give you permission!)

The Universal Pop yarn says to use needles size 5-7 and I’ll get 5-6 stitches per inch. Measuring my gauge, let’s say I get 5 stitches per inch on my US 5 needles. And I want my scarf to be 8 inches wide. I need to cast on 40 stitches. (5×8=40).

For this scarf, I’m going to use a stockinette stitch (knit on the right side, purl on the wrong side) and I’m going to continue in this pattern throughout. It looks like the original scarf is pretty long – and I’m going to knit my scarf until it’s about the same length (or the length I like) and then cast off on the right side.

Ta Da! You have just designed your very own scarf!

A couple of tips …

1. Your edge will be much prettier if you slip the first stitch in every row. Slip it purlwise or knitwise but be consistent!

2. Block your scarf! (See my post about blocking here!) It will hold its shape and the sides of stockinette stitch fabric are famous for rolling. Blocking will help it to unroll … but if you look at the Princess’ scarf, you’ll see it does roll a little bit! 🙂

Gone knitting!