
Note to Self …

note-to-selfMy sister-in-law is awesome. She helped take care of my mother when she had alzheimer’s disease and wasn’t very nice to her. (My mother wasn’t nice. My sister-in-law was a saint!) She is raising three great boys. She’s supported my brother and his business and has even gone back to work there now that the kids are bigger (not that they are independent, just bigger). She’s always happy to welcome us into her home, three dogs and all, with or without any of our children, planned visit or last minute … she’s really a great lady.

Anyway, I digress. She happened to mention that she wanted a beige wrap to match a pair of shoes she just bought and to wear on those nights when you just need a little something more to be comfortable. I offered, because I love the idea of doing something for her, to knit her something. I found a great beige yarn and a pattern. Good, right? Then I went off on a road trip and found another pattern that would be great for her shawl but the yarn is too heavy-weight. So, let’s be flexible and adapt the pattern, right? Easy peasy lemon squeezey. I bought two skeins of yarn and off I went.

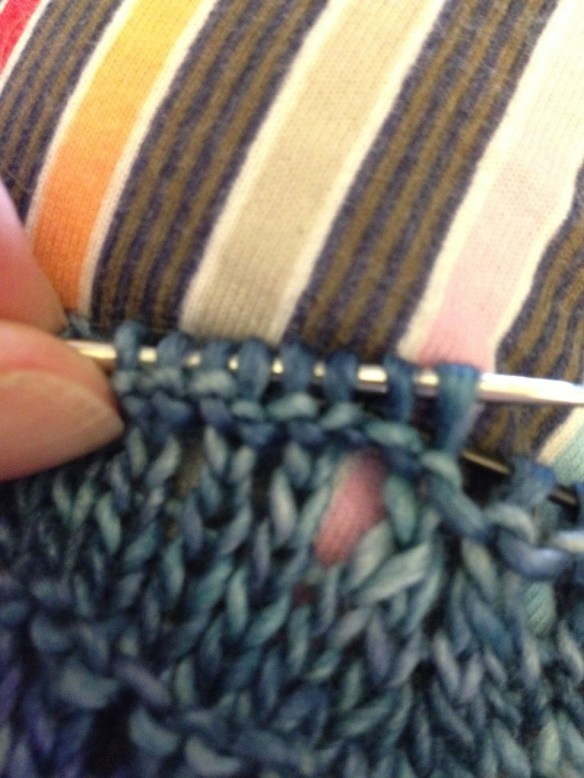
I’ve been knitting away for a few days … and for the last couple not paying a whole lot of attention. And today I ran out of yarn. Oops! Twelve rows to go and I’m out of yarn. Good grief!

Note to self: buy more than you need. (I hope they have more in the same dye lot at the yarn shop tonight.)

Gone knitting.

P.S. We should remind ourselves and others how awesome we are more often. Life goes by so quickly and we just don’t “take the time” … but I am awesome, and my life is, too. And my friends and family are, too. I’m one lucky gal!

Just So Bag – Finished and Perfect!

Here it is! I’m finished and ready to fill it up and use it as my purse for the next few days.

The Just So Bag by Andrea Babb. I’ve blogged about it here and here. It’s in the Interweave Knits Winter 2012 or you can download the patter from Ravelry.

IMG_3322

I found the oak half-inch dowels at Home Depot. My better half measured twice and cut once and we got perfect 15 inch handles. The little balls at the end were found at JoAnn’s in Waterville. Four in the package. How convenient!? I’m leaving them unfinished and will “seal” them with furniture wax. I like them just the way they are!

Here are a few more views…

IMG_3324

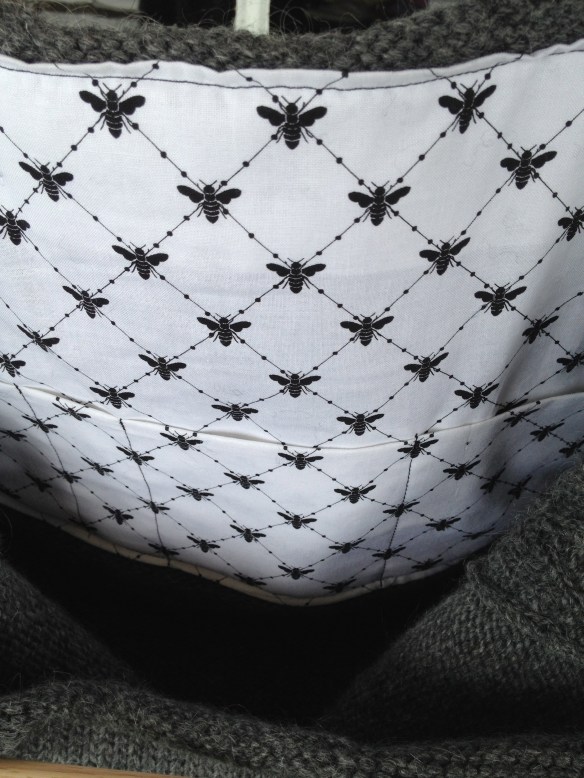
I needed to have a pocket for my phone and pen and pads … otherwise they fall into the black hole never to be found again. The fabric (I love it!) came from Quilt Diva in Rockland. They had several wonderful bee fabrics and I am kicking myself that I didn’t buy a yard of each for the future! I’ll have to go back!IMG_3323

I’m very happy that you can see the lace stitches. Next time, I’ll use pure wool. No more mohair in lace knitting. (Besides, I think I am allergic to it.)IMG_3322The only thing that I may add is a cardboard bottom. If I do, I will cover the cardboard with my bee fabric and then tack it down to the bottom of the bag. It does sag at the bottom!

Gone knitting!


Finishing the Just So Bag

As I was seaming the Just So Bag, I looked at my bag and I looked at the pictures on the pattern and realized that the pattern had a different “hem line” at the bottom than the regular seam that I would have sewn. Mine was just a typical seam connecting two stockinette pieces and was nearly invisible. Pretty but not striking. The problem was that I liked theirs better.

So, what’s a knitter to do when the directions don’t give you the information on how to make a project look exactly like the one in the pictures on the pattern?

I fiddled with it for awhile and in the end, I am very happy with it. Here’s what I did. (Sorry, I didn’t take a photograph of the seam I didn’t like but it was smooth and I liked her piping-like seam that bumped out a little bit.

You’re going to start with the bottom strip and one of the side pieces both placed on a table with right sides facing up. (You can do it on your lap, too, if you want.) Grab the first stitch on the bottom strip as you normally would seam together two pieces of stockinette (grabbing the “v”). This is all you’re going to do on the bottom piece all the way along the seam. Easy peasy.

On the bottom strip, seam as normal

On the bottom strip, seam as normal, using the inverted “v” of the first row of stitches.

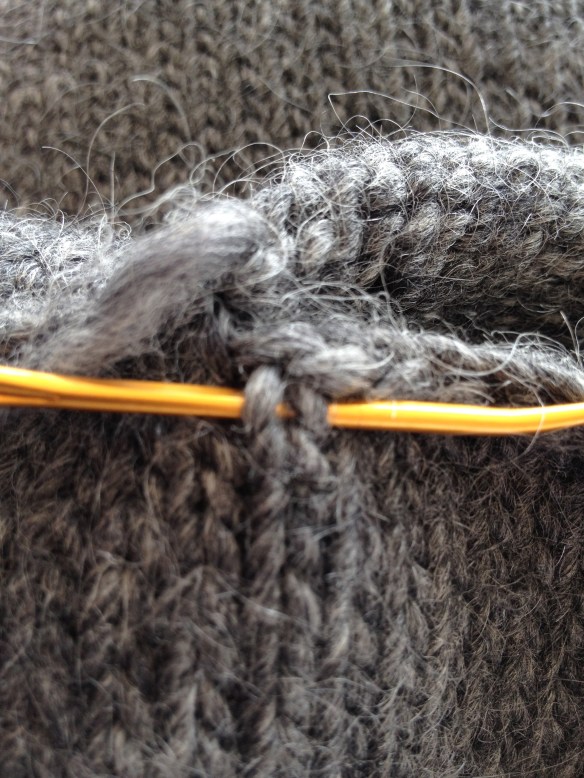
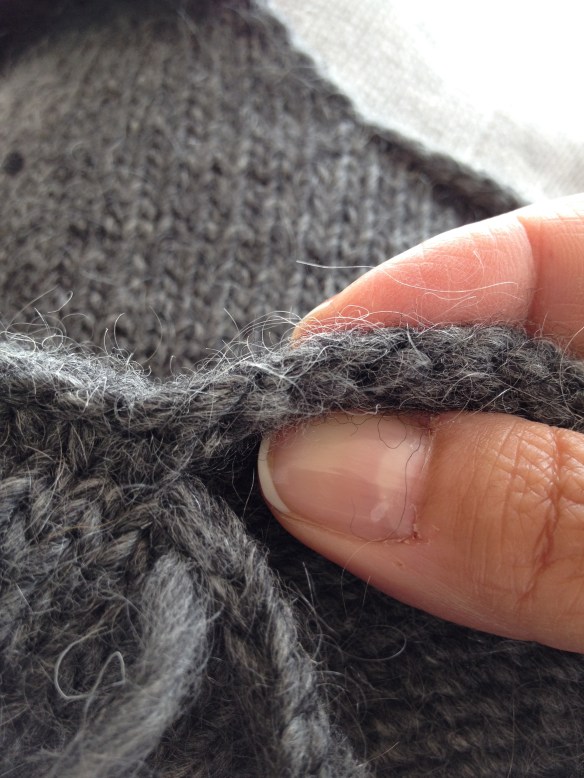
The “side” piece is where we’re going to drift away from “normal” seaming in order to get the little “piping” effect like on a sewn cushion. You are going to turn sew into the wrong side of the fabric. Inserting your needle into the left side of the first row of purl bumps.


One of the two side pieces. See the row of purl bumps just under the cast-on edge?

One of the two side pieces. See the row of purl bumps just under the cast-on edge?

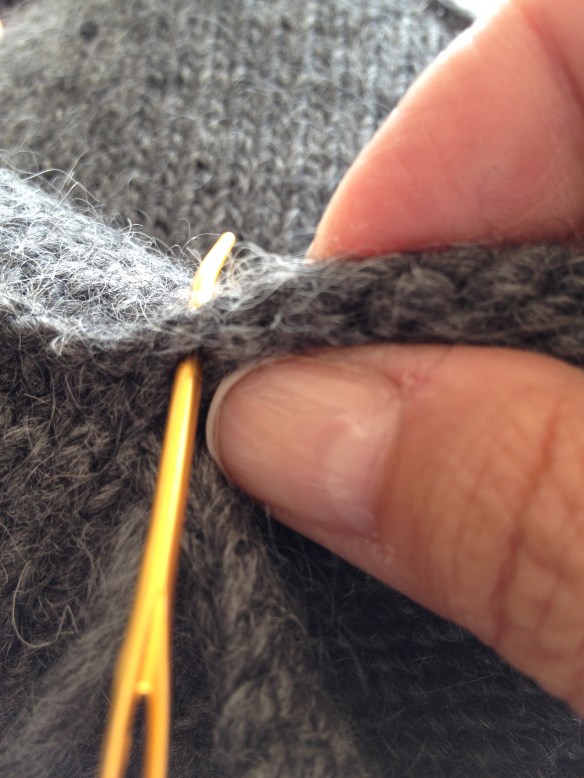
You’re going to sew up on the left side like this.

Sew up on the left side of the purl bump.

Sew up on the left side of the purl bump.

And then just come down on the right side of the purl bump and then you’ll grab the “v” in the next stitch of the bottom strip. Repeat this process all the way across the bottom edge of your bag. (And then you have one more seam to sew on the other side… practice!)

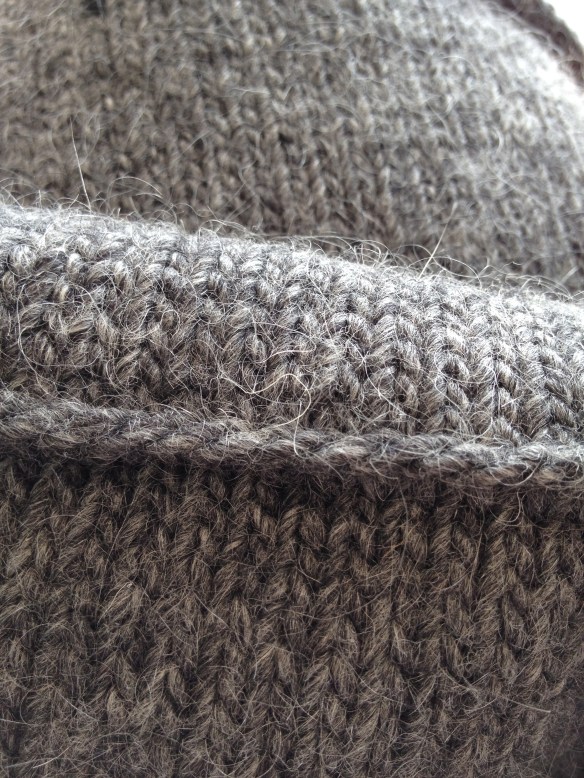
Here’s what my bottom edge looks like. I am quite pleased with it!

Pretty "piping"!

Pretty “piping”!

Gone knitting.

I’m the Queen Bee and it’s Been Over a Month Since I’ve Posted.

Welcome to Maine

Welcome to Maine

I can’t believe that I haven’t posted anything in over a month! I’m sure I’ve thought about it many times … apologies to my loyal followers (all three of you!)

I was a sick puppy!

I was a sick puppy! Out of work for five weeks!

I’ve recovered from a nasty bout with pneumonia and bronchitis and finished the school year and moved up to our home in Maine. I’ve also started a new “diet” to try to lose some weight before the big wedding (not mine, my daughter’s). I have been way to “happy” (read this as eating for all celebratory reasons) for the past several years and have gained a good forty pounds since my divorce diet and weight loss. I’m hoping to get back to that post-divorce weight without severing a long relationship. I’ve enlisted a team of coaches and doctors and am starting day 6, having lost about six pounds. Woo! Hoo! The program that I’m using is Your Road To Health. It’s a Medifast program. I was hungry and cranky the first few days but I’m feeling better as the days go on. Today I am feeling hopeful and that’s a really great way to feel.

I’ve been knitting a lot, too. Have several projects on the needles. I’ll go into more detail over the next few days. Suffice it to say, there is no shortage of projects – and the ones that have deadlines are the ones that I don’t really feel like working on.

I’m almost done with the lap blanket for my daughter’s wedding (there will be rocking chairs on the Yacht Club’s porch and she really wanted to have a cozy blanket on them … it could be chilly in September in Massachusetts.) Bulky yarn knits up pretty quickly … even if it’s a boring project.

Wonderful Wallaby sleeves … two at a time.

Wonderful Wallaby sleeves … two at a time.

Closing in on Row 70 … a bazillion rows left!

Closing in on Row 70 … a bazillion rows left!

I’ve kind of given up on the idea of finishing the lace shawl by her wedding. But maybe not.

I started a “selfish knitting” shawl … one of those projects that I can work on at knitting classes because I don’t have to count.

One mitt down, one to go.

One mitt down, one to go.

I have one of my two fingerless mitts done. An Intarsia pattern. I have decided I need to practice intarsia more … not my favorite technique. One left … and I haven’t even started it yet.

Wonderful Wallaby sleeves … two at a time.

Wonderful Wallaby sleeves … two at a time.

Last, I have a Wonderful Wallaby sweater that I am knitting for myself. Another easy pattern that  I can knit and visit with. I have the majority of the body done and am working on the sleeves. Would love to finish this before the end of the summer so it can live here in Maine. It’ll be way too warm for Florida.

My super-duper LL Bean bag is full of yarn and “hopeful” knitting projects. If I can finish even some of my projects already on the needles, I can start those. A sweater for my soon-to-be niece, a sweater for the soon-to-be big sister, an Australian possum pelt kit … OH BOY!

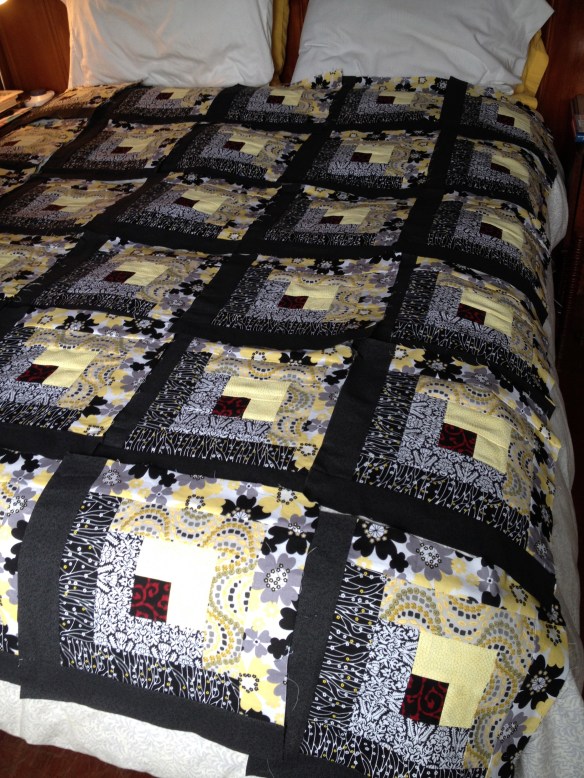
And then there's this project! A king-size Log Cabin quilt!

And then there’s this project! A king-size Log Cabin quilt!

I’d best stop writing and get knitting!

Gone knitting!

A Secret Surprise Project

I have a friend who has a husband who we all love. He’s the sweetest, most thoughtful, most attentive husband that we’ve ever met. And he is totally in love with his wife.

He is also in the retail “restaurant quality” food business and has recently been promoted to Manager of his own store. The store opens in about ten days and I wanted to make him a present … for his “bow tie Wednesdays”.

Rodney's Bow Tie Wednesday Tie

Rodney’s Bow Tie Wednesday Tie

The pattern is free on the Web. (Click here to be magically transported!)

What I love about this pattern is that it’s quick … it took me about an hour and a half to knit from beginning to end. Well, it may have taken a bit longer for the i-cord, but I did it while I was watching TV so it hardly counts. I used some scraps of Noro yarn that I had in my stash, knowing that he’d want something a little bit “wild”.

I love that within the instructions there are two videos to help you with a new stitch (the lateral braid) and how to knit an i-cord. I-cord is such a fun thing to knit and can be used for so many applications … good to know!

This pattern is made for a dog but can easily be made for a human, too. I didn’t swatch (I know, don’t judge me!) but I decided if it was “awful” that I’d just pitch it. It was a bit too wide so I stuffed the ends into the middle until the tie was the size I thought was appropriate. I finished it according to the instructions and made my i-cord neck piece long enough to go over my head and so he can make it tighten to fit his neck.

IMG_3075


It will also come untied but I hope it’s easy enough to fix … and he knows where I live! 🙂

Don’t tell Rodney if you see him!

Gone knitting.

My Favorite Thing


imageThis little pair of cat scissors is on of my favorite things.

I bought them at my LYS here in Orlando for less than $10. They came in several colors.

Ive added a longer chain to mine so I can wear it around my neck. But it’s wonderful. And I imagine that I can take it on airplanes if I so choose and still be able to cut my yarn! Woo! Hoo!

Gone knitting!


I Hate it When This Happens

Happily knitting along on my Wonderful Wallaby and my right hand feels a lump.

I hate it when this happens!

I hate it when this happens!

Thankfully, I’m knitting with wool and since it’s a natural fiber, I can do a “spit join” and it will be a seamless (and end-less … read this as no ends to weave in) way to keep on knitting.

To do this, all you have to do is:

1) cut out the knot with your handy dandy scissors

2) separate the plies from each end of the yarn

3) mine was 4-ply. I cut out two plies from each end of the yarn

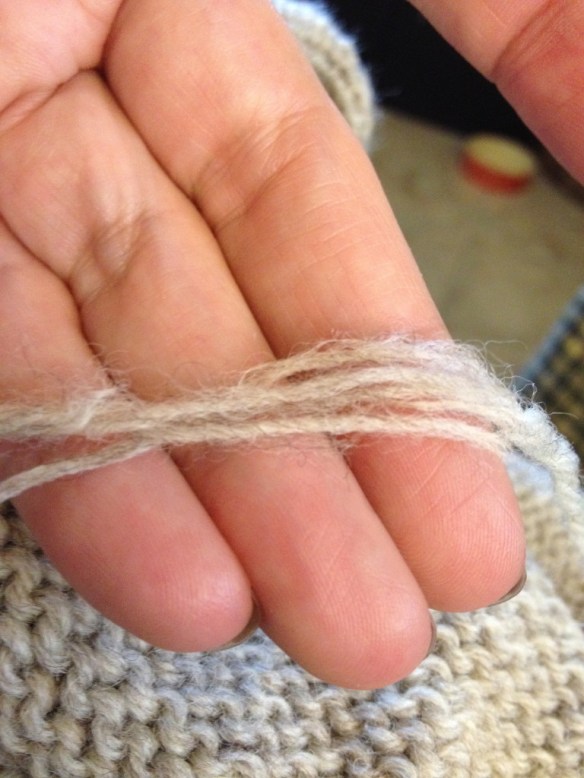
After separating the plies, cut out half of them & wet both ends and lay them together again

After separating the plies, cut out half of them & wet both ends and lay them together again

4) “spit” on the yarn (or dip it into some water) and hold the two ends together and rub them between your two hands. The heat and agitation will bind the fibers … like magic!

Magic! Ready to knit on!

Magic! Ready to knit on!

5) knit on!

Gone knitting!

I have learned a great new provisional cast on.

I am beginning to knit a new pair of Footie Socks by Miriam Felton. I bought the pattern for these socks because I wear Dansko clogs a lot (A LOT!) and I like to wear socks with them so they don’t get sweaty and gross. I’ve tried the Turkish Bed Socks pattern with some mediocre success. Basically, the problem that I find is that the heel isn’t quite “tall” enough to stay on my heel and in the shoe. This new pattern, I decided to try when a bunch of my knitting friends also started chatting online about the pattern.

Anyway, the provisional cast on is the one that Miriam Felton suggests and she has made a lovely little Youtube video that I would love to share with you – this may be my new go-to provisional cast on! Get a length of scrap yarn (about the same “weight” as your project yarn) and give it a go!

It’s simple. I could manage it the first time and got my 12 stitches provisionally cast on. I’m getting better with the crochet hook and that surely helps. If I was trying to do this cast on and had no experience at all with crochet, it might take me a few tries! As she says at the end of the video, what’s really great about this cast on is that the stitches are oriented in the right direction so that you can just begin knitting with your project yarn.

Anyway … off I go into a new experience!

Gone knitting.


Is There Such a Thing as a Knitter’s Block?

I know that there’s supposed to be a writer’s block … I am afraid that I have a knitter’s block. I have been knitting little simple projects but my brain isn’t wrapping itself around the idea of one of the several sweaters that I know I have the yarn to knit.

I’ve marked a few patterns, I want to have the garments. So, what the heck’s going on?

Sometimes, one just has to take a few days “off” from the challenges of knitting, I guess. Life gets in the way of our art … work, family, and other things poke their heads in, demanding our immediate attention. My energy level at the end of the day is waning and I am simply tired. So, I’m going to take my own advice and be gentle with myself. Give myself the time to just be … and know that my knitting mojo will return.

For now, I’ll be satisfied with the granny squares and the dish cloths.

Gone (not) knitting!


Throw Out the Lifeline!

There is an old hymn that shares the title for my post. I guess I’m older than I think I am because I remember singing it at a hymn sing as a young girl in Tenants Harbor, Maine. As soon as I typed my title, I had to search for the song (to make sure I wasn’t remembering “wrong”!) There it was. What a wonderful memory! (Click here for the link to YouTube.)

In knitting, a life line can be a project saver. I used one just this weekend when I was finishing my Jimmy Beans Wool Downton Abbey Mystery KAL … a lovely shawlette. I was really happy with the project and had a bit of yarn left over that I thought MIGHT be enough to have a third repeat of the lace edge. On Thursday night I expressed my concern to my knitting friends and Kelly suggested that I give it a try but use a life line (just in case)! What a wonderful suggestion.

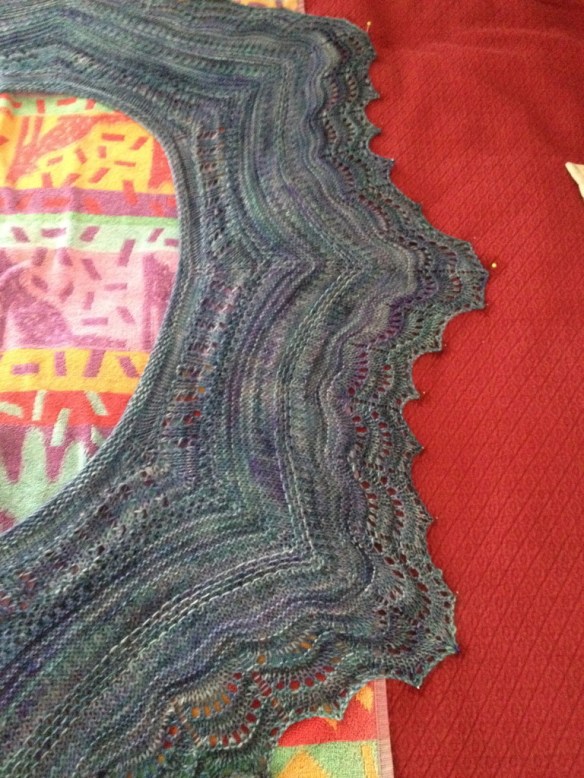
Here’s what mine looked like when it was being blocked …

My Shawlette in Malabrigo Silky Merino color 856 Azules

My Shawlette in Malabrigo Silky Merino color 856 Azules

Never used a life line? Really!? Well, I have to confess that I hadn’t used one before. But it’s really quite simple. This is all it takes …

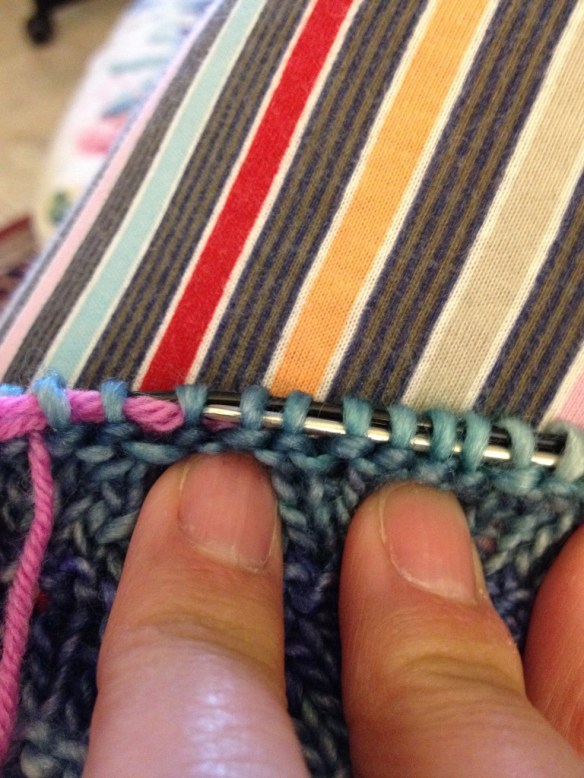
Life Line (pink) …

Life Line (pink) … Wow! I need a manicure! 🙂

All you have to do is get a different color bit of yarn. Since I was knitting a lace piece with several hundred stitches, I kept it really long so I didn’t drop stitches off the life line. That would be disastrous!

With your tapestry needle, thread the life line (pink) through every stitch.

With your tapestry needle, thread the life line (pink) through every stitch.

Thread your tapestry needle and  starting on one end of your work, run the life line through every stitch. (Note: do not run the life line through your markers as this will cause trouble when you go to knit! Run the life line under the markers.)

What you need to do before you start knitting again is make sure that the life line is “in the same place” and no wound around the needle. I made sure that my life line was beneath the needle sitting on the bottom of my last row of stitches. Once you start knitting, just make sure that you don’t knit your life line in with your stitches.

I was super lucky this time and I did have enough yarn. I may have been able to knit ONE more row … but I was concerned that I wasn’t going to have enough for the one knit row and then a bind off row. So, my last row was a knit and bind off at the same time.

I’m really pleased with the end result … I can’t wait to wear it!

Gone knitting!